Still Pictures—Editing
Accessing the Album (still picture)/Picture View
[RAM]
You can edit pictures and albums.
Preparation:
≥Press [DRIVE SELECT] to select the DVD drive.
≥Release protection (> 64, Setting Protection)
1 Press [DIRECT NAVIGATOR].
When “PICTURE” is not selected, press the “Green” button to select “PICTURE”.
Editing an album:
2 Press [3, 4, 2, 1] to select the album.
–Multiple editing (> below, Tips)
–When you want to create an album using “Create Album”, press [OPTION] without selecting album.
Editing a still picture:
2![]() 1. Press [3, 4, 2, 1] to select the album which contains the still picture to edit, then press [OK].
1. Press [3, 4, 2, 1] to select the album which contains the still picture to edit, then press [OK].
2.Press [3, 4, 2, 1] to select the still picture.
– Multiple editing (> below, Tips)
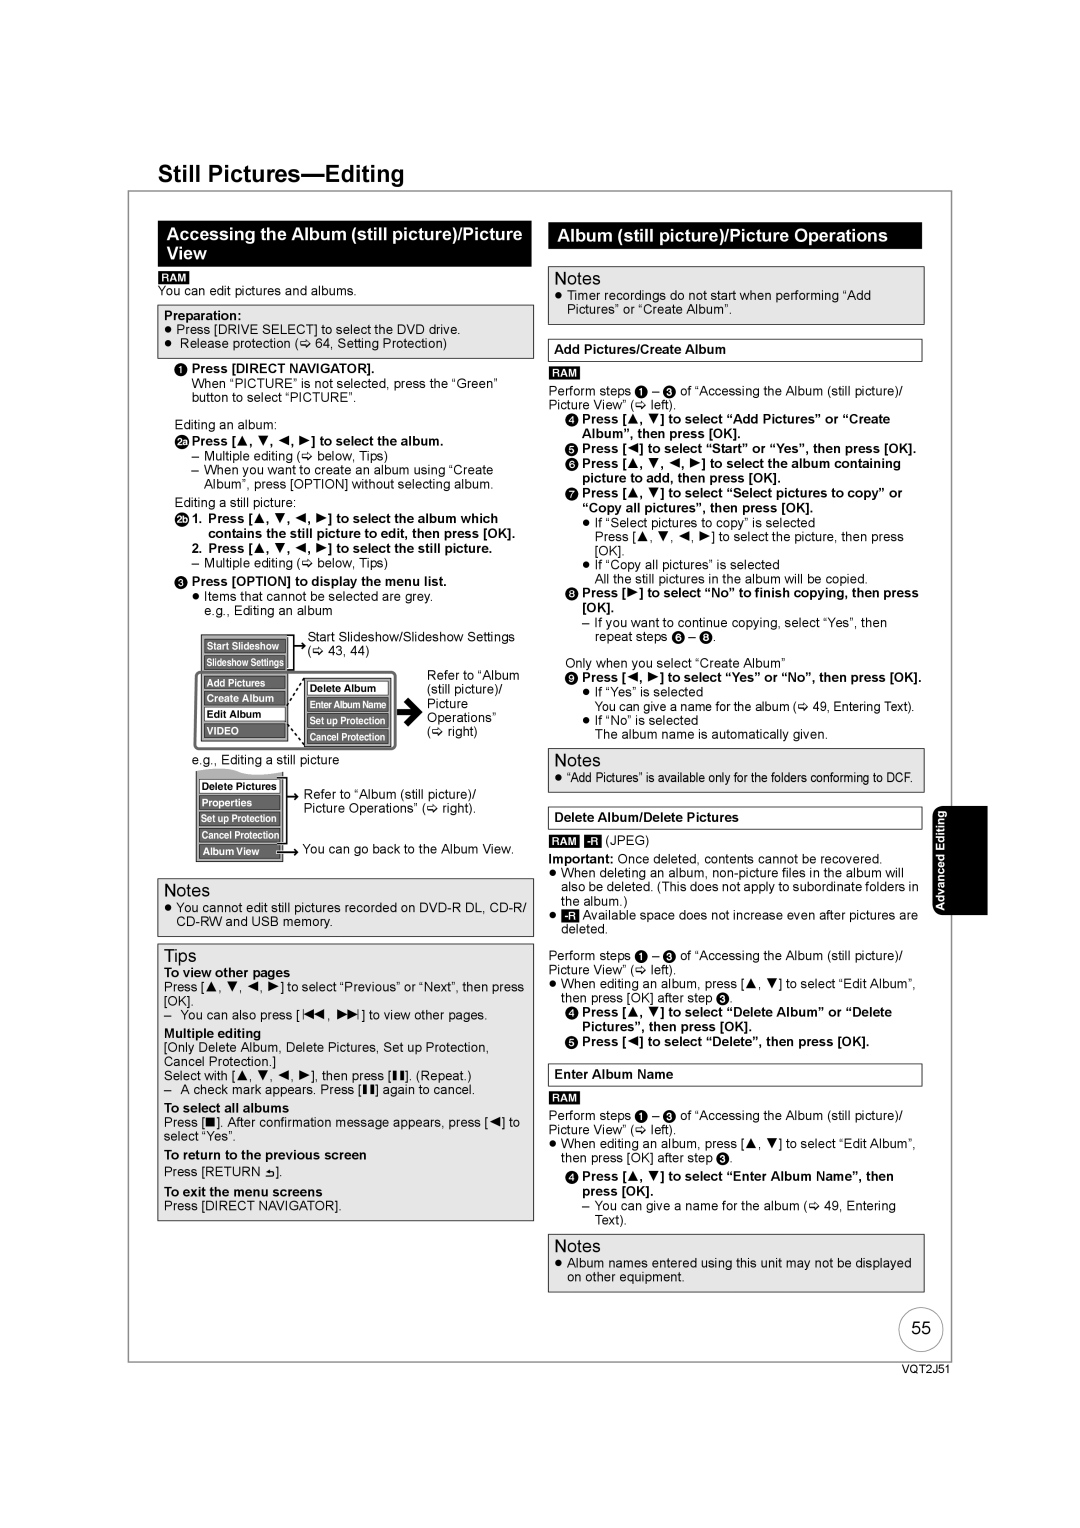
3Press [OPTION] to display the menu list.
≥Items that cannot be selected are grey. e.g., Editing an album
|
|
|
|
|
| Start Slideshow/Slideshow Settings | |||
| Start Slideshow |
|
|
| |||||
|
| (> 43, 44) |
|
|
| ||||
| Slideshow Settings |
|
|
|
|
|
| Refer to “Album | |
|
|
|
|
|
|
|
|
| |
| Add Pictures |
|
|
|
|
|
| (still picture)/ | |
|
|
|
| Delete Album |
|
| |||
| Create Album |
|
|
|
|
| |||
|
|
|
| Enter Album Name |
|
| Picture | ||
| Edit Album |
|
|
|
|
| |||
|
|
|
| Set up Protection |
|
| Operations” | ||
|
|
|
|
|
|
| (> right) | ||
| VIDEO |
|
|
|
|
|
| ||
|
|
|
| Cancel Protection | |||||
|
|
|
|
|
|
|
|
|
|
|
|
|
|
|
|
|
|
|
|
e.g., Editing a still picture |
|
|
| ||||||
|
|
|
|
|
|
|
|
|
|
| Delete Pictures |
|
|
| Refer to “Album (still picture)/ | ||||
| Properties |
|
|
| Picture Operations” (> right). | ||||
| Set up Protection |
|
|
| |||||
|
|
|
|
|
|
|
|
| |
| Cancel Protection |
|
|
| You can go back to the Album View. | ||||
| Album View |
|
|
| |||||
|
|
|
| ||||||
|
|
|
|
|
|
|
|
|
|
Notes
≥You cannot edit still pictures recorded on
Tips
To view other pages
Press [3, 4, 2, 1] to select “Previous” or “Next”, then press [OK].
– You can also press [:, 9] to view other pages.
Multiple editing
[Only Delete Album, Delete Pictures, Set up Protection, Cancel Protection.]
Select with [3, 4, 2, 1], then press [;]. (Repeat.)
– A check mark appears. Press [;] again to cancel.
To select all albums
Press [∫]. After confirmation message appears, press [2] to select “Yes”.
To return to the previous screen
Press [RETURN ![]() ].
].
To exit the menu screens
Press [DIRECT NAVIGATOR].
Album (still picture)/Picture Operations
Notes
≥Timer recordings do not start when performing “Add Pictures” or “Create Album”.
Add Pictures/Create Album
[RAM]
Perform steps 1 – 3 of “Accessing the Album (still picture)/ Picture View” (> left).
4Press [3, 4] to select “Add Pictures” or “Create
Album”, then press [OK].
5Press [2] to select “Start” or “Yes”, then press [OK].
6 Press [3, 4, 2, 1] to select the album containing picture to add, then press [OK].
7 Press [3, 4] to select “Select pictures to copy” or “Copy all pictures”, then press [OK].
≥If “Select pictures to copy” is selected
Press [3, 4, 2, 1] to select the picture, then press [OK].
≥If “Copy all pictures” is selected
All the still pictures in the album will be copied.
8Press [1] to select “No” to finish copying, then press [OK].
–If you want to continue copying, select “Yes”, then repeat steps 6 – 8.
Only when you select “Create Album”
9Press [2, 1] to select “Yes” or “No”, then press [OK].
≥If “Yes” is selected
You can give a name for the album (> 49, Entering Text).
≥If “No” is selected
The album name is automatically given.
Notes
≥“Add Pictures” is available only for the folders conforming to DCF.
Delete Album/Delete Pictures
[RAM] [-R] (JPEG)
Important: Once deleted, contents cannot be recovered.
≥When deleting an album,
≥
Perform steps 1 – 3 of “Accessing the Album (still picture)/ Picture View” (> left).
≥When editing an album, press [3, 4] to select “Edit Album”, then press [OK] after step 3.
4 Press [3, 4] to select “Delete Album” or “Delete
Pictures”, then press [OK].
5 Press [2] to select “Delete”, then press [OK].
Enter Album Name
[RAM]
Perform steps 1 – 3 of “Accessing the Album (still picture)/ Picture View” (> left).
≥When editing an album, press [3, 4] to select “Edit Album”, then press [OK] after step 3.
4Press [3, 4] to select “Enter Album Name”, then press [OK].
–You can give a name for the album (> 49, Entering Text).
Notes
≥Album names entered using this unit may not be displayed on other equipment.
55
VQT2J51