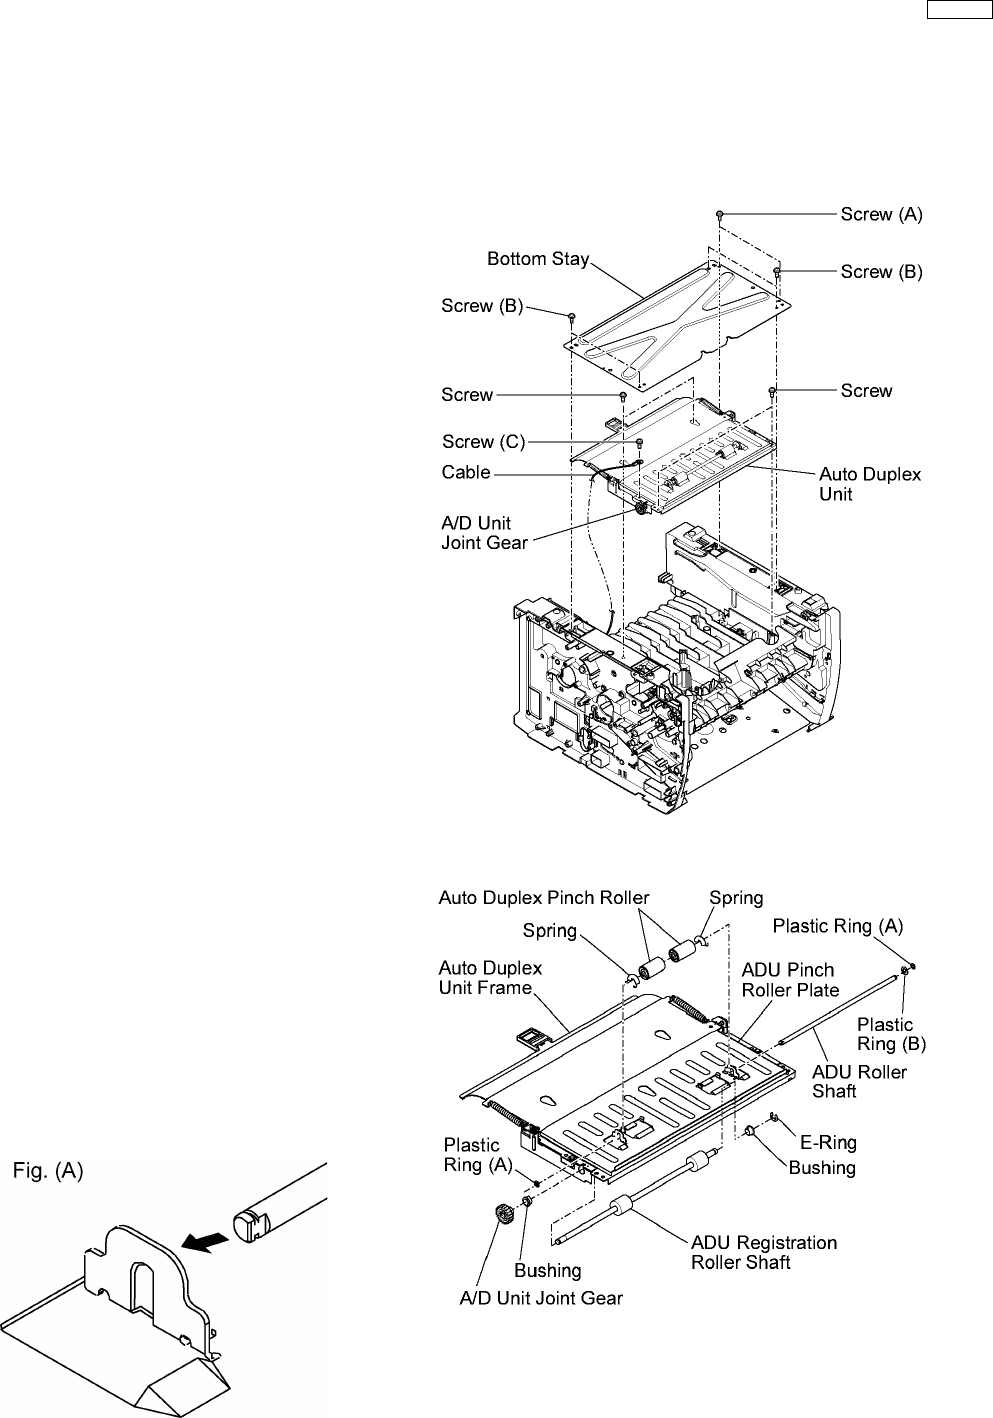
 3.14. Auto Duplex Unit, ADU Registration Roller and ADU Pinch Roller
Before handling, perform the following steps A-B :
A. Remove the Paper Cassette and OPC Drum Unit.
B. Place the printer up side down.
3.14.1. Auto Duplex Unit ( ADU )
(1) Remove the 2 screws ( A ) and 4 screws ( B ).
Caution:
Screw ( A ) is different from screws ( B ). When
reinstalling the screw ( A ), return it to the original
positon.
(2) Remove the Bottom Stay.
(3) Remove the Auto Duplex Unit with care to preven t damage
to the A/D Unit Joint Gear {4 screws and screws (C)}.
3.14.1.1. Auto Duplex Pinch and Registration Rollers
1. Remove the 3 plastic rings and 2 springs.
2. Remove the A/D Roller Shaft and 2 Auto Duplex Pinch
Rollers.
3. Remove the E-ring.
4. Remove the A/D Unit Joint Gear from the ADU Registration
Roller Shaft. The Registration Roller Shaft and 2 bushings
can be remove from the Auto Duplex Unit frame.
Note:
When reinstalling the A/D Rollers Shaft to ADU Pinch Roller
Plate, ensure that it is installed as shown in Fig.( A ).
45
KX-P7100