KX-P7100
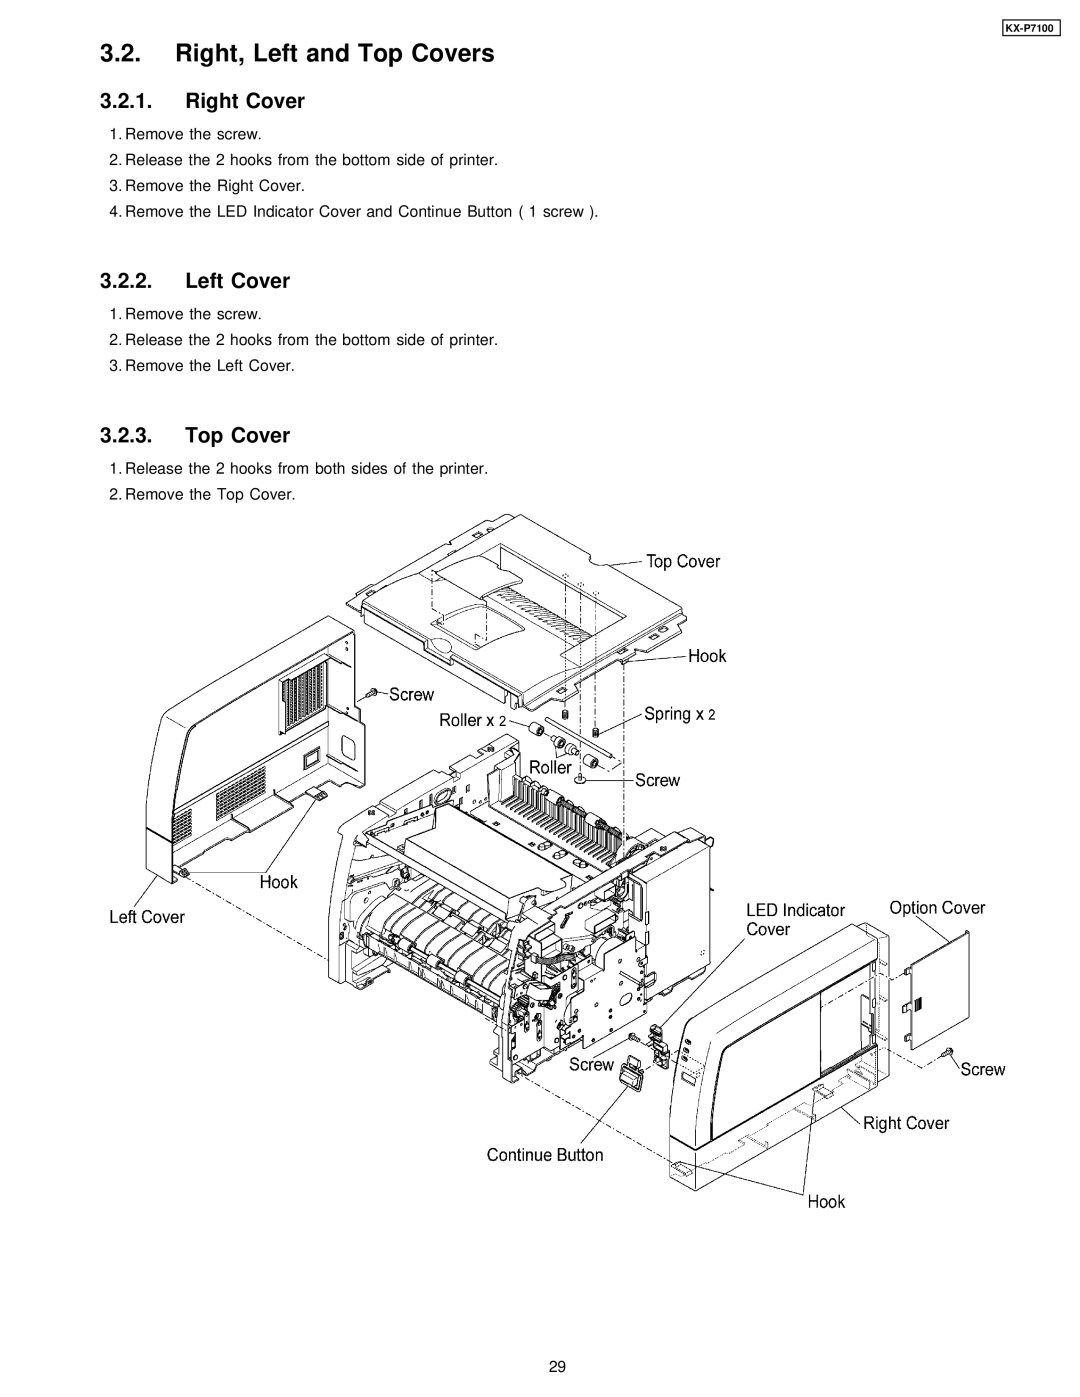
3.2.Right, Left and Top Covers
3.2.1.Right Cover
1.Remove the screw.
2.Release the 2 hooks from the bottom side of printer.
3.Remove the Right Cover.
4.Remove the LED Indicator Cover and Continue Button ( 1 screw ).
3.2.2.Left Cover
1.Remove the screw.
2.Release the 2 hooks from the bottom side of printer.
3.Remove the Left Cover.
3.2.3.Top Cover
1.Release the 2 hooks from both sides of the printer.
2.Remove the Top Cover.
29