Before using
Using the menu screen
For each individual menu, please refer to
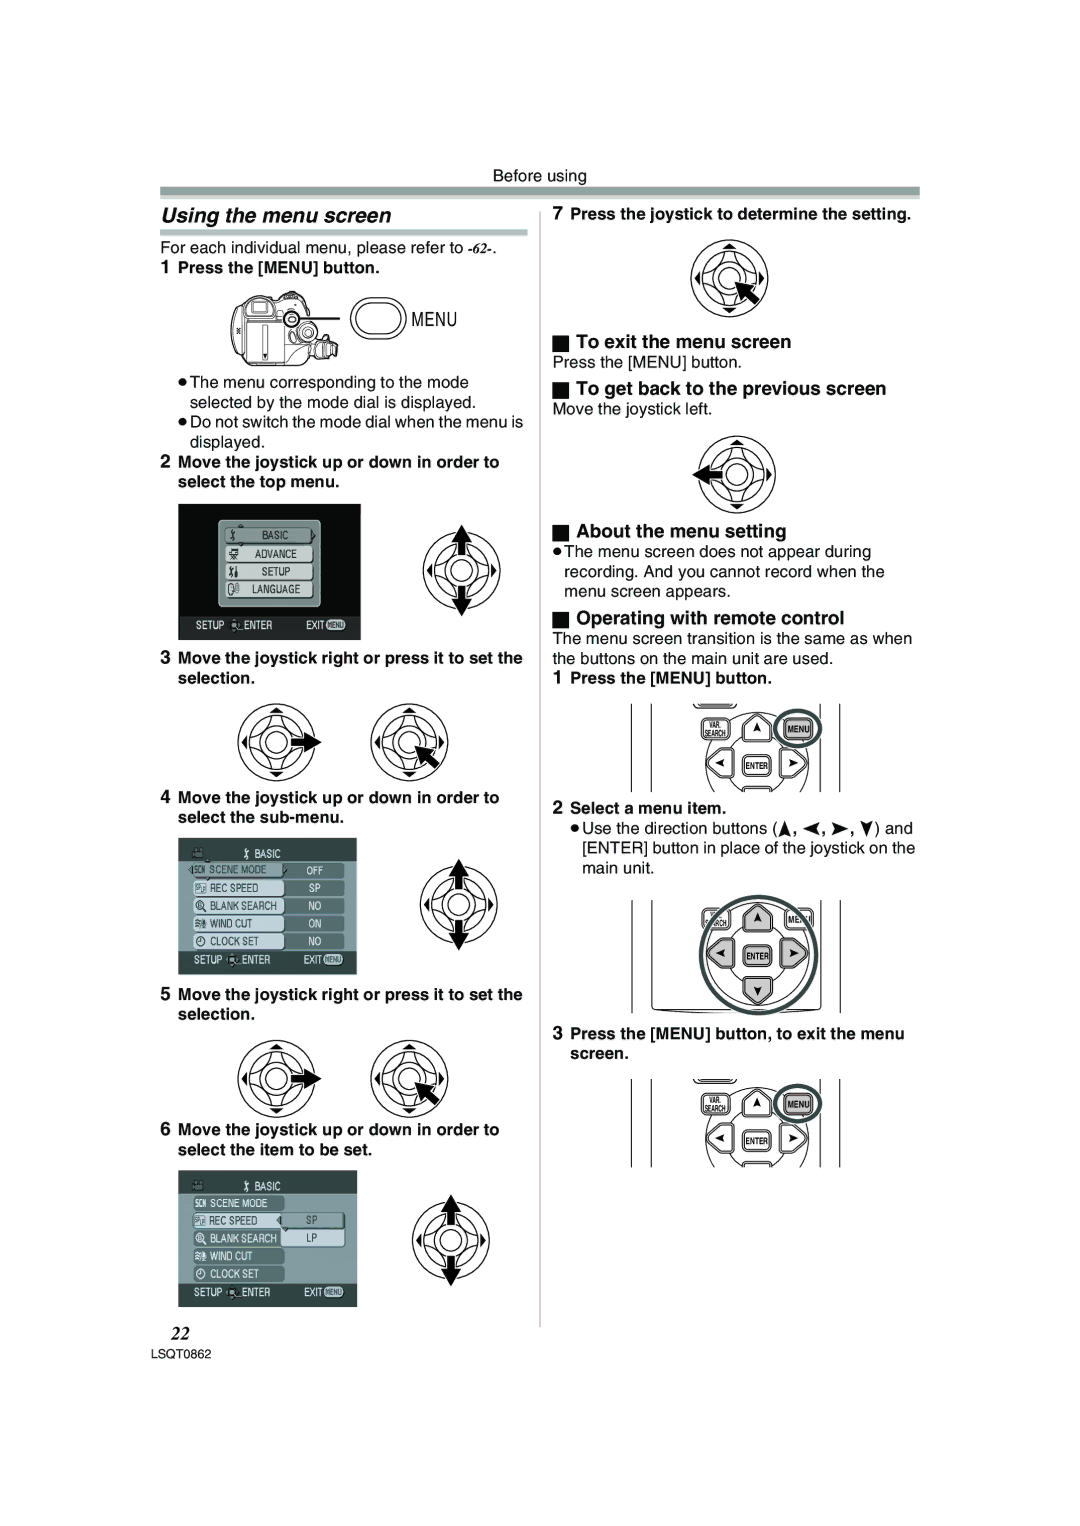
1Press the [MENU] button.

 MENU
MENU
≥The menu corresponding to the mode selected by the mode dial is displayed.
≥Do not switch the mode dial when the menu is displayed.
2Move the joystick up or down in order to select the top menu.
3Move the joystick right or press it to set the selection.
4Move the joystick up or down in order to select the
5Move the joystick right or press it to set the selection.
6Move the joystick up or down in order to select the item to be set.
7Press the joystick to determine the setting.
ªTo exit the menu screen
Press the [MENU] button.
ªTo get back to the previous screen
Move the joystick left.
ªAbout the menu setting
≥The menu screen does not appear during recording. And you cannot record when the menu screen appears.
ªOperating with remote control
The menu screen transition is the same as when the buttons on the main unit are used.
1Press the [MENU] button.
VAR.
SEARCHMENU
ENTER
2Select a menu item.
≥Use the direction buttons (π, ∑, ∏, ∫) and [ENTER] button in place of the joystick on the main unit.
VAR.
SEARCHMENU
ENTER
3Press the [MENU] button, to exit the menu screen.
VAR.
SEARCHMENU
ENTER
22