Edit mode
Edit mode
Recording from a tape onto a card
Still pictures can be recorded on a memory card from scenes that have already been recorded on a cassette.
≥Set to Tape Playback Mode.
≥Insert a tape which already has recorded contents and a card.
1Start playback.
2Pause at the scene you wish to record, and press the [PHOTO SHOT] button.
![]() PHOTO
PHOTO
SHOT
≥Audio will not be recorded.
≥The size of still pictures recorded on a card becomes [640]. (This is not mega pixel
≥If you press the [PHOTO SHOT] button without
pausing, blurred pictures may be recorded. ≥For pictures with an aspect ratio of 16:9,
“CHANGE ASPECT TO 4:3” is shown, indicating that still pictures cannot be recorded.
≥DV input and wide images recorded on a tape cannot be recorded on a card.
Copying onto a DVD recorder or a VCR (Dubbing)
Pictures recorded by the Camcorder can be stored on a
≥Place a recorded cassette in the Camcorder, and an unrecorded
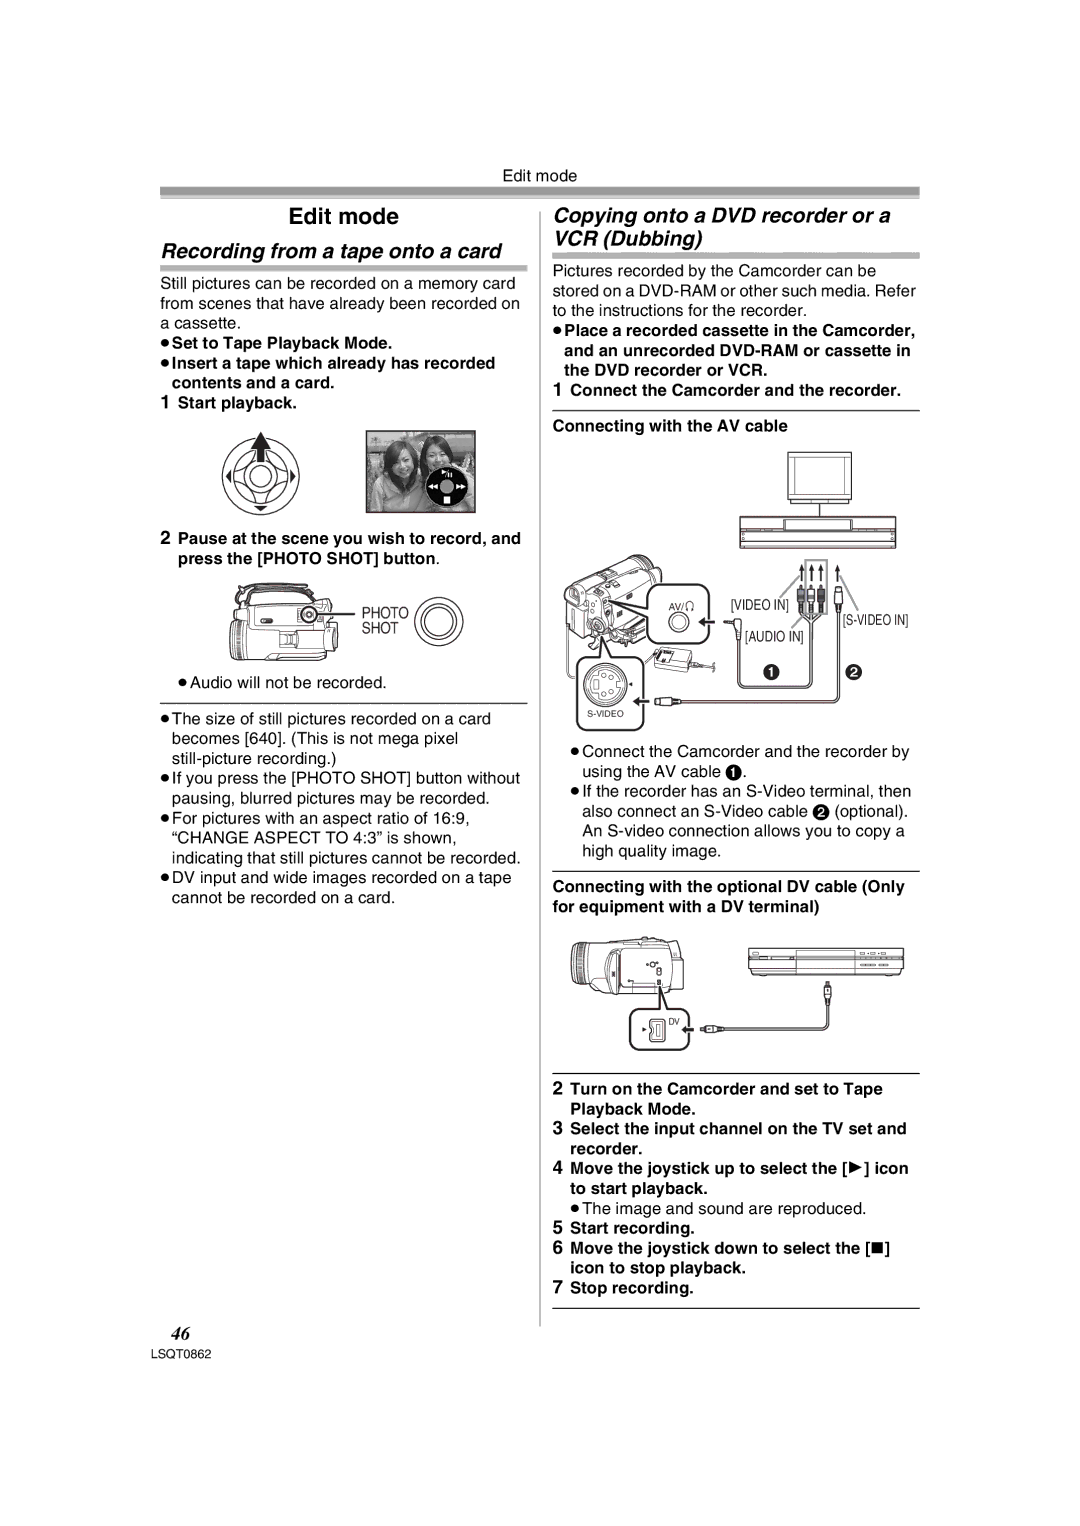
1Connect the Camcorder and the recorder. Connecting with the AV cable
AV/ | [VIDEO IN] |
| |
| [AUDIO IN] |
1 2
≥Connect the Camcorder and the recorder by using the AV cable 1.
≥If the recorder has an
Connecting with the optional DV cable (Only for equipment with a DV terminal)
DV
2Turn on the Camcorder and set to Tape Playback Mode.
3Select the input channel on the TV set and recorder.
4Move the joystick up to select the [1] icon to start playback.
≥The image and sound are reproduced.
5Start recording.
6Move the joystick down to select the [∫] icon to stop playback.
7Stop recording.
46