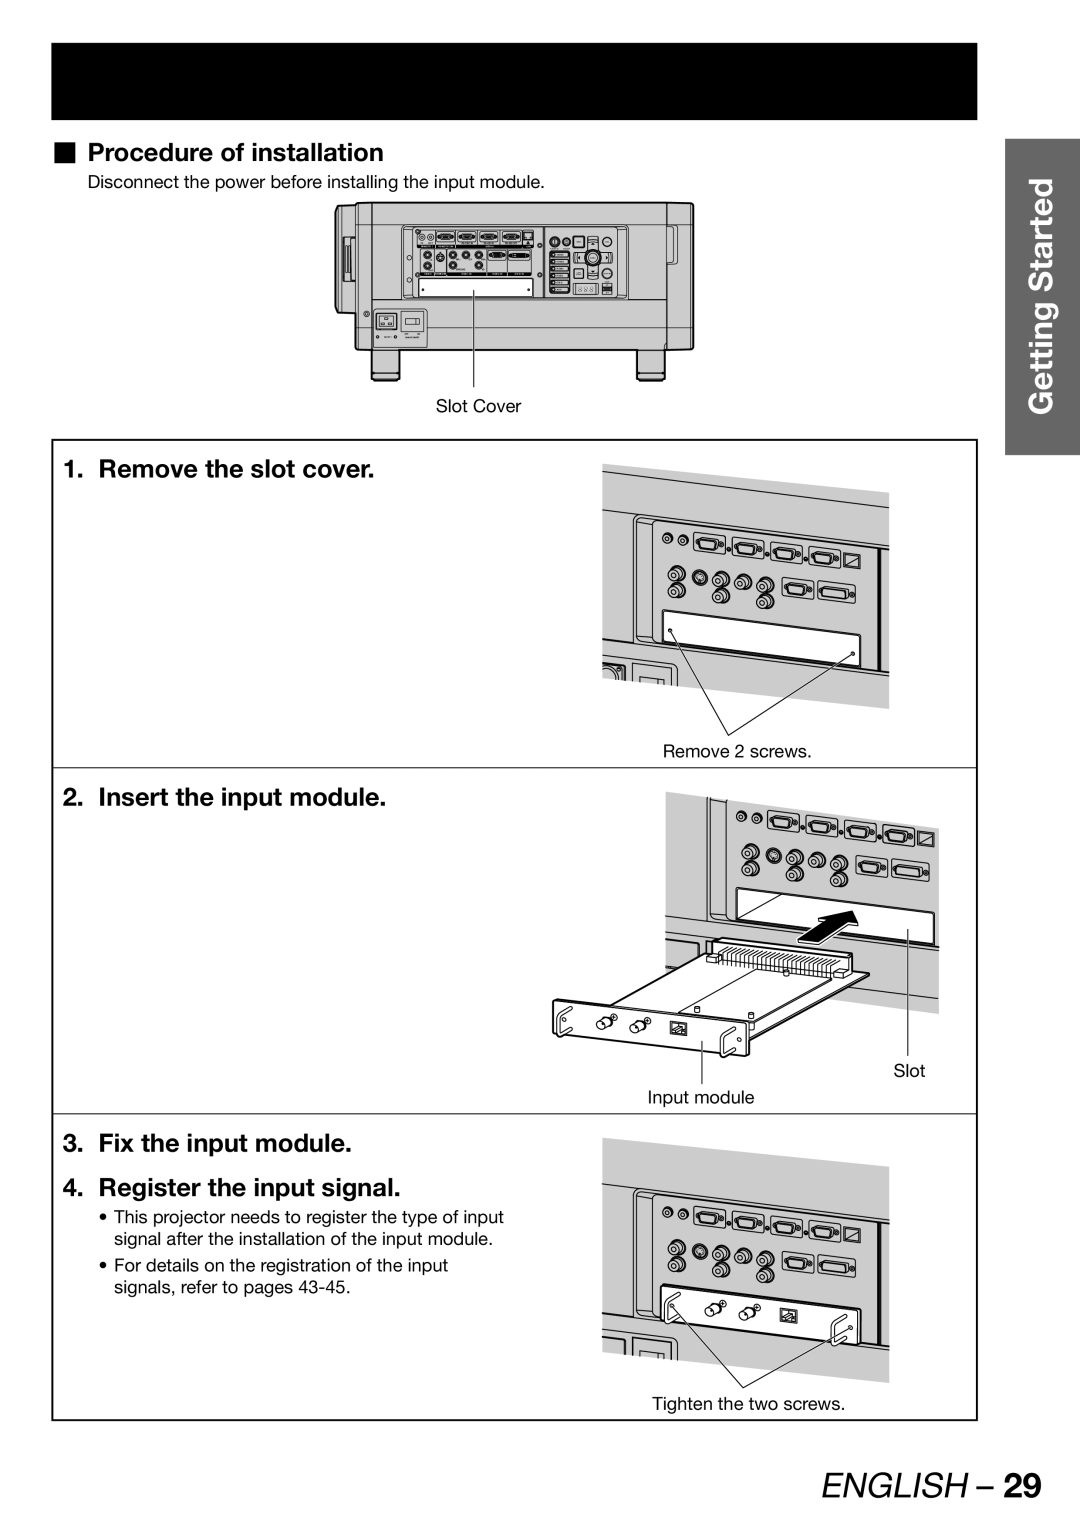
Procedure of installation
Disconnect the power before installing the input module.
|
| IN | OUT |
|
| |||
|
| REMOTE 1 | REMOTE 2 IN |
| SERIAL |
| LAN | |
|
|
|
|
|
|
|
| VIDEO |
|
|
| IN | R/P | G/Y | B/P |
| |
|
|
| OUT | SYNC/HD | VD |
| RGB1 | |
|
|
| VIDEO | RGB 1 IN | RGB 2 IN | RGB2 | ||
|
|
|
|
|
|
|
| |
|
|
|
|
|
|
|
| AUX |
| OFF | ON |
|
|
|
|
|
|
AC IN | MAIN POWER |
|
|
|
|
|
| |
Slot Cover
1. Remove the slot cover.
Getting Started
Remove 2 screws.
2. Insert the input module.
Slot
Input module
3. Fix the input module.
4. Register the input signal.
• This projector needs to register the type of input signal after the installation of the input module.
• For details on the registration of the input signals, refer to pages
Tighten the two screws.
