Notes when installing the ceiling mount bracket
When installing the ceiling mount bracket to the projector, install the accessory eye bolts and wires to the projector. (The projector will still be safe if they are not used, however they will help prevent the possibility of accidents caused by the projector falling down if the screws happen to become loose.)
Installation should be carried out by a qualified technician by following the procedure given below.
•Panasonic takes no responsibility for any losses or damage occurring as a result of using a ceiling mount bracket not manufactured by Panasonic, or if damage to the projector occurs as a result of an inappropriate location used for installing the ceiling mount bracket, even if the projector’s warranty period has not yet expired.
•Use a torque screwdriver or similar tool to tighten the screws. Do not use tools such as electric screwdrivers or impact screwdrivers.
•Dispose of any used products as soon as possible by asking a qualified technician for assistance.
Attention
• Be sure to use the accessory eye bolts and wires.
Installation procedure
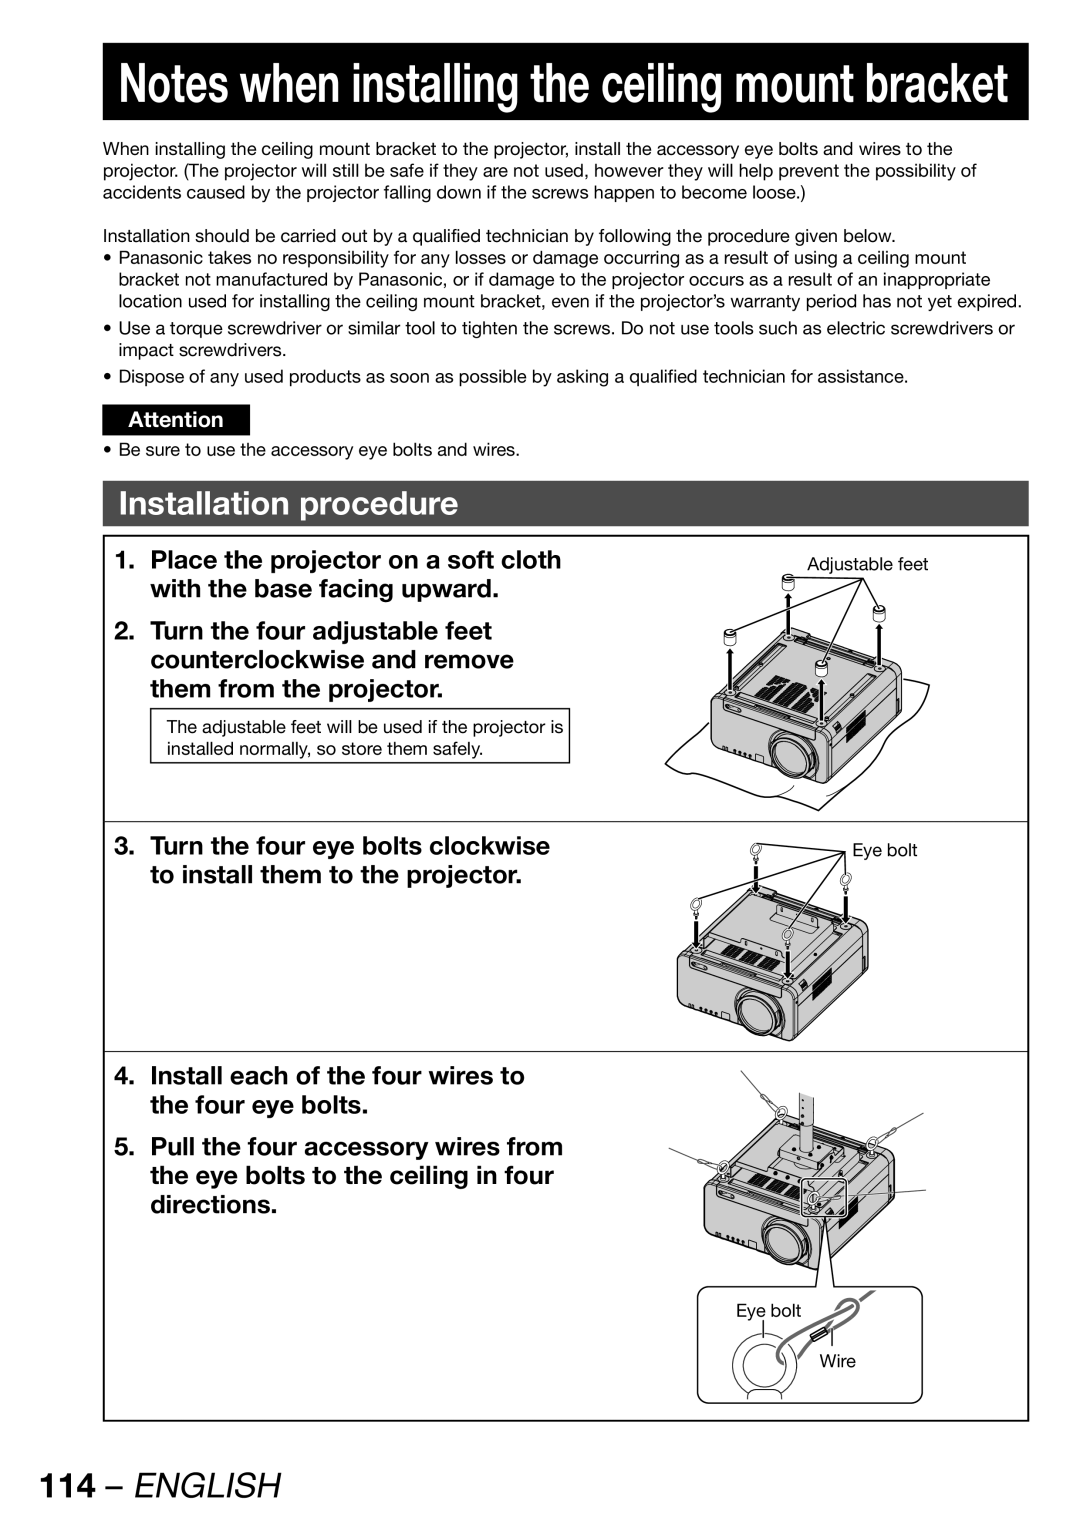
1.Place the projector on a soft cloth with the base facing upward.
2.Turn the four adjustable feet counterclockwise and remove them from the projector.
Adjustable feet
The adjustable feet will be used if the projector is installed normally, so store them safely.
3.Turn the four eye bolts clockwise to install them to the projector.
![]() Eye bolt
Eye bolt
4. Install each of the four wires to the four eye bolts.
5. Pull the four accessory wires from the eye bolts to the ceiling in four directions.
Eye bolt
Wire