Projector setup (continued)
Installation Setting
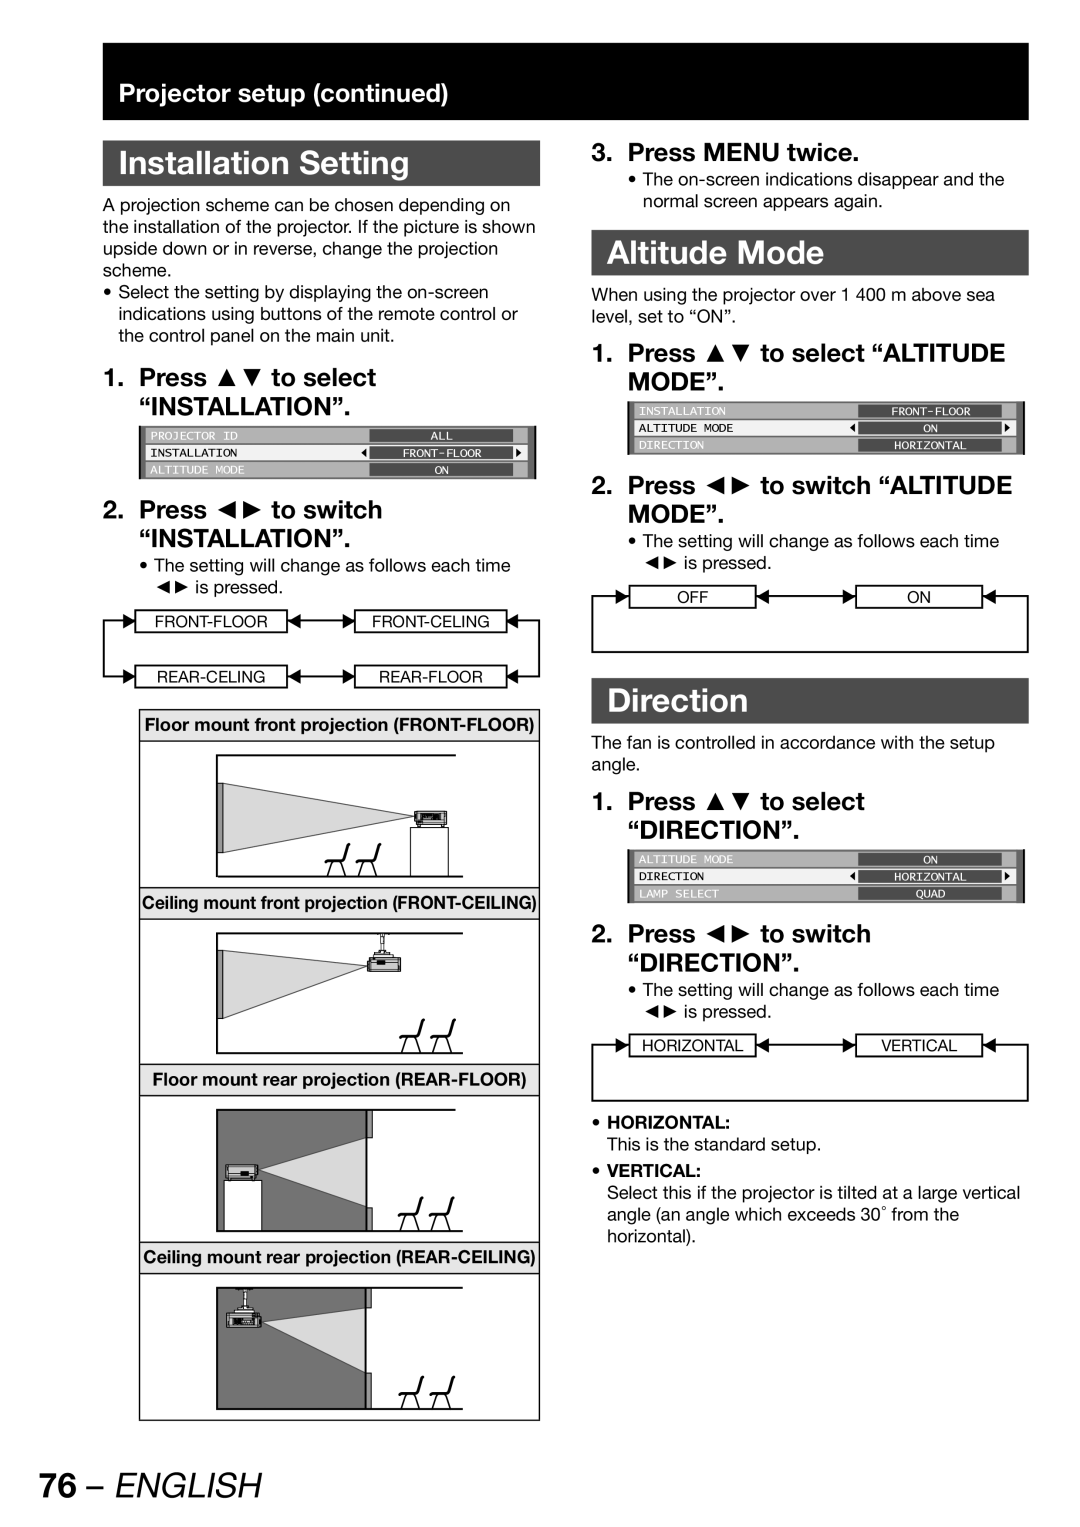
A projection scheme can be chosen depending on the installation of the projector. If the picture is shown upside down or in reverse, change the projection scheme.
•Select the setting by displaying the
1. Press ▲▼ to select
“INSTALLATION”. |
|
|
| |
| PROJECTOR ID | ALL |
|
|
| INSTALLATION |
|
| |
| ALTITUDE MODE | ON |
|
|
|
|
|
|
|
2.Press ◄► to switch “INSTALLATION”.
•The setting will change as follows each time ◄► is pressed.
![]()
![]()
|
|
| ||
|
|
|
Floor mount front projection
Ceiling mount front projection
Floor mount rear projection
Ceiling mount rear projection
3.Press MENU twice.
•The
Altitude Mode
When using the projector over 1 400 m above sea level, set to “ON”.
1. Press ▲▼ to select “ALTITUDE MODE”.
INSTALLATIONFRONT-FLOOR
ALTITUDE MODE | ON |
|
DIRECTION | HORIZONTAL |
|
|
|
|
2.Press ◄► to switch “ALTITUDE MODE”.
•The setting will change as follows each time ◄► is pressed.
OFF | ON |
Direction
The fan is controlled in accordance with the setup angle.
1. Press ▲▼ to select “DIRECTION”.
| ALTITUDE MODE | ON |
|
|
| DIRECTION | HORIZONTAL |
|
|
| LAMP SELECT | QUAD |
|
|
|
|
|
|
|
2.Press ◄► to switch “DIRECTION”.
•The setting will change as follows each time ◄► is pressed.
HORIZONTAL | VERTICAL |
•HORIZONTAL:
This is the standard setup.
•VERTICAL:
Select this if the projector is tilted at a large vertical angle (an angle which exceeds 30°from the horizontal).