Screenshot 3
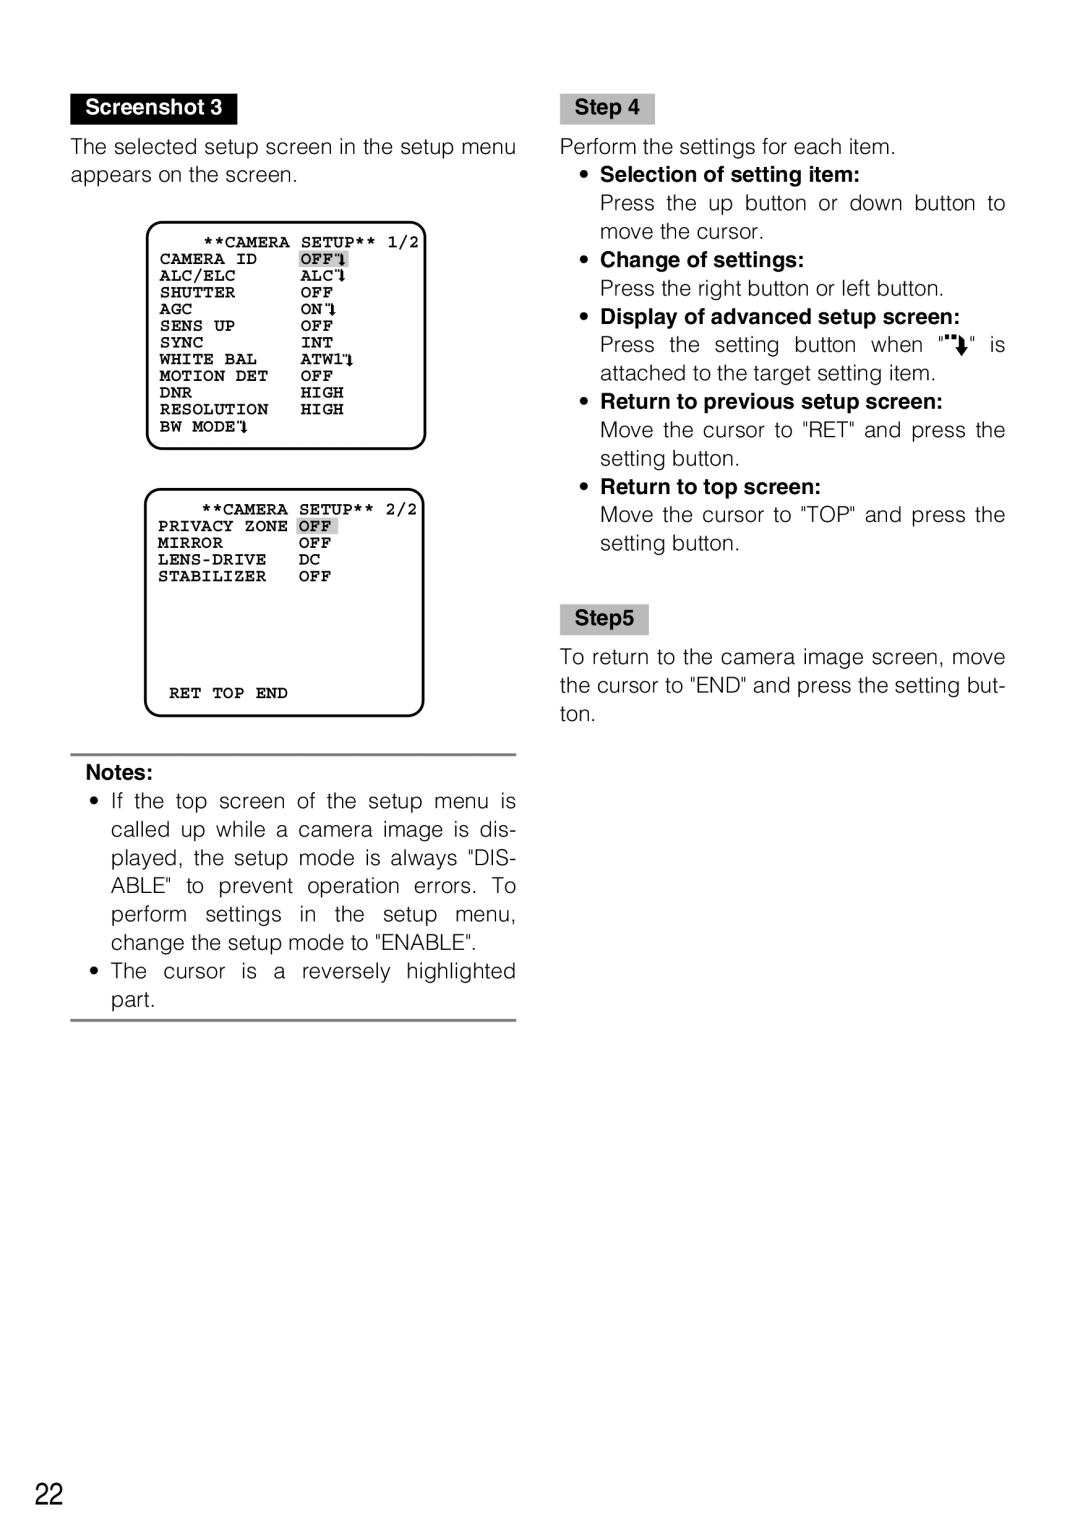
The selected setup screen in the setup menu appears on the screen.
**CAMERA | SETUP** 1/2 | ||||||||
CAMERA ID | OFF |
|
|
|
| ||||
ALC/ELC | ALC |
|
|
|
| ||||
|
|
| |||||||
|
|
| |||||||
SHUTTER | OFF | ||||||||
AGC | ON |
|
| ||||||
| |||||||||
SENS UP | OFF | ||||||||
SYNC | INT | ||||||||
WHITE BAL | ATW1 |
|
| ||||||
| |||||||||
MOTION DET | OFF | ||||||||
DNR | HIGH | ||||||||
RESOLUTION | HIGH | ||||||||
BW MODE |
|
|
|
|
|
|
|
|
|
|
|
|
|
|
|
|
| ||
|
|
|
|
|
|
|
| ||
**CAMERA | SETUP** 2/2 | |
PRIVACY ZONE | OFF |
|
MIRROR | OFF |
|
DC | ||
STABILIZER | OFF | |
RET TOP END |
|
|
Notes:
•If the top screen of the setup menu is called up while a camera image is dis- played, the setup mode is always "DIS- ABLE" to prevent operation errors. To perform settings in the setup menu, change the setup mode to "ENABLE".
•The cursor is a reversely highlighted part.
Step 4
Perform the settings for each item.
•Selection of setting item:
Press the up button or down button to move the cursor.
•Change of settings:
Press the right button or left button.
•Display of advanced setup screen: Press the setting button when "O" is attached to the target setting item.
•Return to previous setup screen: Move the cursor to "RET" and press the setting button.
•Return to top screen:
Move the cursor to "TOP" and press the setting button.
Step5
To return to the camera image screen, move the cursor to "END" and press the setting but- ton.
22