12. Privacy zone setting [PRIVACY ZONE]
When undesired portions in the camera shooting area (on the screen) exist, those portions (pri- vacy zone) are hidden.
ON (1): | Grays the zone. |
ON (2): | Mosaics the zone. |
OFF (default): | Displays the zone normally. |
Up to 8 portions can be specified for the privacy zone. Follow the procedure below for privacy zone setting.
Note:
The privacy zone function is disabled at initializing the unit, i.e. right after turning on the power.
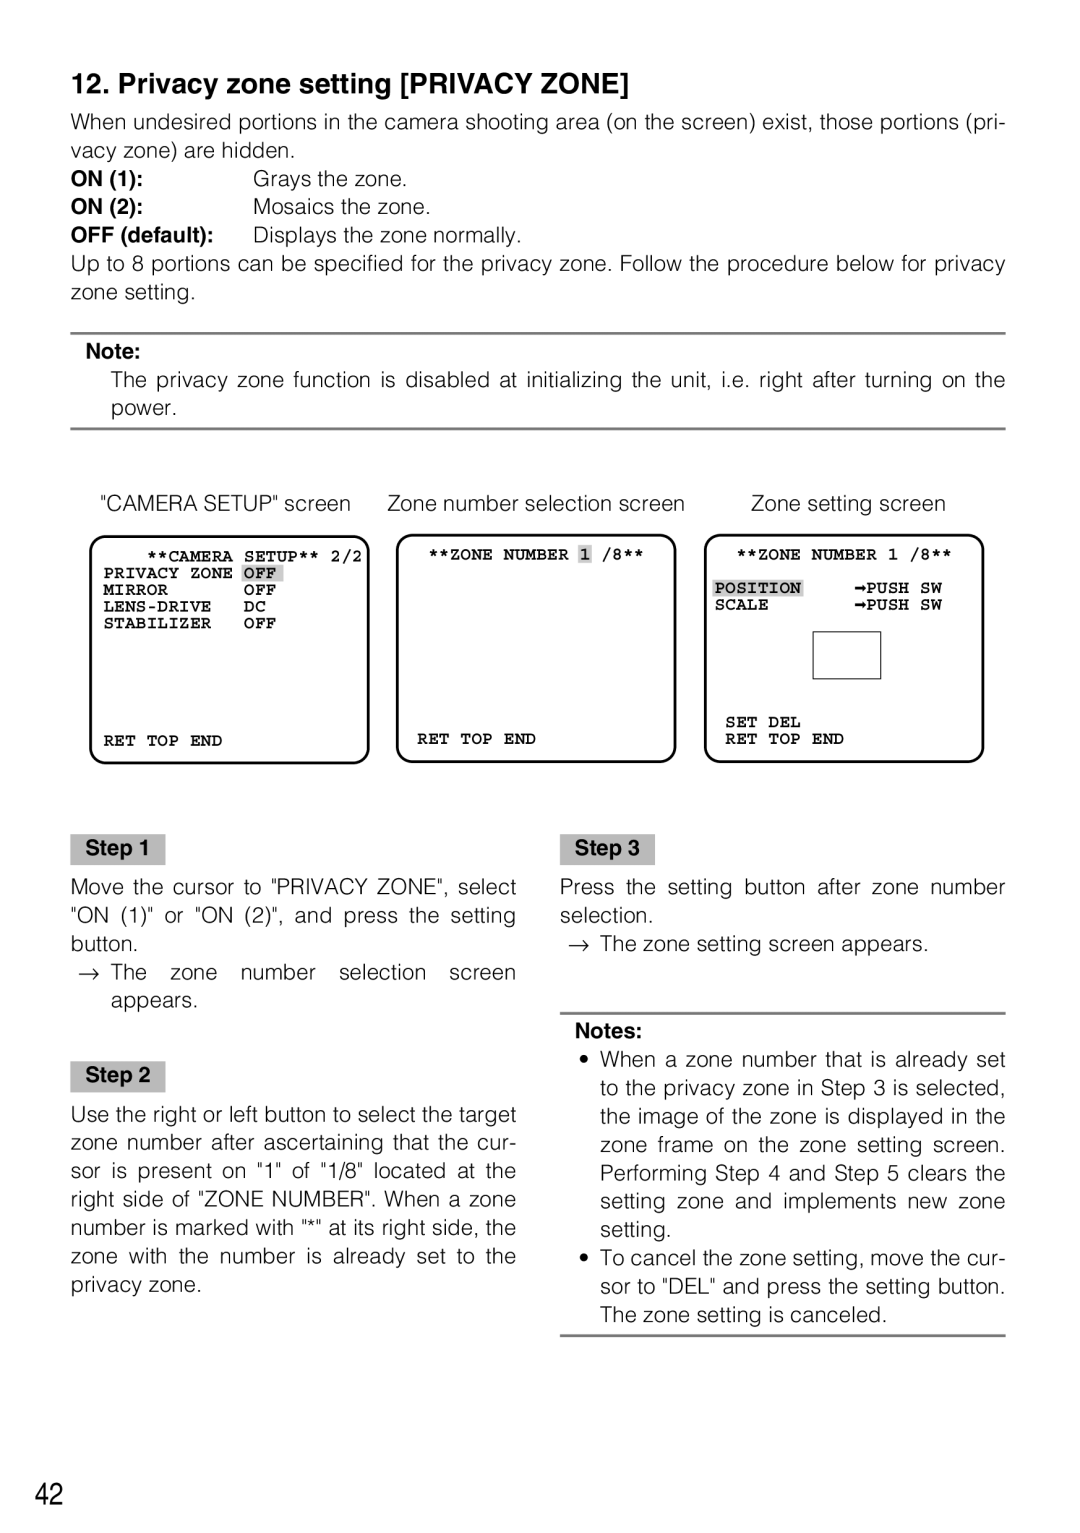
"CAMERA SETUP" screen | Zone number selection screen | Zone setting screen | |||||||||
|
|
|
|
|
|
|
| ||||
**CAMERA | SETUP** 2/2 | **ZONE NUMBER | 1 | /8** | **ZONE NUMBER 1 /8** | ||||||
PRIVACY ZONE | OFF |
|
|
|
|
|
|
|
| PUSH SW | |
MIRROR | OFF |
|
|
|
| POSITION |
|
|
| ||
DC |
|
|
| SCALE |
|
|
| PUSH SW | |||
|
|
|
|
|
| ||||||
STABILIZER | OFF |
|
|
|
|
|
|
|
|
| |
|
|
|
|
|
|
|
|
|
|
| |
|
|
|
|
|
| SET DEL |
|
|
| ||
RET TOP END |
|
| RET TOP END | RET TOP END |
|
|
| ||||
Step 1
Move the cursor to "PRIVACY ZONE", select "ON (1)" or "ON (2)", and press the setting button.
→The zone number selection screen appears.
Step 2
Use the right or left button to select the target zone number after ascertaining that the cur- sor is present on "1" of "1/8" located at the right side of "ZONE NUMBER". When a zone number is marked with "*" at its right side, the zone with the number is already set to the privacy zone.
Step 3
Press the setting button after zone number selection.
→The zone setting screen appears.
Notes:
•When a zone number that is already set to the privacy zone in Step 3 is selected, the image of the zone is displayed in the zone frame on the zone setting screen. Performing Step 4 and Step 5 clears the setting zone and implements new zone setting.
•To cancel the zone setting, move the cur- sor to "DEL" and press the setting button. The zone setting is canceled.
42