4.Click the Apply button to save the changes and continue to other settings. If you are finished updating settings, click the OK button to close the screen.
ALARM SETTINGS
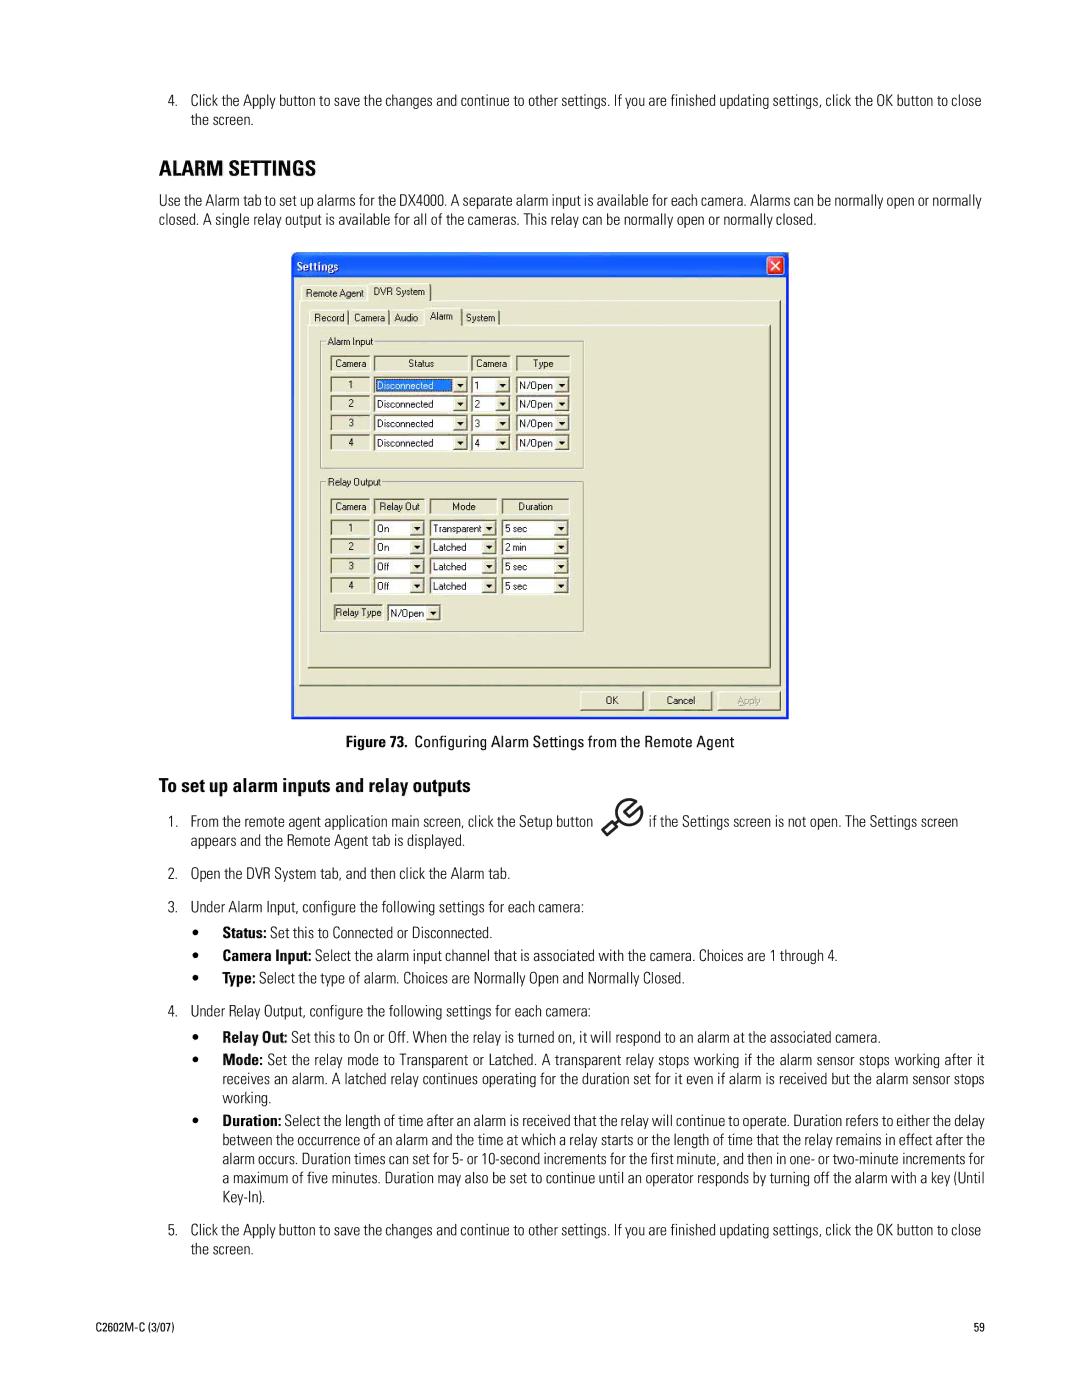
Use the Alarm tab to set up alarms for the DX4000. A separate alarm input is available for each camera. Alarms can be normally open or normally closed. A single relay output is available for all of the cameras. This relay can be normally open or normally closed.
Figure 73. Configuring Alarm Settings from the Remote Agent
To set up alarm inputs and relay outputs
1. From the remote agent application main screen, click the Setup button | if the Settings screen is not open. The Settings screen |
appears and the Remote Agent tab is displayed. |
|
2.Open the DVR System tab, and then click the Alarm tab.
3.Under Alarm Input, configure the following settings for each camera:
•Status: Set this to Connected or Disconnected.
•Camera Input: Select the alarm input channel that is associated with the camera. Choices are 1 through 4.
•Type: Select the type of alarm. Choices are Normally Open and Normally Closed.
4.Under Relay Output, configure the following settings for each camera:
•Relay Out: Set this to On or Off. When the relay is turned on, it will respond to an alarm at the associated camera.
•Mode: Set the relay mode to Transparent or Latched. A transparent relay stops working if the alarm sensor stops working after it receives an alarm. A latched relay continues operating for the duration set for it even if alarm is received but the alarm sensor stops working.
•Duration: Select the length of time after an alarm is received that the relay will continue to operate. Duration refers to either the delay between the occurrence of an alarm and the time at which a relay starts or the length of time that the relay remains in effect after the alarm occurs. Duration times can set for 5- or
5.Click the Apply button to save the changes and continue to other settings. If you are finished updating settings, click the OK button to close the screen.
| 59 |