8.0 RECORDING
NOTES:
•Press the PAUSE/SHUTTLE HOLD button to momentarily stop recording. Press the button again to resume recording.
•To protect the tape, the pause mode is automatically released after about five minutes.
•The REC button will not function unless the tape is in the stop or pause mode.
•If the cassette you insert in the VCR has the erasure prevention tab removed, the VCR will auto- matically eject it if you try to record on it.
•Both
8.1 MANUAL RECORDING
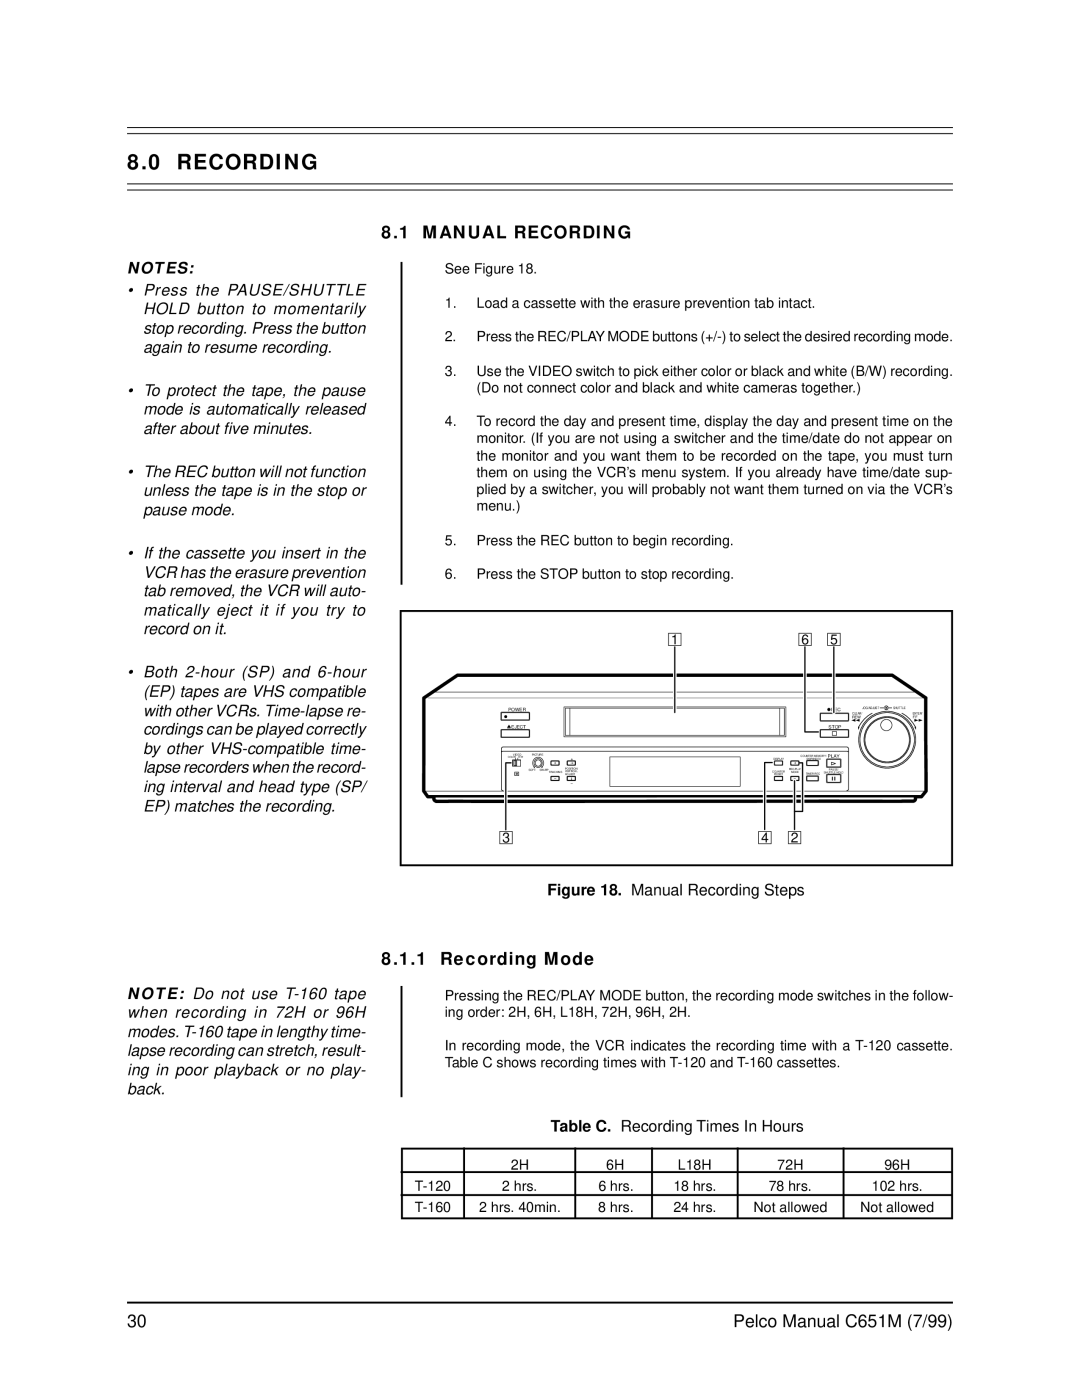
See Figure 18.
1.Load a cassette with the erasure prevention tab intact.
2.Press the REC/PLAY MODE buttons
3.Use the VIDEO switch to pick either color or black and white (B/W) recording. (Do not connect color and black and white cameras together.)
4.To record the day and present time, display the day and present time on the monitor. (If you are not using a switcher and the time/date do not appear on the monitor and you want them to be recorded on the tape, you must turn them on using the VCR’s menu system. If you already have time/date sup- plied by a switcher, you will probably not want them turned on via the VCR’s menu.)
5.Press the REC button to begin recording.
6.Press the STOP button to stop recording.
|
|
| 1 |
|
| 6 |
| 5 |
|
|
POWER |
|
|
|
|
|
|
| REC | JOG/ADJUST | SHUTTLE |
|
|
|
|
|
|
|
|
| CLEAR/ | ENTER/ |
|
|
|
|
|
|
|
|
| REW | FF |
EJECT |
|
|
|
|
|
|
| STOP |
|
|
VIDEO | PICTURE |
|
|
| COUNTER MEMORY/ | PLAY |
|
| ||
COLOR B/W |
|
|
| DISPLAY |
| SKIP/INDEX |
|
|
| |
| SOFT | SHARP | POSITION/ |
| REC/PLAY |
| PAUSE/ |
|
| |
|
| TRACKING | VERTICAL | COUNTER | MODE | TIMER REC | SHUTTLE HOLD |
|
| |
|
|
| ADJUST | RESET |
|
|
|
|
| |
3 |
|
|
| 4 | 2 |
|
|
|
|
|
Figure 18. Manual Recording Steps
NOTE: Do not use
8.1.1 Recording Mode
Pressing the REC/PLAY MODE button, the recording mode switches in the follow- ing order: 2H, 6H, L18H, 72H, 96H, 2H.
In recording mode, the VCR indicates the recording time with a
Table C. Recording Times In Hours
| 2H | 6H | L18H | 72H | 96H |
2 hrs. | 6 hrs. | 18 hrs. | 78 hrs. | 102 hrs. | |
2 hrs. 40min. | 8 hrs. | 24 hrs. | Not allowed | Not allowed | |
|
|
|
|
|
|
30 | Pelco Manual C651M (7/99) |