12 3
| WED |
| A0001 | |
|
|
|
|
|
|
|
|
|
|
00:00:00 |
| L18 |
|
|
|
|
|
|
|
45 6
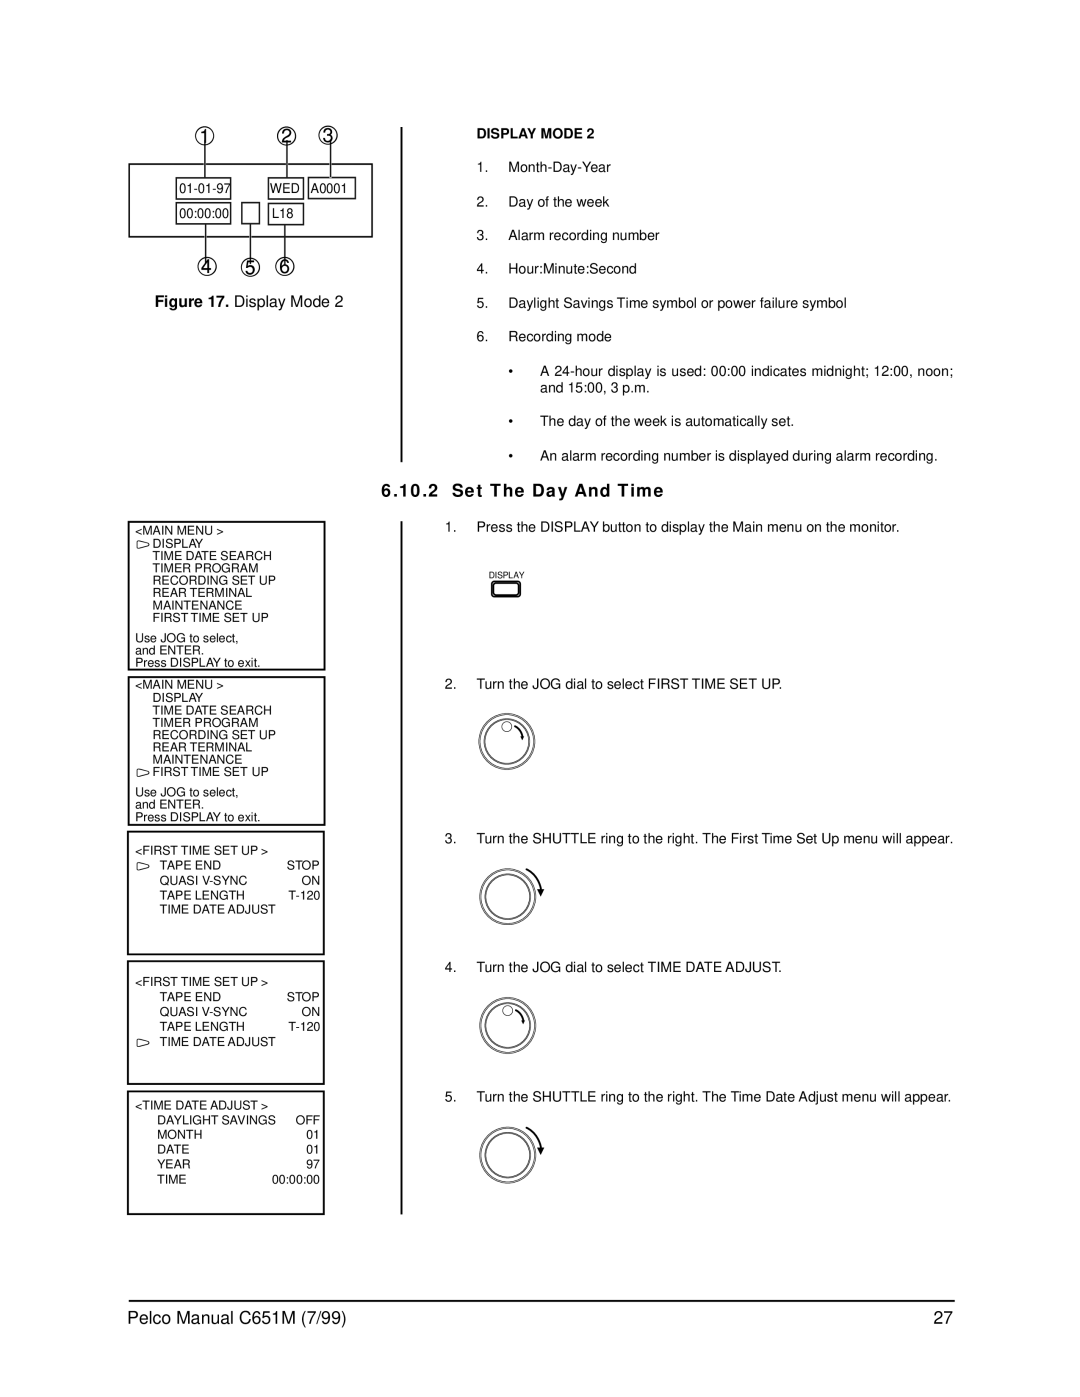
Figure 17. Display Mode 2
DISPLAY MODE 2
1.
2.Day of the week
3.Alarm recording number
4.Hour:Minute:Second
5.Daylight Savings Time symbol or power failure symbol
6.Recording mode
•A
•The day of the week is automatically set.
•An alarm recording number is displayed during alarm recording.
<MAIN MENU >
)DISPLAY
TIME DATE SEARCH TIMER PROGRAM RECORDING SET UP REAR TERMINAL MAINTENANCE FIRST TIME SET UP
Use JOG to select, and ENTER.
Press DISPLAY to exit.
<MAIN MENU >
DISPLAY
TIME DATE SEARCH TIMER PROGRAM RECORDING SET UP REAR TERMINAL MAINTENANCE
)FIRST TIME SET UP
Use JOG to select, and ENTER.
Press DISPLAY to exit.
<FIRST TIME SET UP > |
|
) TAPE END | STOP |
QUASI | ON |
TAPE LENGTH | |
TIME DATE ADJUST |
|
|
|
|
|
<FIRST TIME SET UP > |
|
TAPE END | STOP |
QUASI | ON |
TAPE LENGTH |
)TIME DATE ADJUST
<TIME DATE ADJUST > DAYLIGHT SAVINGS OFF
MONTH | 01 |
DATE | 01 |
YEAR | 97 |
TIME | 00:00:00 |
6.10.2Set The Day And Time
1.Press the DISPLAY button to display the Main menu on the monitor.
DISPLAY
2.Turn the JOG dial to select FIRST TIME SET UP.
3.Turn the SHUTTLE ring to the right. The First Time Set Up menu will appear.
4.Turn the JOG dial to select TIME DATE ADJUST.
5.Turn the SHUTTLE ring to the right. The Time Date Adjust menu will appear.
Pelco Manual C651M (7/99) | 27 |
