1Connect a coaxial cable (not supplied) to:
•the COAXIAL jack on this product.
•the COAXIAL/DIGITAL input jack on the device.
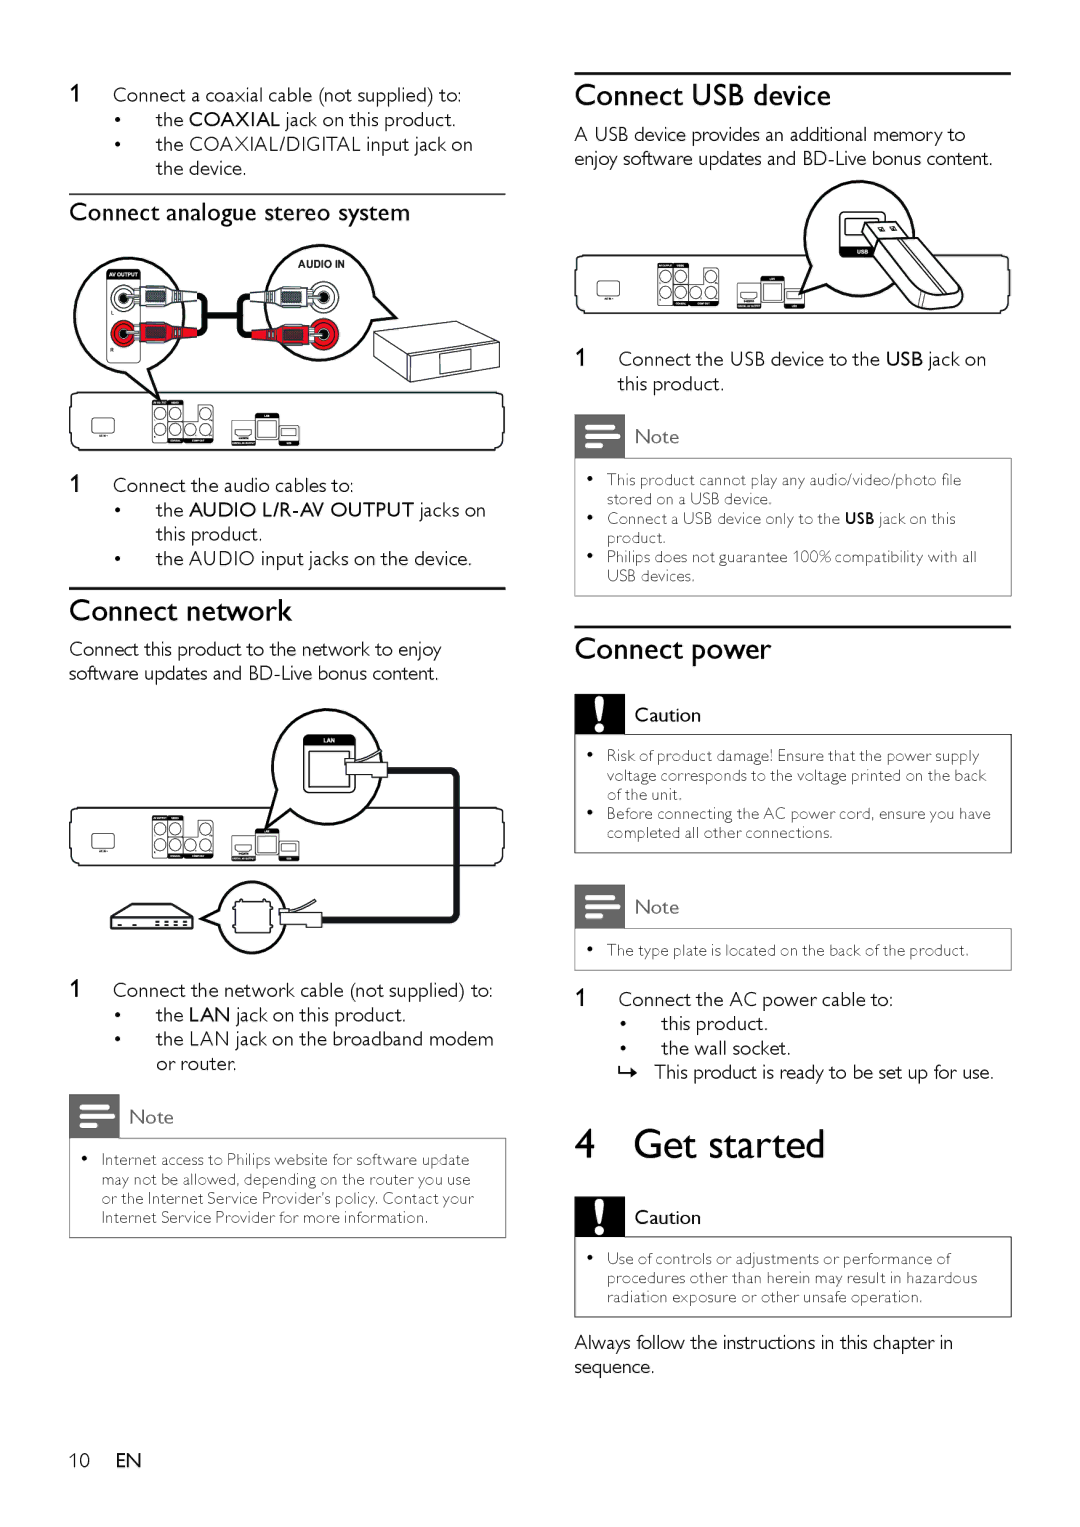
Connect analogue stereo system
AUDIO IN
1Connect the audio cables to:
•the AUDIO
•the AUDIO input jacks on the device.
Connect network
Connect this product to the network to enjoy software updates and
1Connect the network cable (not supplied) to:
•the LAN jack on this product.
•the LAN jack on the broadband modem or router.
Note
•• Internet access to Philips website for software update may not be allowed, depending on the router you use or the Internet Service Provider’s policy. Contact your Internet Service Provider for more information.
Connect USB device
A USB device provides an additional memory to enjoy software updates and
1Connect the USB device to the USB jack on this product.
![]() Note
Note
•• This product cannot play any audio/video/photo file stored on a USB device.
•• Connect a USB device only to the USB jack on this product.
•• Philips does not guarantee 100% compatibility with all USB devices.
Connect power
![]() Caution
Caution
•• Risk of product damage! Ensure that the power supply voltage corresponds to the voltage printed on the back of the unit.
•• Before connecting the AC power cord, ensure you have completed all other connections.
Note
•• The type plate is located on the back of the product.
1Connect the AC power cable to:
•this product.
•the wall socket.
»» This product is ready to be set up for use.
4 Get started
Caution
•• Use of controls or adjustments or performance of procedures other than herein may result in hazardous radiation exposure or other unsafe operation.
Always follow the instructions in this chapter in sequence.
10EN