01Rear Panel
1 | 2 |
|
|
|
|
|
|
|
|
|
|
|
|
|
R | FRONT | L | SUB WOOFER | CENTER |
| AUDIO OUT ( 7.1 ch ) | R | SURROUND | L | R | SURROUND | L |
| ||||||||||||
|
|
|
|
|
| BACK |
AC IN
CONTROL | LAN(100) | DIGITAL OUT | |
IN |
|
|
|
|
| OPTICAL | COAXIAL |
8 7 6
|
| VIDEO OUT | VIDEO | |
|
|
| ||
|
|
|
| |
|
| COMPONENT VIDEO | ||
| HDMI OUT |
|
|
|
MAIN(KURO LINK) | SUB | PR | PB | Y |
| 5 | 4 | 3 |
|
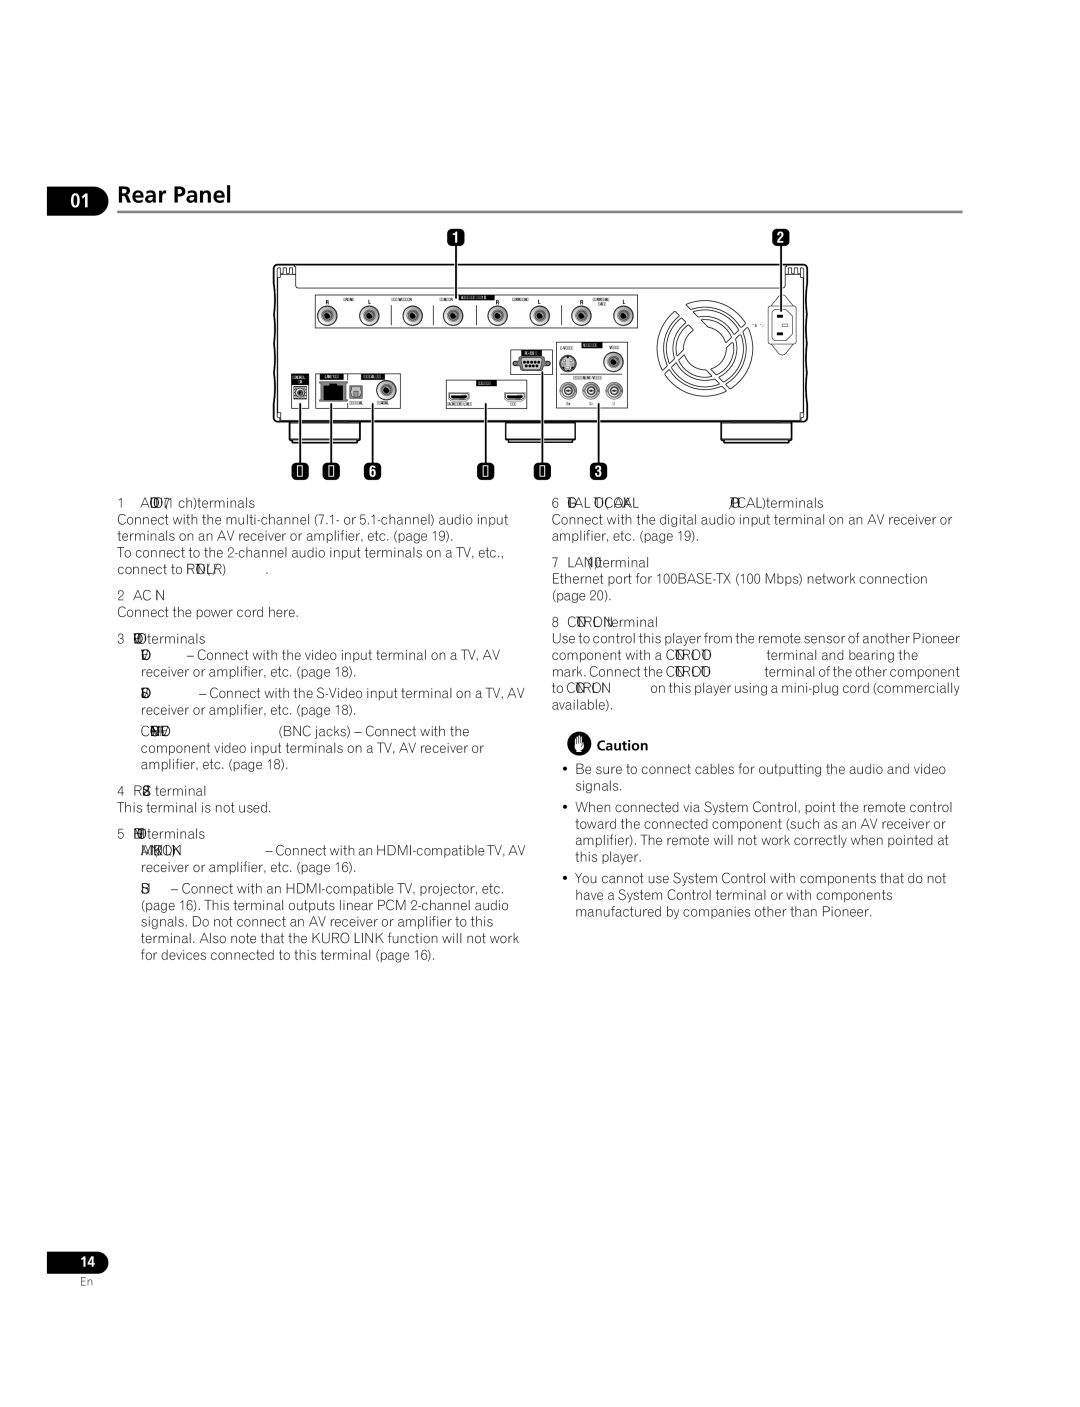
1 AUDIO OUT (7.1 ch) terminals
Connect with the
To connect to the
2 AC IN
Connect the power cord here.
3VIDEO OUT terminals
VIDEO – Connect with the video input terminal on a TV, AV receiver or amplifier, etc. (page 18).
COMPONENT VIDEO (BNC jacks) – Connect with the component video input terminals on a TV, AV receiver or amplifier, etc. (page 18).
4
This terminal is not used.
5HDMI OUT terminals
MAIN (KURO LINK) – Connect with an
SUB – Connect with an
6 DIGITAL OUT (COAXIAL/OPTICAL) terminals
Connect with the digital audio input terminal on an AV receiver or amplifier, etc. (page 19).
7 LAN (100) terminal
Ethernet port for
8 CONTROL IN terminal
Use to control this player from the remote sensor of another Pioneer component with a CONTROL OUT terminal and bearing the mark. Connect the CONTROL OUT terminal of the other component to CONTROL IN on this player using a
![]() Caution
Caution
•Be sure to connect cables for outputting the audio and video signals.
•When connected via System Control, point the remote control toward the connected component (such as an AV receiver or amplifier). The remote will not work correctly when pointed at this player.
•You cannot use System Control with components that do not have a System Control terminal or with components manufactured by companies other than Pioneer.
14
En
