02 Specially shaped discs
Specially shaped discs
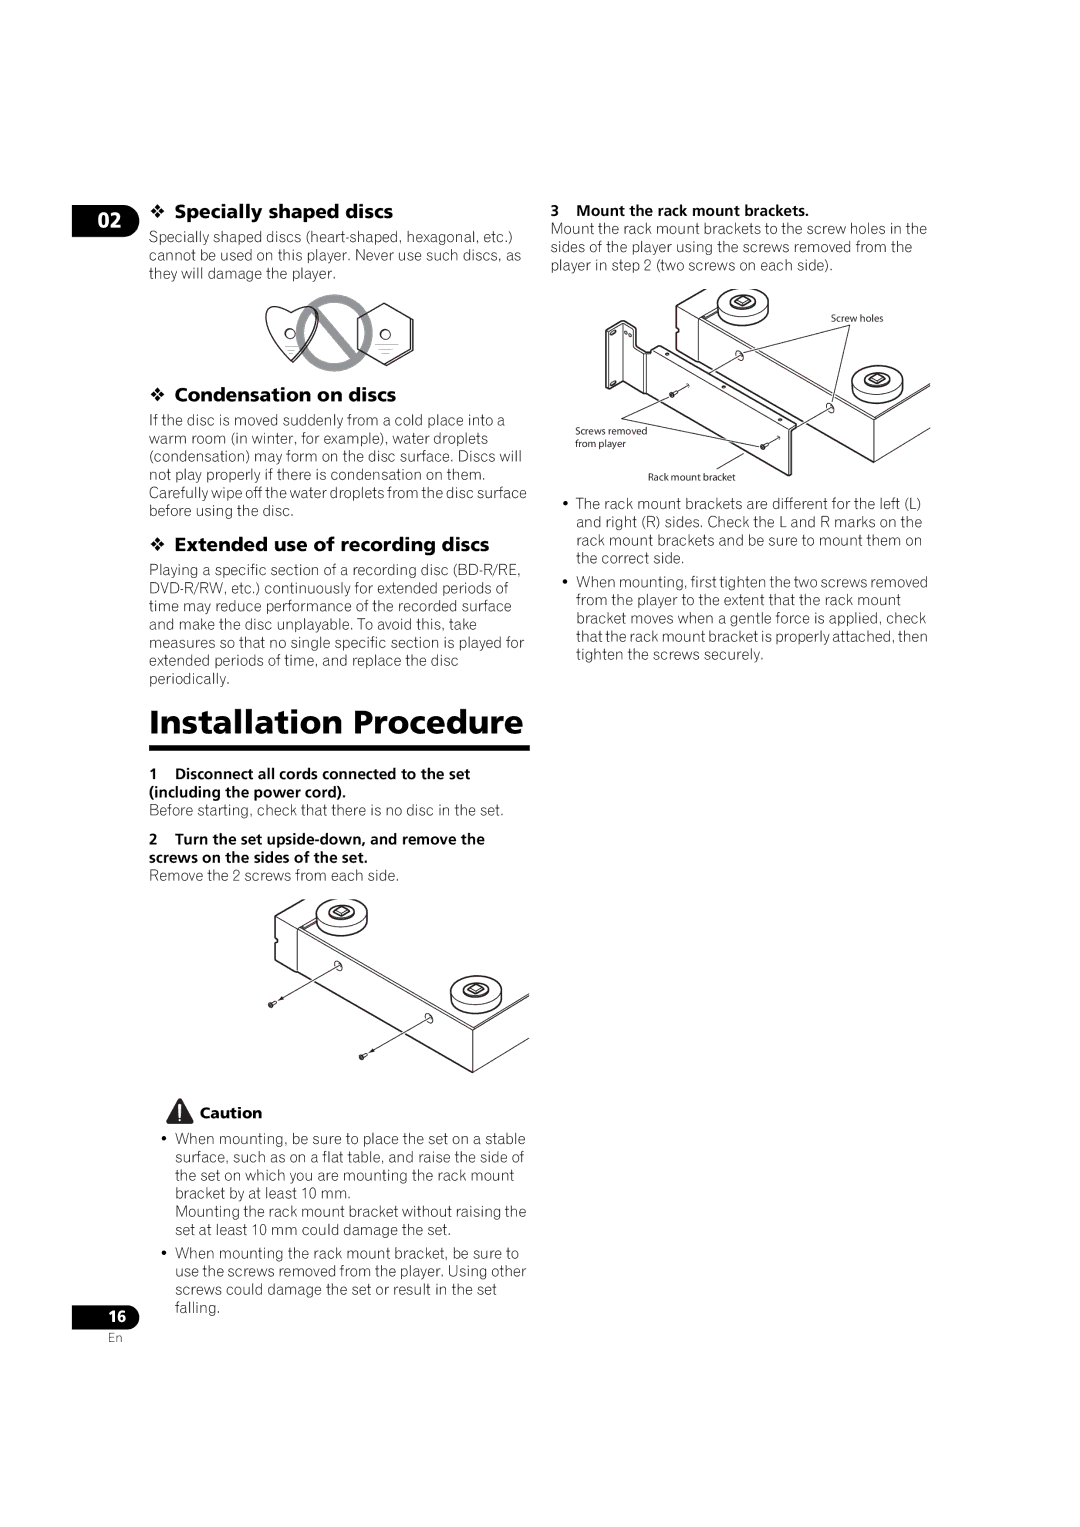
3 Mount the rack mount brackets.
Mount the rack mount brackets to the screw holes in the sides of the player using the screws removed from the player in step 2 (two screws on each side).
Condensation on discs
If the disc is moved suddenly from a cold place into a warm room (in winter, for example), water droplets (condensation) may form on the disc surface. Discs will not play properly if there is condensation on them. Carefully wipe off the water droplets from the disc surface before using the disc.
Extended use of recording discs
Playing a specific section of a recording disc
Installation Procedure
1Disconnect all cords connected to the set (including the power cord).
Before starting, check that there is no disc in the set.
2Turn the set
Remove the 2 screws from each side.
![]() Caution
Caution
• When mounting, be sure to place the set on a stable surface, such as on a flat table, and raise the side of the set on which you are mounting the rack mount bracket by at least 10 mm.
Mounting the rack mount bracket without raising the set at least 10 mm could damage the set.
• When mounting the rack mount bracket, be sure to use the screws removed from the player. Using other screws could damage the set or result in the set
Screw holes
Screws removed from player
Rack mount bracket
•The rack mount brackets are different for the left (L) and right (R) sides. Check the L and R marks on the rack mount brackets and be sure to mount them on the correct side.
•When mounting, first tighten the two screws removed from the player to the extent that the rack mount bracket moves when a gentle force is applied, check that the rack mount bracket is properly attached, then tighten the screws securely.
16
falling.
En
