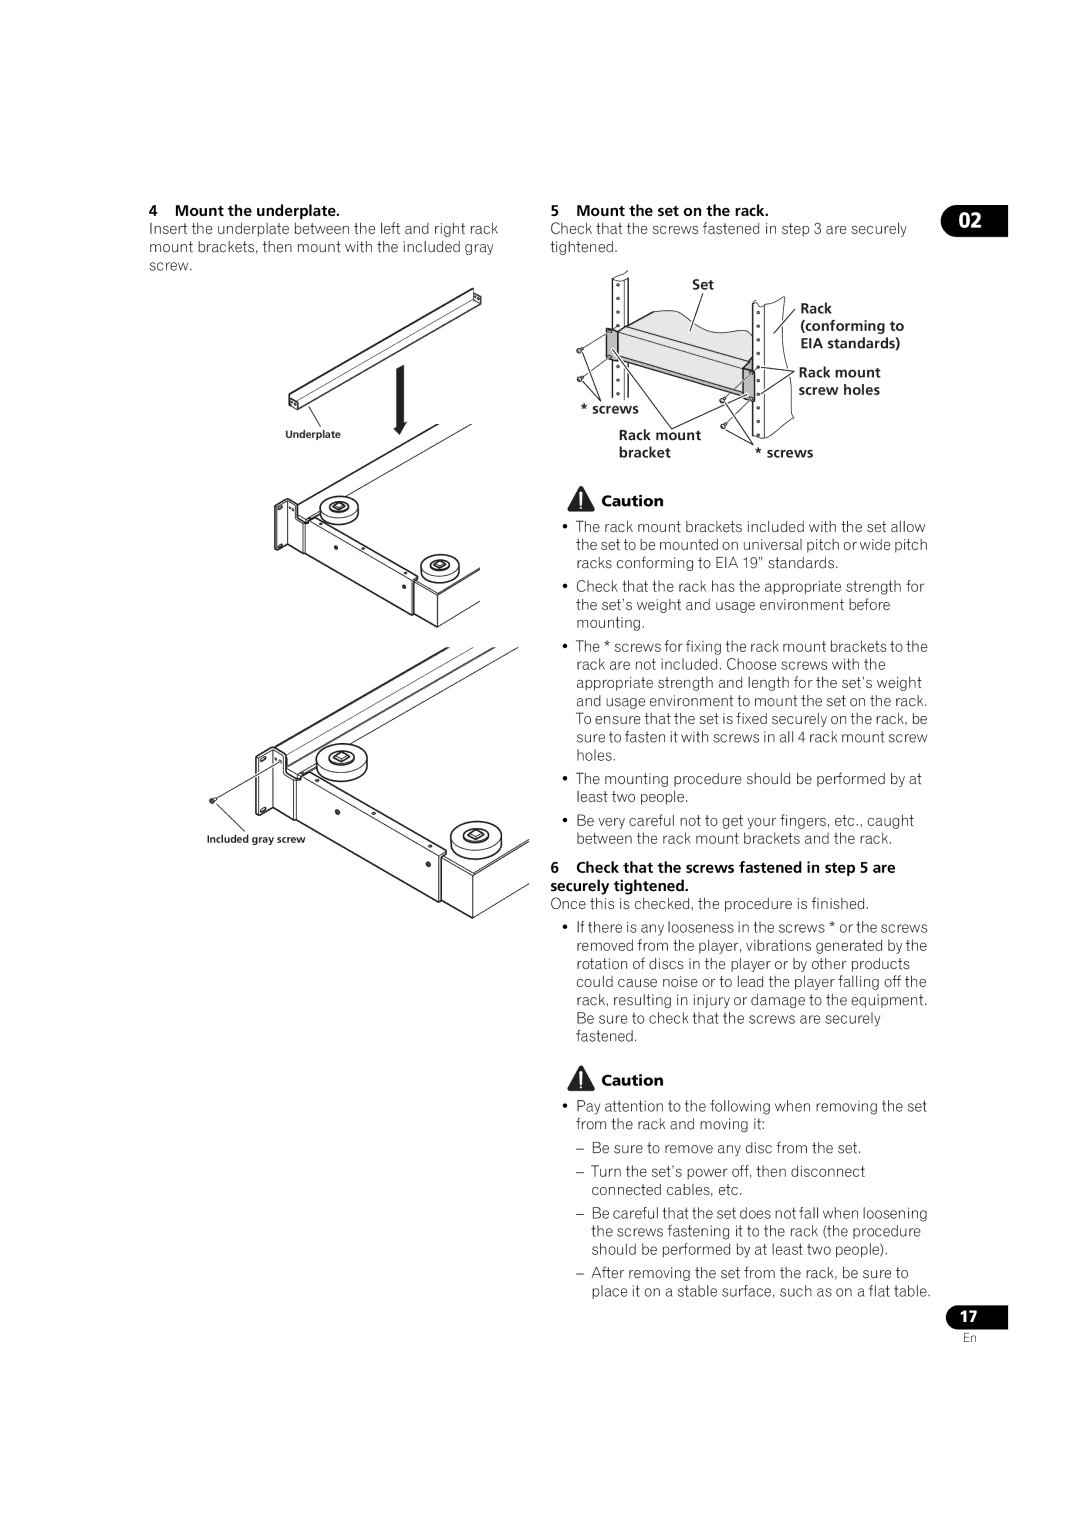
4 Mount the underplate.
Insert the underplate between the left and right rack mount brackets, then mount with the included gray screw.
Underplate
Included gray screw
5 Mount the set on the rack.
Check that the screws fastened in step 3 are securely tightened.
Set
Rack (conforming to EIA standards)
Rack mount

 screw holes * screws
Rack mount |
|
bracket | * screws |
![]() Caution
Caution
•The rack mount brackets included with the set allow the set to be mounted on universal pitch or wide pitch racks conforming to EIA 19” standards.
•Check that the rack has the appropriate strength for the set’s weight and usage environment before mounting.
•The * screws for fixing the rack mount brackets to the rack are not included. Choose screws with the appropriate strength and length for the set’s weight and usage environment to mount the set on the rack. To ensure that the set is fixed securely on the rack, be sure to fasten it with screws in all 4 rack mount screw holes.
•The mounting procedure should be performed by at least two people.
•Be very careful not to get your fingers, etc., caught between the rack mount brackets and the rack.
6Check that the screws fastened in step 5 are securely tightened.
Once this is checked, the procedure is finished.
•If there is any looseness in the screws * or the screws removed from the player, vibrations generated by the rotation of discs in the player or by other products could cause noise or to lead the player falling off the rack, resulting in injury or damage to the equipment. Be sure to check that the screws are securely fastened.
![]() Caution
Caution
•Pay attention to the following when removing the set from the rack and moving it:
–Be sure to remove any disc from the set.
–Turn the set’s power off, then disconnect connected cables, etc.
–Be careful that the set does not fall when loosening the screws fastening it to the rack (the procedure should be performed by at least two people).
–After removing the set from the rack, be sure to
place it on a stable surface, such as on a flat table.
02
17
En