08The Initial Setup menu
•Manual clock setting
If no stations in your area are broadcasting time signals, you can set the clock manually:
1Set your time zone.
Set this by selecting a time relative to GMT (see Time Zone list on page 62 for the possible time zones).
![]()
![]()
![]() Clock
Clock
Auto | Date | SAT 01 / 01 / 2005 |
Manual | Time | 12 : 00 |
| Time Zone | GMT+10:00 |
| Summer Time | Off |
|
|
|
2Move the cursor down and select ‘On’ for summer time if you are currently on summer time, then press ENTER.
![]()
![]()
![]() Clock
Clock
Auto | Date | SAT 01 / 01 / 2005 |
Manual | Time | 12 : 00 |
| Time Zone | GMT+10:00 |
| Summer Time | On |
|
|
|
3Set the date (day/month/year) and time, then press ENTER to make all the settings.
![]()
![]()
![]() Clock
Clock
Auto | Date | SAT | 01 | / 01 / 2005 |
Manual | Time | 12 : | 00 |
|
| Time Zone | GMT+10:00 | ||
| Summer Time | On |
| |
|
|
|
|
|
Use the | buttons to change the value in the |
highlighted field. | |
Use the | buttons to move from one field to |
another. |
|
Tuner
![]()
![]()
![]() Basic
Basic
Basic | Clock | Auto CH Setup |
Disc | Tuner | Manual CH Setup |
Video | OSD Language | Channel Swapping |
Audio | Display | Set Guide Preset |
Recording | Remote Control |
|
Playback | Setup Navigator |
|
| Power Save |
|
|
|
|
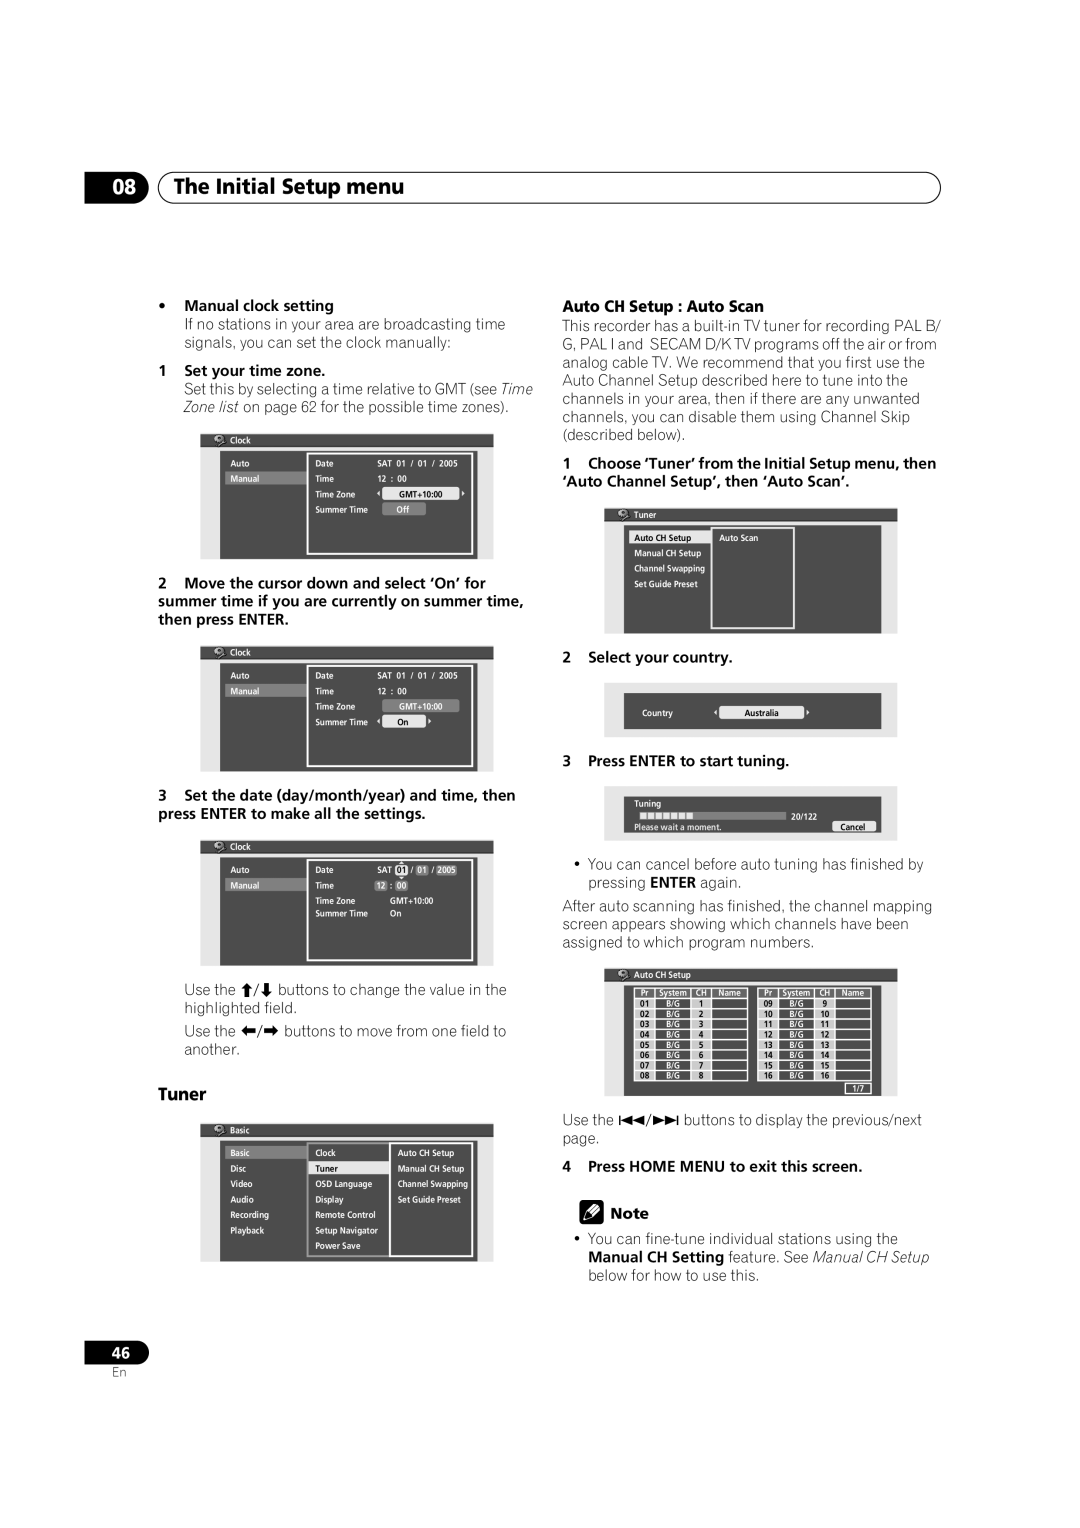
Auto CH Setup : Auto Scan
This recorder has a
1Choose ‘Tuner’ from the Initial Setup menu, then ‘Auto Channel Setup’, then ‘Auto Scan’.
![]() Tuner
Tuner
Auto CH Setup | Auto Scan |
|
Manual CH Setup |
|
|
Channel Swapping |
|
|
Set Guide Preset |
|
|
|
|
|
2 Select your country.
Country ![]() Australia
Australia
3 Press ENTER to start tuning.
|
|
|
|
|
|
|
|
|
|
|
|
| Tuning |
|
| ||||||||
|
|
|
|
|
|
|
|
|
| 20/122 |
|
| Please wait a moment. | Cancel |
| ||||||||
|
|
|
|
|
|
|
|
|
|
|
|
•You can cancel before auto tuning has finished by pressing ENTER again.
After auto scanning has finished, the channel mapping screen appears showing which channels have been assigned to which program numbers.
![]() Auto CH Setup
Auto CH Setup
|
| Pr | System | CH Name | Pr | System | CH Name |
| |
|
| 01 | B/G | 1 |
| 09 | B/G | 9 |
|
|
| 02 | B/G | 2 |
| 10 | B/G | 10 |
|
|
| 03 | B/G | 3 |
| 11 | B/G | 11 |
|
|
| 04 | B/G | 4 |
| 12 | B/G | 12 |
|
|
| 05 | B/G | 5 |
| 13 | B/G | 13 |
|
|
| 06 | B/G | 6 |
| 14 | B/G | 14 |
|
|
| 07 | B/G | 7 |
| 15 | B/G | 15 |
|
|
| 08 | B/G | 8 |
| 16 | B/G | 16 |
|
|
|
|
|
|
|
|
| 1/7 |
|
Use the | buttons to display the previous/next | ||||||||
page. |
|
|
|
|
|
|
| ||
4 Press HOME MENU to exit this screen.
![]() Note
Note
•You can
46
En