06Recording
•Except when finalizing Video mode discs, timer recording will start when the operation preventing timer recording has finished.
•If a disc is playing when a timer recording is due to start, playback will automatically stop to allow the recording to start.
•The timer indicator lights in the front panel display when the timer is active. If the indicator is blinking it means that there is no disc loaded, or the disc loaded is not recordable.
•Approximately two minutes before a timer recording is set to start, the recorder will go into timer recording standby (assuming that a recordable disc is loaded). In timer recording standby you cannot use some functions.
CLEAR
ENTER
HOME
MENU
TIMER REC
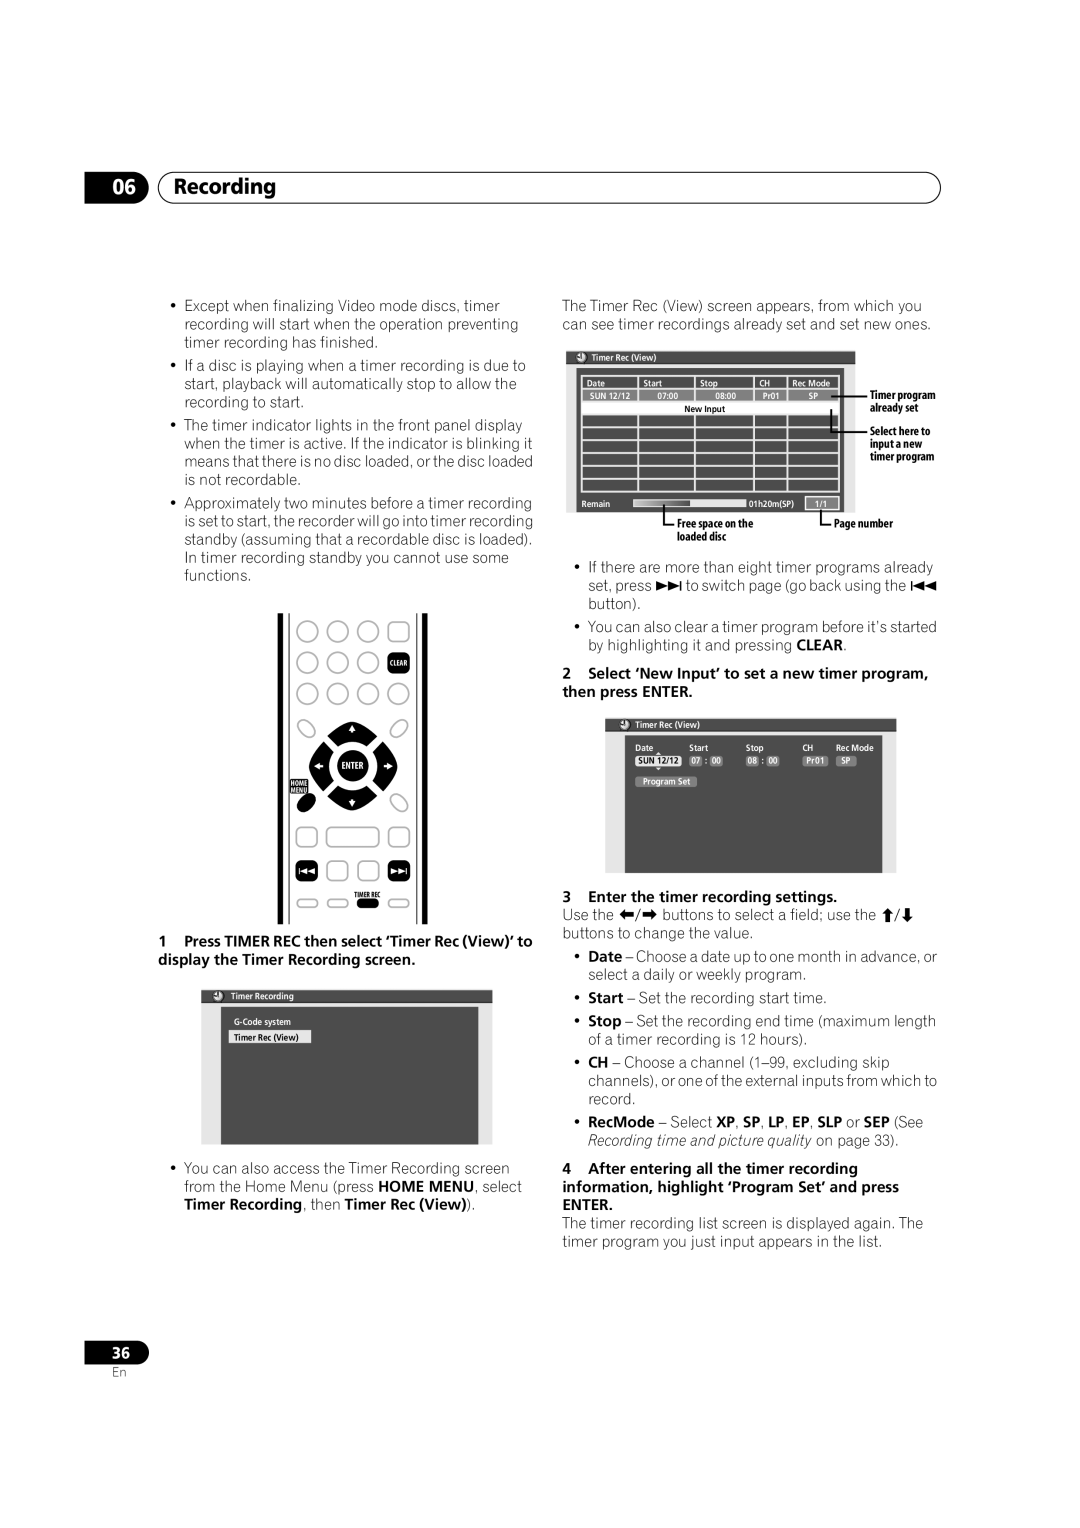
1Press TIMER REC then select ‘Timer Rec (View)’ to display the Timer Recording screen.
![]() Timer Recording
Timer Recording
Timer Rec (View)
•You can also access the Timer Recording screen from the Home Menu (press HOME MENU, select Timer Recording, then Timer Rec (View)).
The Timer Rec (View) screen appears, from which you can see timer recordings already set and set new ones.
![]() Timer Rec (View)
Timer Rec (View)
|
|
|
|
|
|
|
|
|
|
|
|
|
Date | Start | Stop |
| CH | Rec Mode |
|
|
| ||||
SUN 12/12 | 07:00 | 08:00 |
| Pr01 |
| SP |
|
| Timer program | |||
|
|
|
| |||||||||
|
|
|
| New Input |
|
|
|
|
|
|
| already set |
|
|
|
|
|
|
|
|
|
|
|
| Select here to |
|
|
|
|
|
|
|
|
|
|
|
| |
|
|
|
|
|
|
|
|
|
|
|
| input a new |
|
|
|
|
|
|
|
|
|
|
| ||
|
|
|
|
|
|
|
|
|
|
|
| timer program |
|
|
|
|
|
|
|
|
|
|
| ||
|
|
|
|
|
|
|
|
|
|
|
|
|
|
|
|
|
|
|
|
|
|
|
|
|
|
Remain |
|
|
|
| 01h20m(SP) | 1/1 |
|
|
| |||
|
|
|
|
|
|
|
|
|
|
|
|
|
|
|
| Free space on the |
|
|
| Page number | |||||
|
|
|
|
|
| |||||||
|
|
| loaded disc |
|
|
|
|
|
|
|
| |
• If there are more than eight timer programs already
set, press to switch page (go back using the button).
•You can also clear a timer program before it’s started by highlighting it and pressing CLEAR.
2Select ‘New Input’ to set a new timer program, then press ENTER.
![]() Timer Rec (View)
Timer Rec (View)
Date | Start | Stop |
| CH | Rec Mode |
SUN 12/12 | 07 : 00 | 08 : | 00 | Pr01 | SP |
Program Set
3 Enter the timer recording settings.
Use the buttons to select a field; use the buttons to change the value.
•Date – Choose a date up to one month in advance, or select a daily or weekly program.
•Start – Set the recording start time.
•Stop – Set the recording end time (maximum length of a timer recording is 12 hours).
•CH – Choose a channel
•RecMode – Select XP, SP, LP, EP, SLP or SEP (See Recording time and picture quality on page 33).
4After entering all the timer recording information, highlight ‘Program Set’ and press
ENTER.
The timer recording list screen is displayed again. The timer program you just input appears in the list.
36
En
