C O M M E R C I A L P R O D U C T S D I V I S I O N
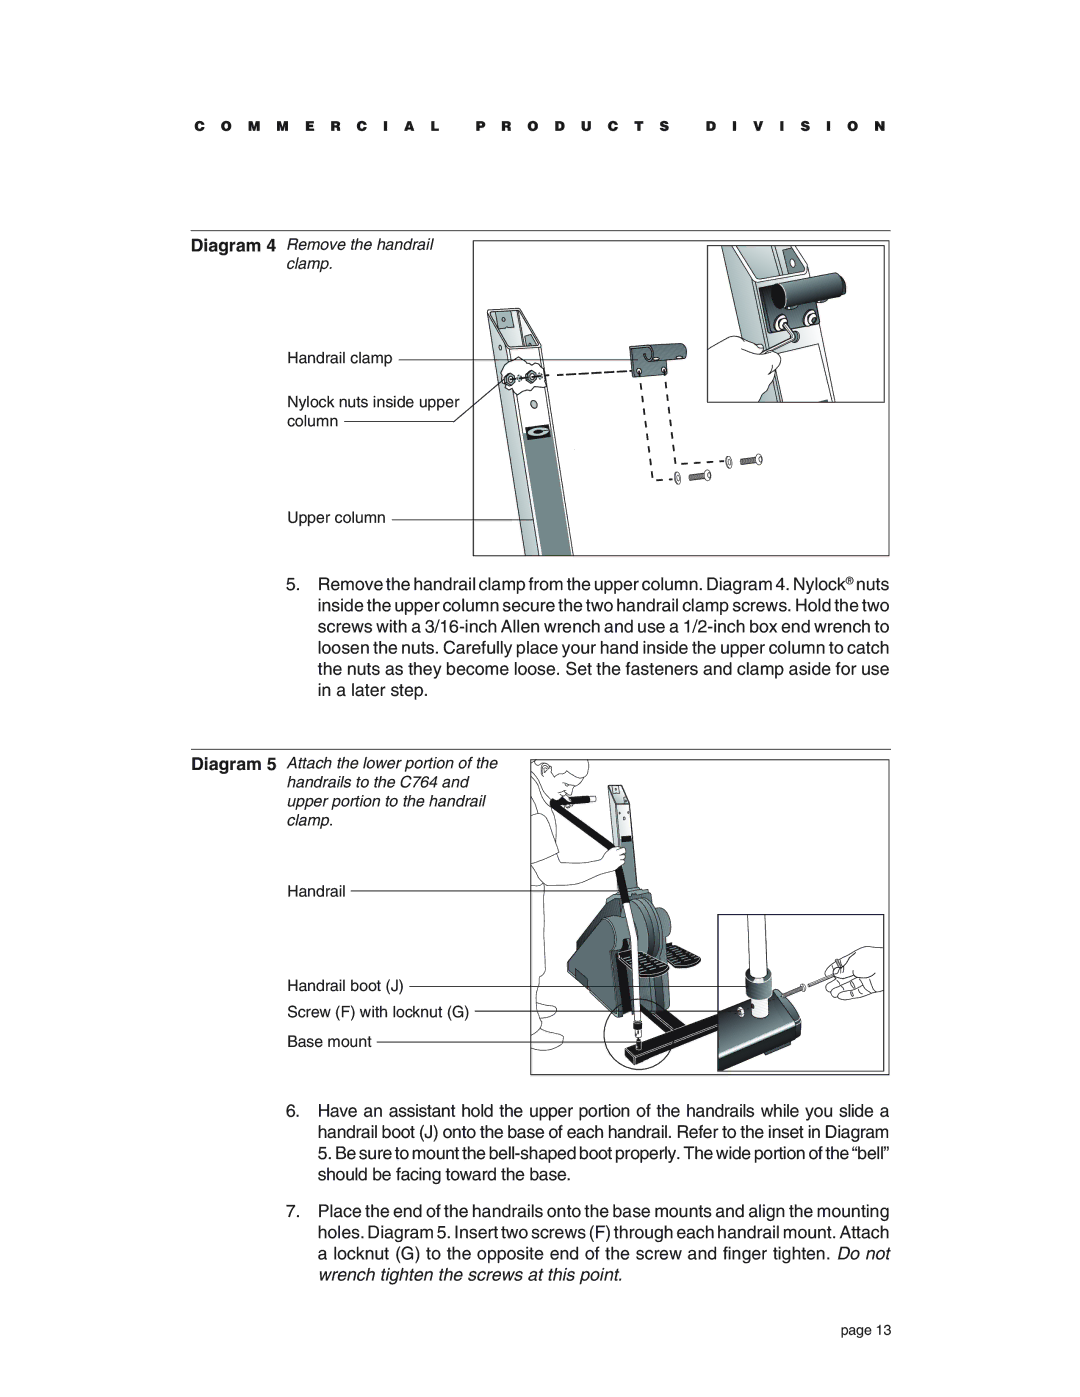
Diagram 4 Remove the handrail
clamp.
Handrail clamp
Nylock nuts inside upper column
Upper column
5.Remove the handrail clamp from the upper column. Diagram 4. Nylock® nuts inside the upper column secure the two handrail clamp screws. Hold the two screws with a
Diagram 5 Attach the lower portion of the handrails to the C764 and upper portion to the handrail clamp.
Handrail
Handrail boot (J)
Screw (F) with locknut (G)
Base mount
6.Have an assistant hold the upper portion of the handrails while you slide a handrail boot (J) onto the base of each handrail. Refer to the inset in Diagram 5. Be sure to mount the
7.Place the end of the handrails onto the base mounts and align the mounting holes. Diagram 5. Insert two screws (F) through each handrail mount. Attach a locknut (G) to the opposite end of the screw and finger tighten. Do not wrench tighten the screws at this point.
page 13