C O M M E R C I A L |
| P R O D U C T S | D I V I S I O N |
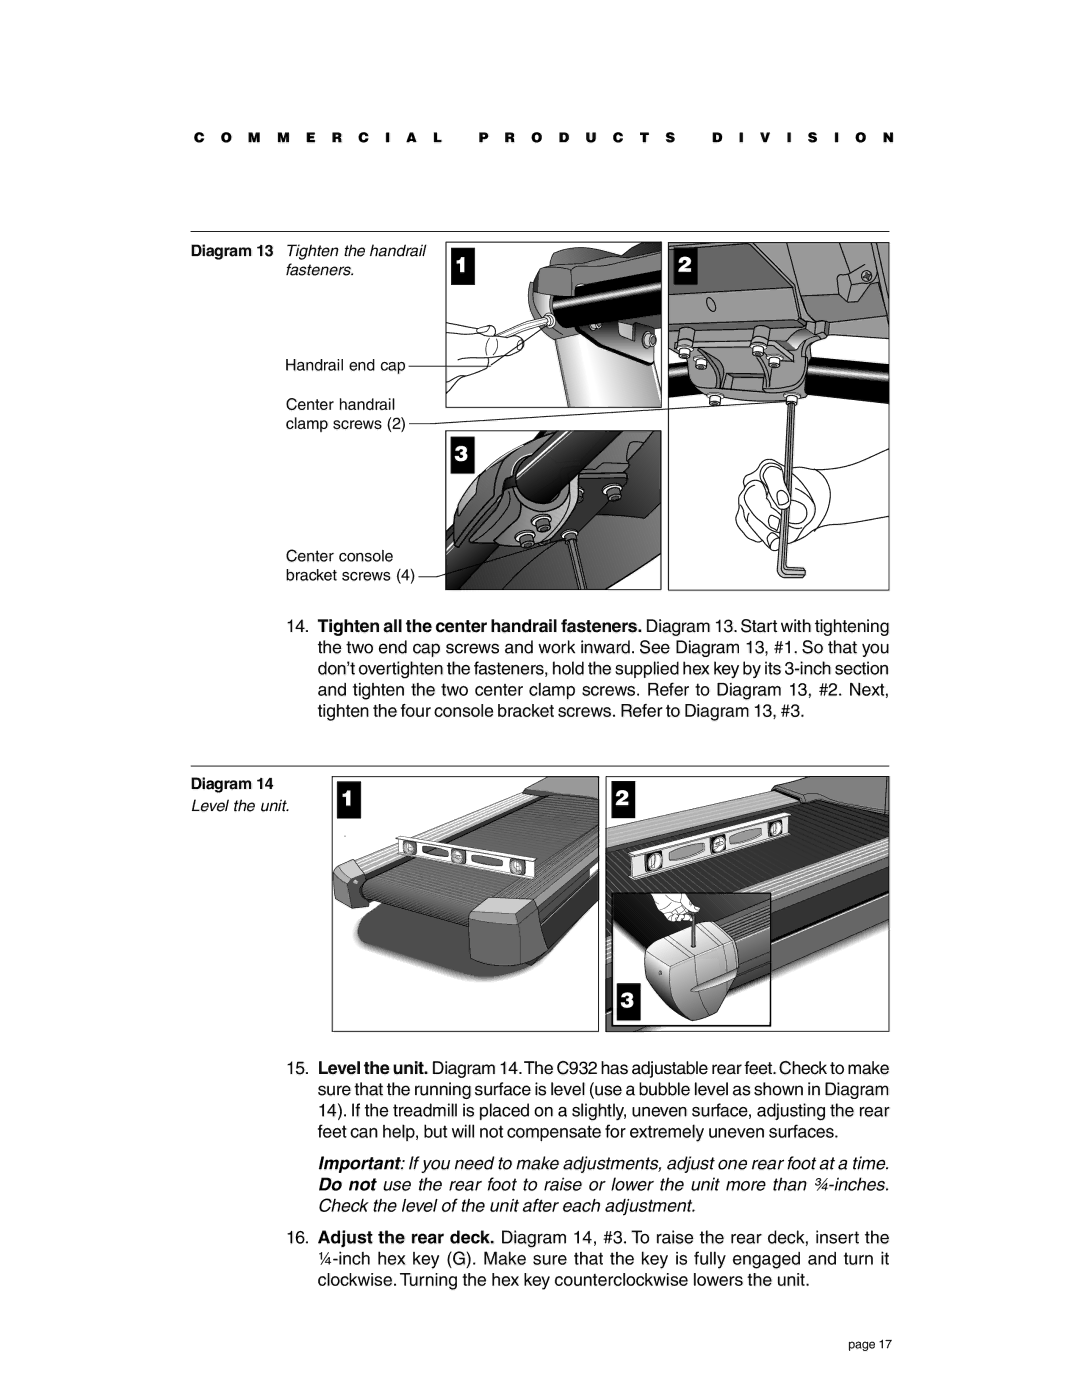
Diagram 13 Tighten the handrail | 1 |
| 2 |
fasteners. |
| ||
Handrail end cap |
|
|
|
Center handrail |
|
|
|
clamp screws (2) |
|
|
|
| 3 |
|
|
Center console |
|
|
|
bracket screws (4) |
|
|
|
14.Tighten all the center handrail fasteners. Diagram 13. Start with tightening the two end cap screws and work inward. See Diagram 13, #1. So that you don’t overtighten the fasteners, hold the supplied hex key by its
Diagram 14
Level the unit.
1 | 2 |
| 3 |
15.Level the unit. Diagram 14.The C932 has adjustable rear feet. Check to make sure that the running surface is level (use a bubble level as shown in Diagram 14). If the treadmill is placed on a slightly, uneven surface, adjusting the rear feet can help, but will not compensate for extremely uneven surfaces.
Important: If you need to make adjustments, adjust one rear foot at a time. Do not use the rear foot to raise or lower the unit more than
16.Adjust the rear deck. Diagram 14, #3. To raise the rear deck, insert the
page 17