C O M M E R C I A L | P R O D U C T S | D I V I S I O N |
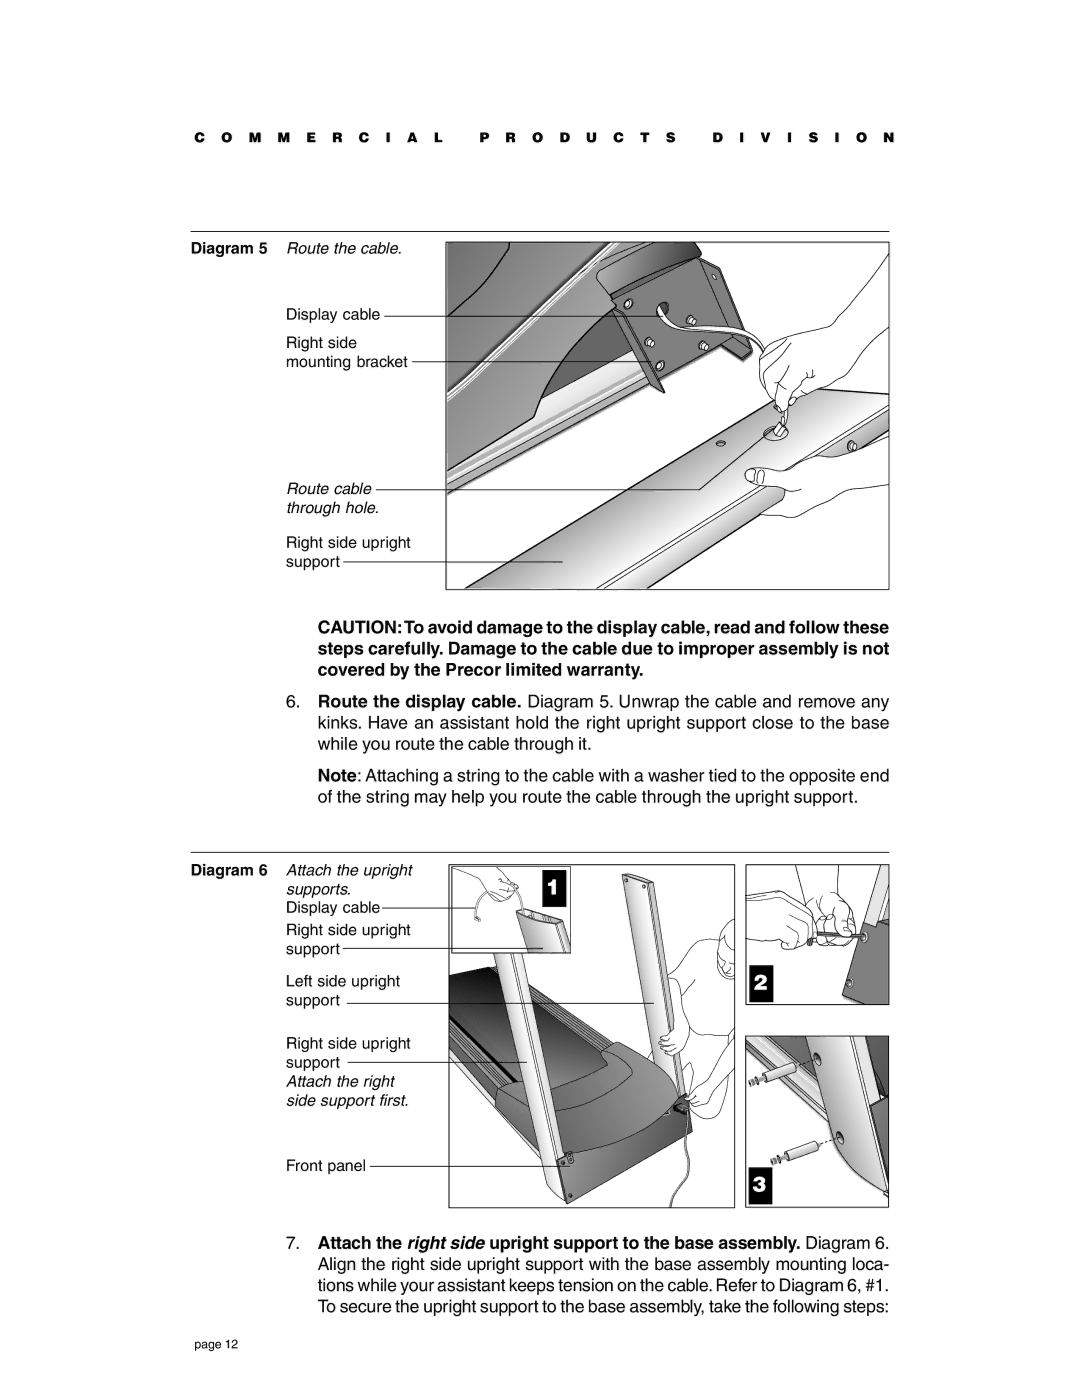
Diagram 5 Route the cable. |
|
|
Display cable |
|
|
Right side |
|
|
mounting bracket |
|
|
Route cable |
|
|
through hole. |
|
|
Right side upright |
|
|
support |
|
|
CAUTION:To avoid damage to the display cable, read and follow these steps carefully. Damage to the cable due to improper assembly is not covered by the Precor limited warranty.
6.Route the display cable. Diagram 5. Unwrap the cable and remove any kinks. Have an assistant hold the right upright support close to the base while you route the cable through it.
Note: Attaching a string to the cable with a washer tied to the opposite end of the string may help you route the cable through the upright support.
Diagram 6 Attach the upright | 1 |
supports. | |
Display cable |
|
Right side upright |
|
support |
|
Left side upright |
|
support |
|
Right side upright |
|
support |
|
Attach the right |
|
side support first. |
|
Front panel |
|
2
3 |
7.Attach the right side upright support to the base assembly. Diagram 6. Align the right side upright support with the base assembly mounting loca- tions while your assistant keeps tension on the cable. Refer to Diagram 6, #1. To secure the upright support to the base assembly, take the following steps:
page 12