C O M M E R C I A L | P R O D U C T S | D I V I S I O N | |
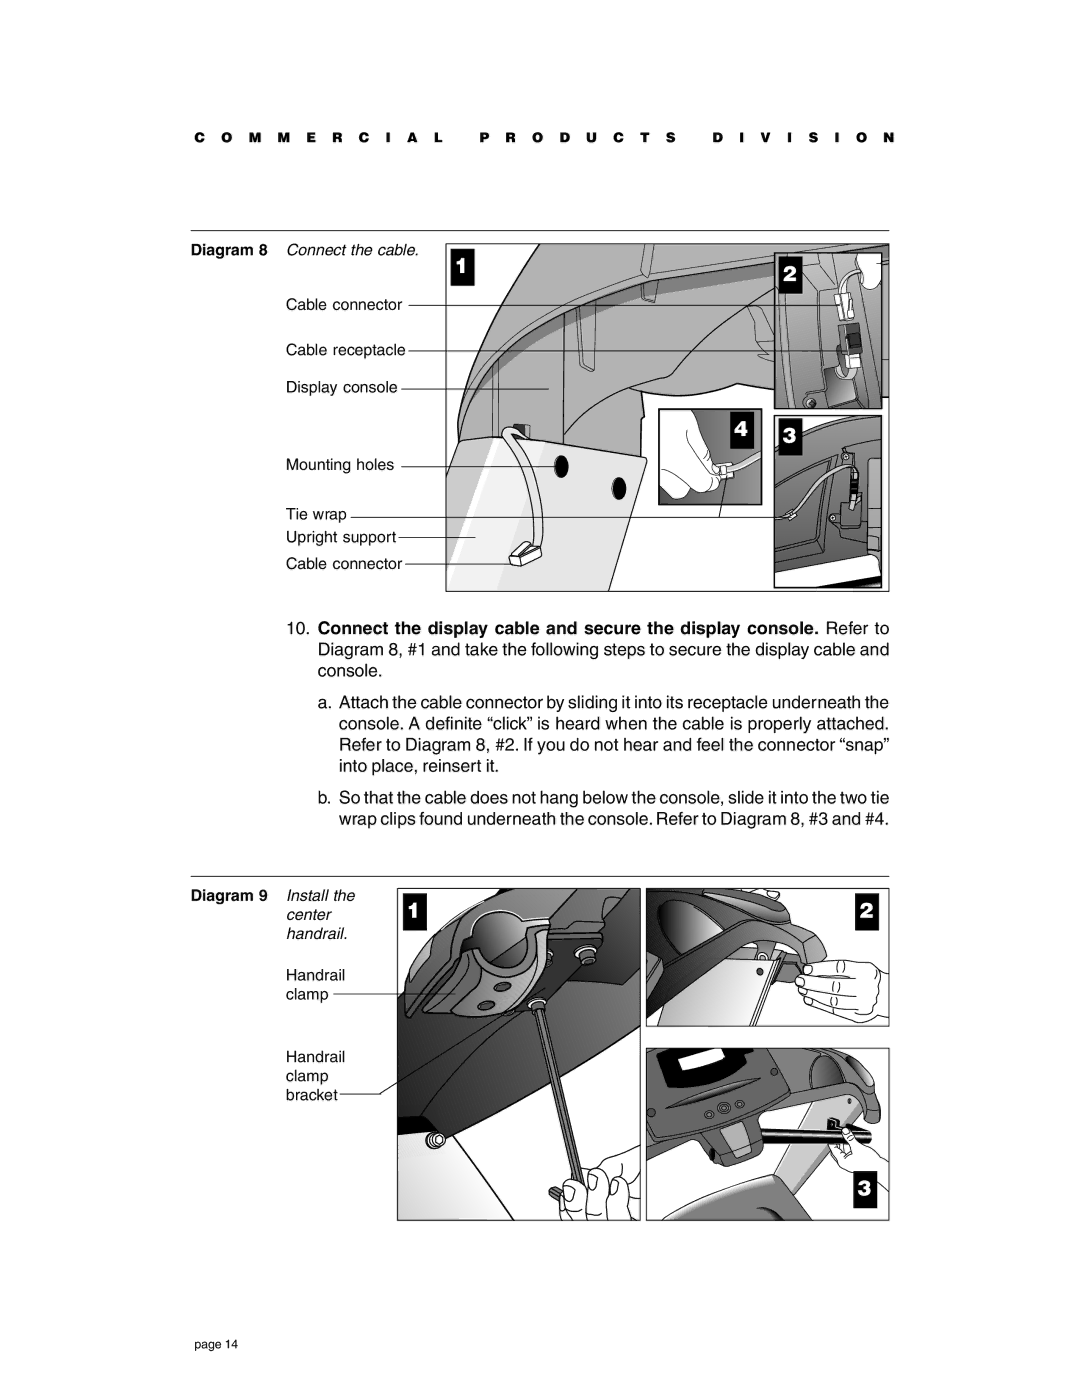
Diagram 8 Connect the cable. | 1 |
|
|
|
| 2 | |
|
|
| |
Cable connector |
|
|
|
Cable receptacle |
|
|
|
Display console |
|
|
|
|
| 4 | 3 |
|
|
| |
Mounting holes |
|
|
|
Tie wrap |
|
|
|
Upright support |
|
|
|
Cable connector |
|
|
|
10.Connect the display cable and secure the display console. Refer to Diagram 8, #1 and take the following steps to secure the display cable and console.
a.Attach the cable connector by sliding it into its receptacle underneath the console. A definite “click” is heard when the cable is properly attached. Refer to Diagram 8, #2. If you do not hear and feel the connector “snap” into place, reinsert it.
b.So that the cable does not hang below the console, slide it into the two tie wrap clips found underneath the console. Refer to Diagram 8, #3 and #4.
Diagram 9 | Install the | 1 | 2 |
| center | ||
| handrail. |
|
|
| Handrail |
|
|
| clamp |
|
|
| Handrail |
|
|
| clamp |
|
|
| bracket |
|
|
|
|
| 3 |
page 14
