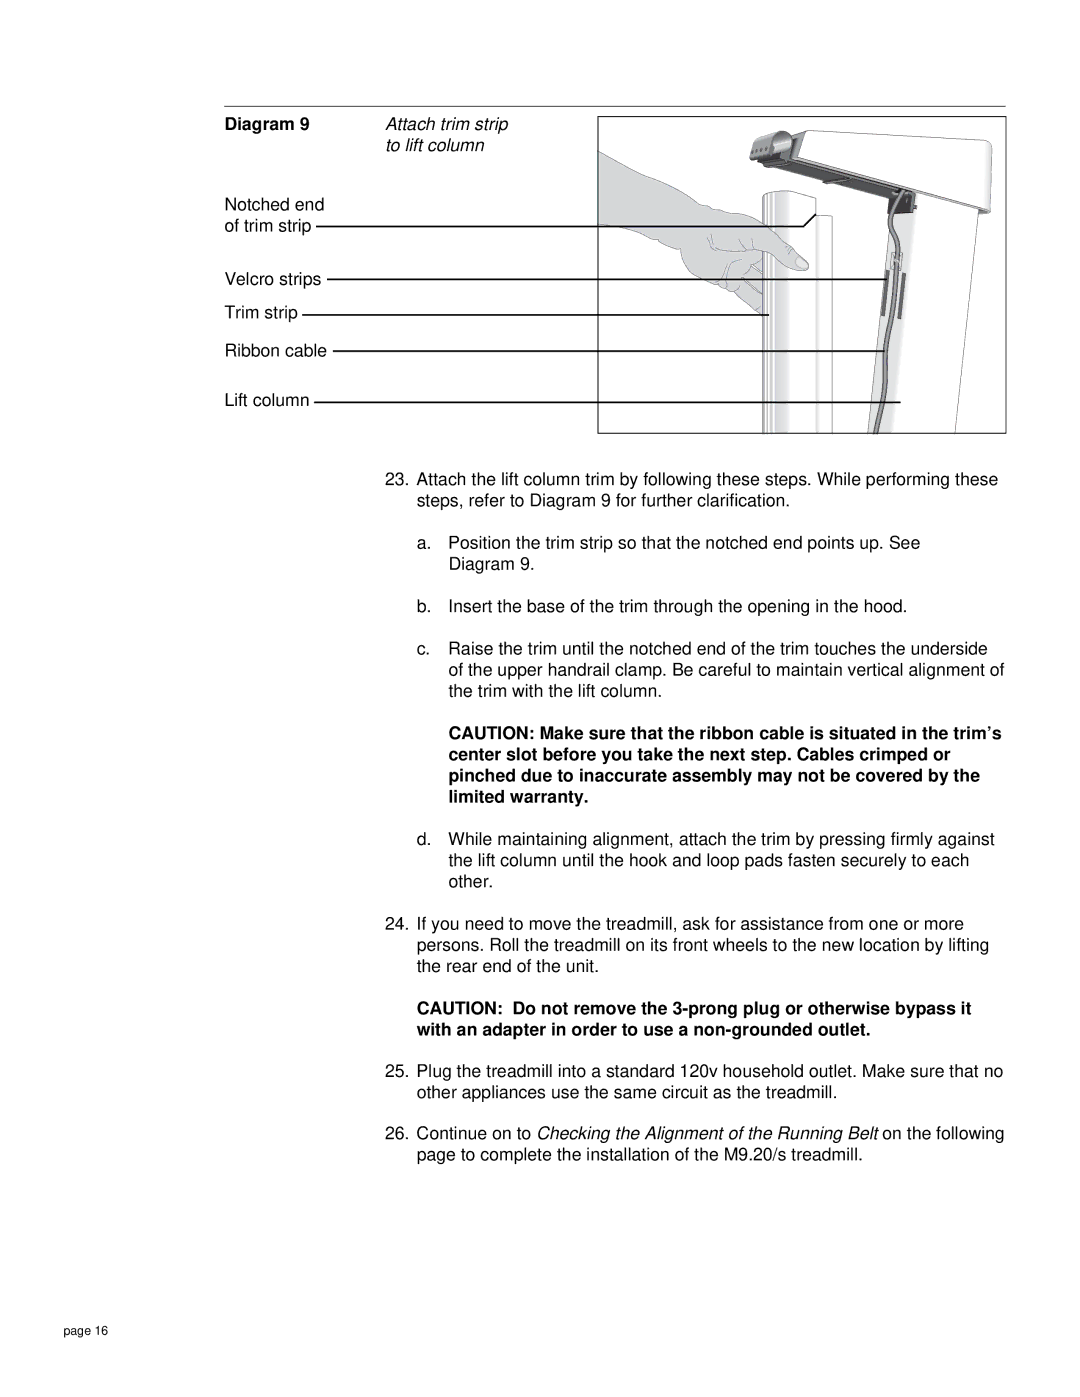
Diagram 9 | Attach trim strip |
| to lift column |
Notched end of trim strip
Velcro strips
Trim strip
Ribbon cable
Lift column
23.Attach the lift column trim by following these steps. While performing these steps, refer to Diagram 9 for further clarification.
a.Position the trim strip so that the notched end points up. See Diagram 9.
b.Insert the base of the trim through the opening in the hood.
c.Raise the trim until the notched end of the trim touches the underside of the upper handrail clamp. Be careful to maintain vertical alignment of the trim with the lift column.
CAUTION: Make sure that the ribbon cable is situated in the trim’s center slot before you take the next step. Cables crimped or pinched due to inaccurate assembly may not be covered by the limited warranty.
d.While maintaining alignment, attach the trim by pressing firmly against the lift column until the hook and loop pads fasten securely to each other.
24.If you need to move the treadmill, ask for assistance from one or more persons. Roll the treadmill on its front wheels to the new location by lifting the rear end of the unit.
CAUTION: Do not remove the
25.Plug the treadmill into a standard 120v household outlet. Make sure that no other appliances use the same circuit as the treadmill.
26.Continue on to Checking the Alignment of the Running Belt on the following page to complete the installation of the M9.20/s treadmill.
page 16