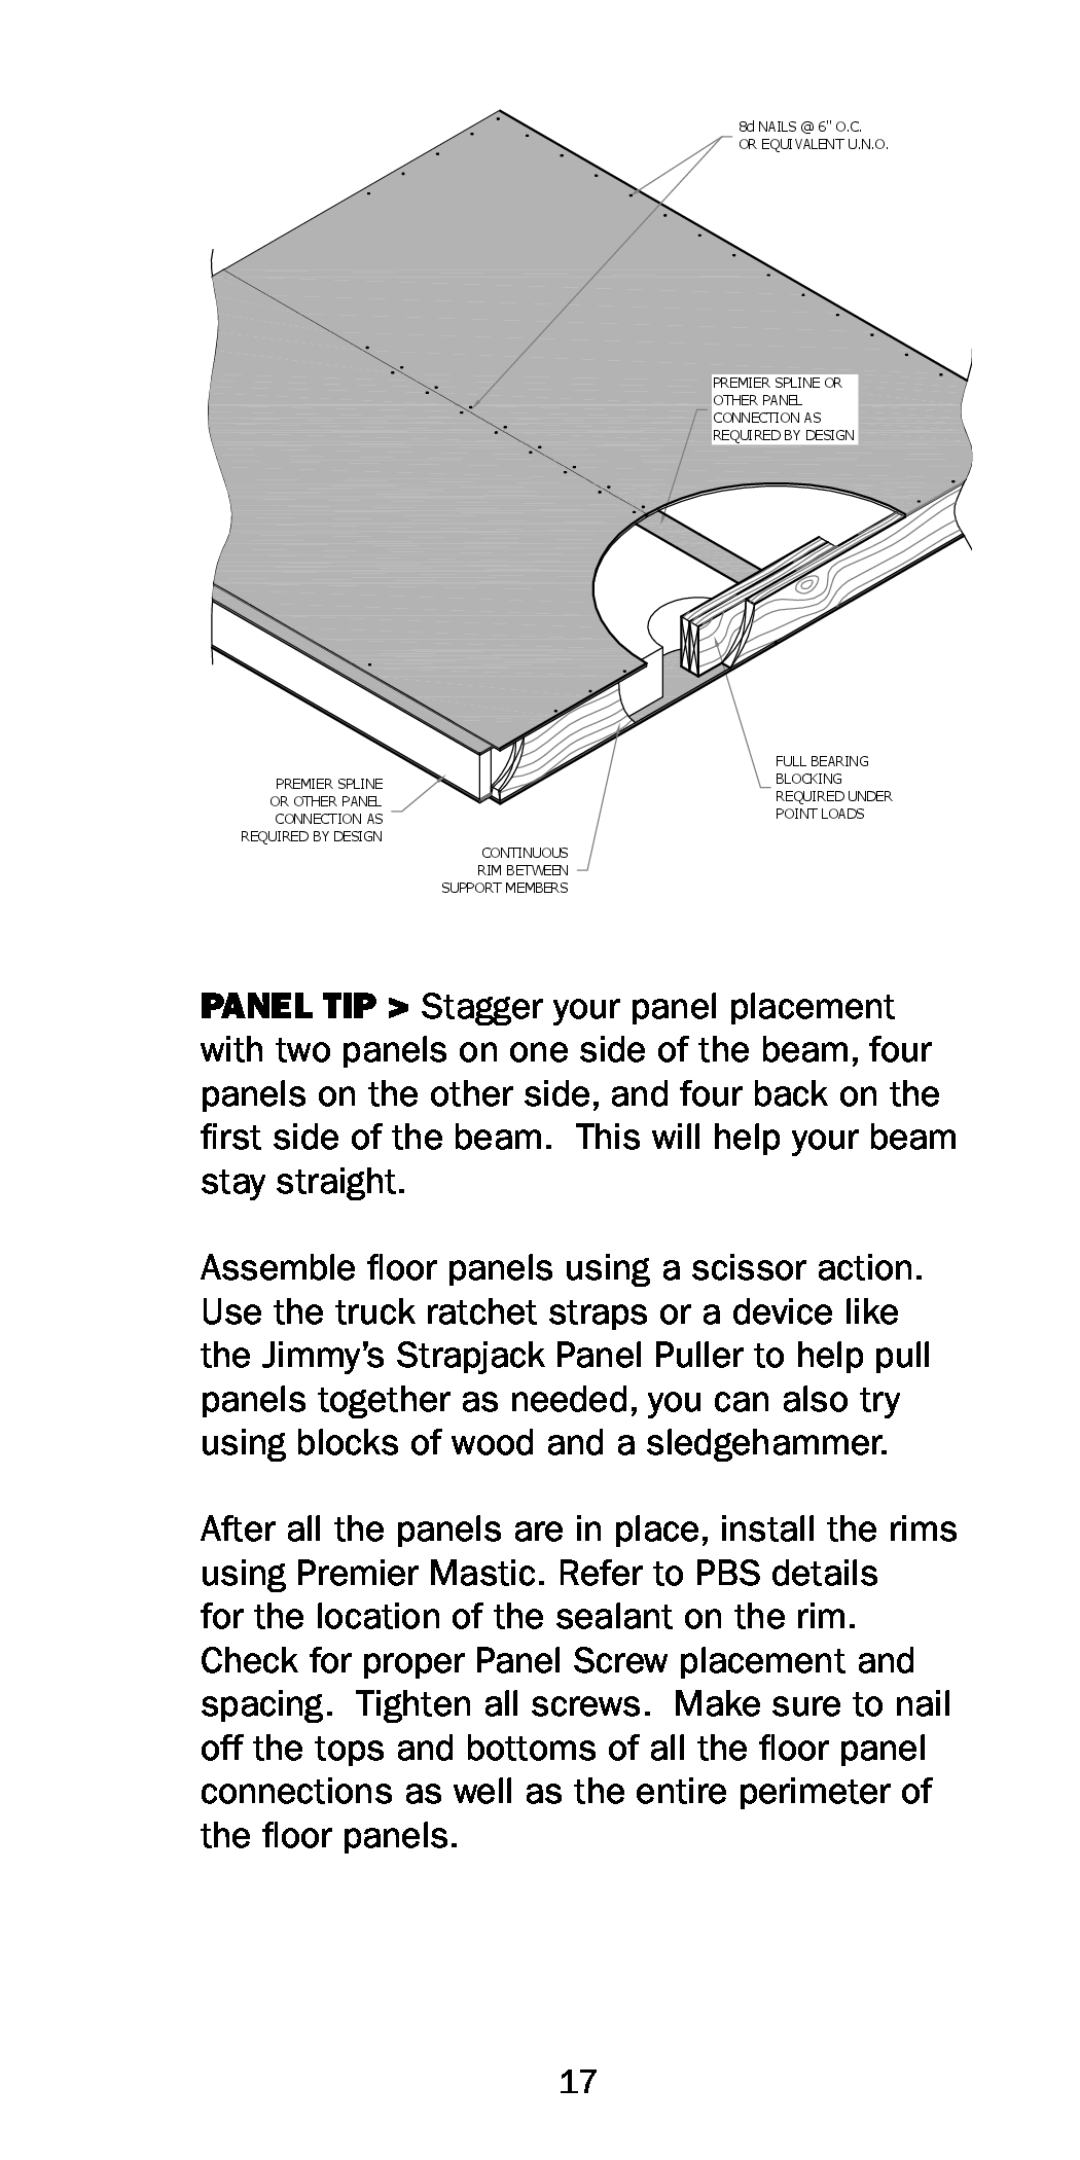
8d NAILS @ 6" O.C.
OR EQUIVALENT U.N.O.
![]() PREMIER SPLINE OR
PREMIER SPLINE OR
![]()
![]() OTHER PANEL
OTHER PANEL
![]() CONNECTION AS
CONNECTION AS ![]()
![]()
![]() REQUIRED BY DESIGN
REQUIRED BY DESIGN ![]()
| FULL BEARING | |
PREMIER SPLINE | BLOCKING | |
OR OTHER PANEL | REQUIRED UNDER | |
POINT LOADS | ||
CONNECTION AS | ||
REQUIRED BY DESIGN | CONTINUOUS | |
| ||
| RIM BETWEEN | |
| SUPPORT MEMBERS |
PANEL TIP > Stagger your panel placement with two panels on one side of the beam, four panels on the other side, and four back on the first side of the beam. This will help your beam stay straight.
Assemble floor panels using a scissor action. Use the truck ratchet straps or a device like the Jimmy’s Strapjack Panel Puller to help pull panels together as needed, you can also try using blocks of wood and a sledgehammer.
After all the panels are in place, install the rims using Premier Mastic. Refer to PBS details
for the location of the sealant on the rim. Check for proper Panel Screw placement and spacing. Tighten all screws. Make sure to nail off the tops and bottoms of all the floor panel connections as well as the entire perimeter of the floor panels.
17