FastTrak TX4000 User Manual
Selecting Array Type
1.Under the Definition section of this menu, highlight the Array # for which you want to assign a RAID level.
2.Press the Spacebar to cycle through three array types:
•Performance (RAID 0 Striping)
•Security (RAID 1 Mirroring
•RAID 0+1 Striping/Mirroring (for 4 drives)
See page 50 for more information about RAID levels.
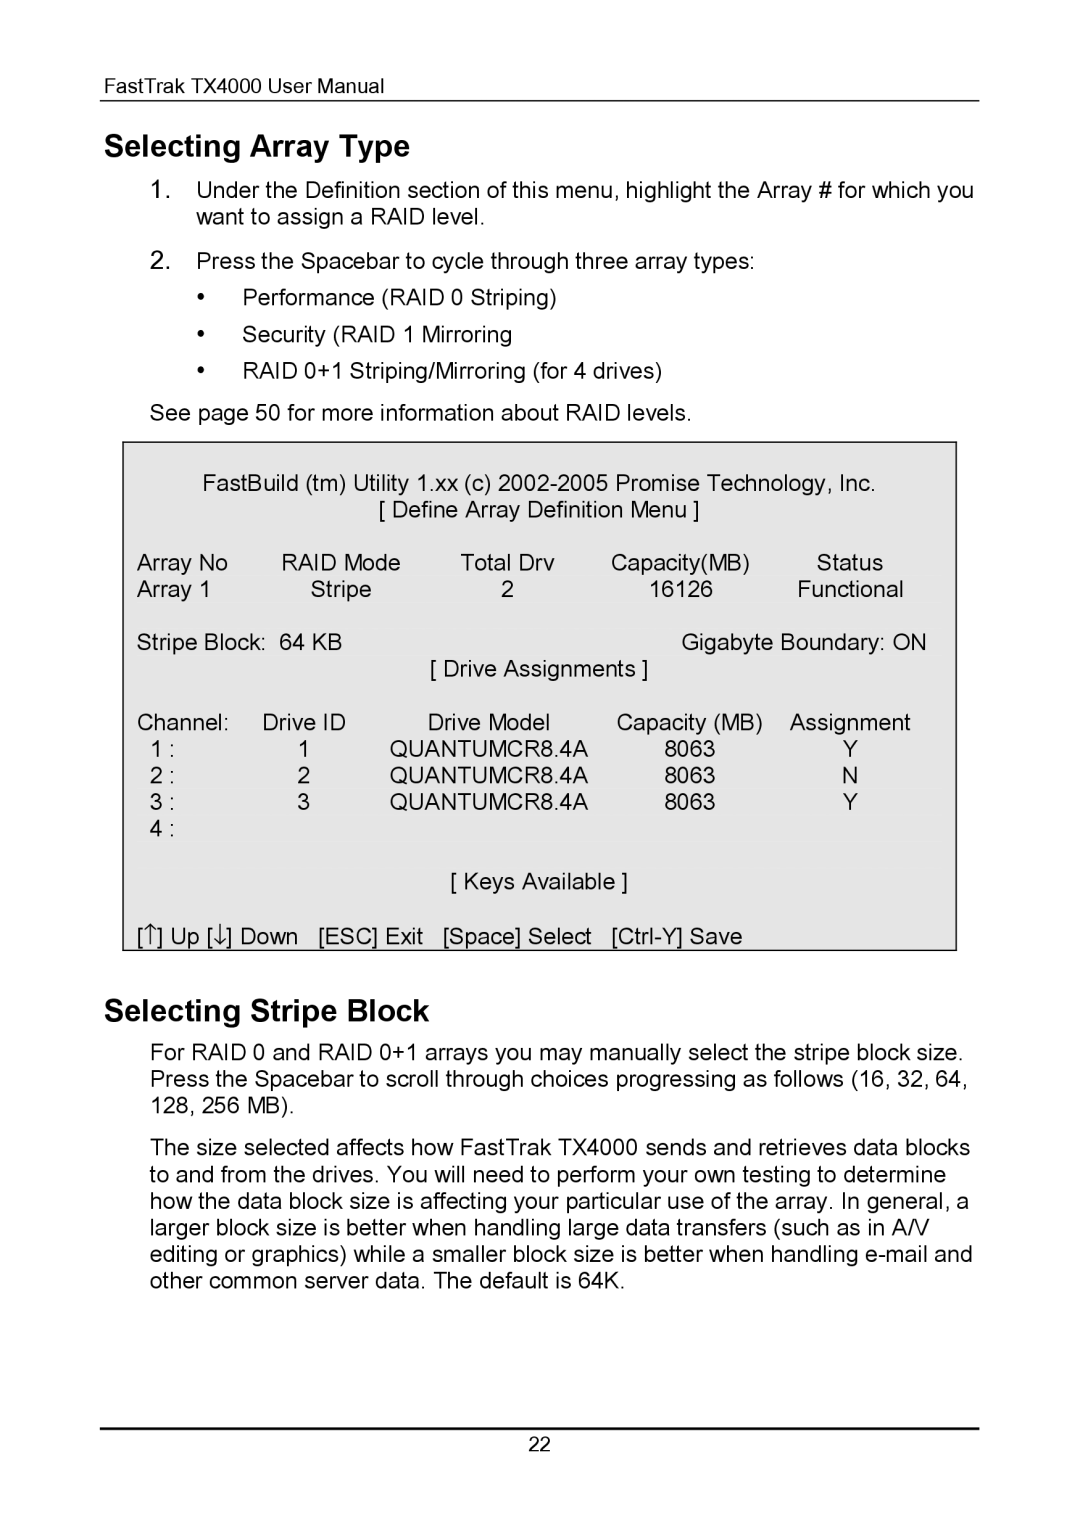
FastBuild (tm) Utility 1.xx (c)
[ Define Array Definition Menu ]
Array No | RAID Mode | Total Drv | Capacity(MB) | Status | |
Array 1 | Stripe |
| 2 | 16126 | Functional |
Stripe Block: 64 KB |
|
| Gigabyte Boundary: ON | ||
|
|
| [ Drive Assignments ] |
| |
Channel: | Drive ID |
| Drive Model | Capacity (MB) | Assignment |
1 : | 1 | QUANTUMCR8.4A | 8063 | Y | |
2 : | 2 | QUANTUMCR8.4A | 8063 | N | |
3 : | 3 | QUANTUMCR8.4A | 8063 | Y | |
4 : |
|
|
|
|
|
|
|
| [ Keys Available ] |
| |
[↑ ] Up [↓ ] Down [ESC] Exit | [Space] Select |
| |||
Selecting Stripe Block
For RAID 0 and RAID 0+1 arrays you may manually select the stripe block size. Press the Spacebar to scroll through choices progressing as follows (16, 32, 64, 128, 256 MB).
The size selected affects how FastTrak TX4000 sends and retrieves data blocks to and from the drives. You will need to perform your own testing to determine how the data block size is affecting your particular use of the array. In general, a larger block size is better when handling large data transfers (such as in A/V editing or graphics) while a smaller block size is better when handling
22