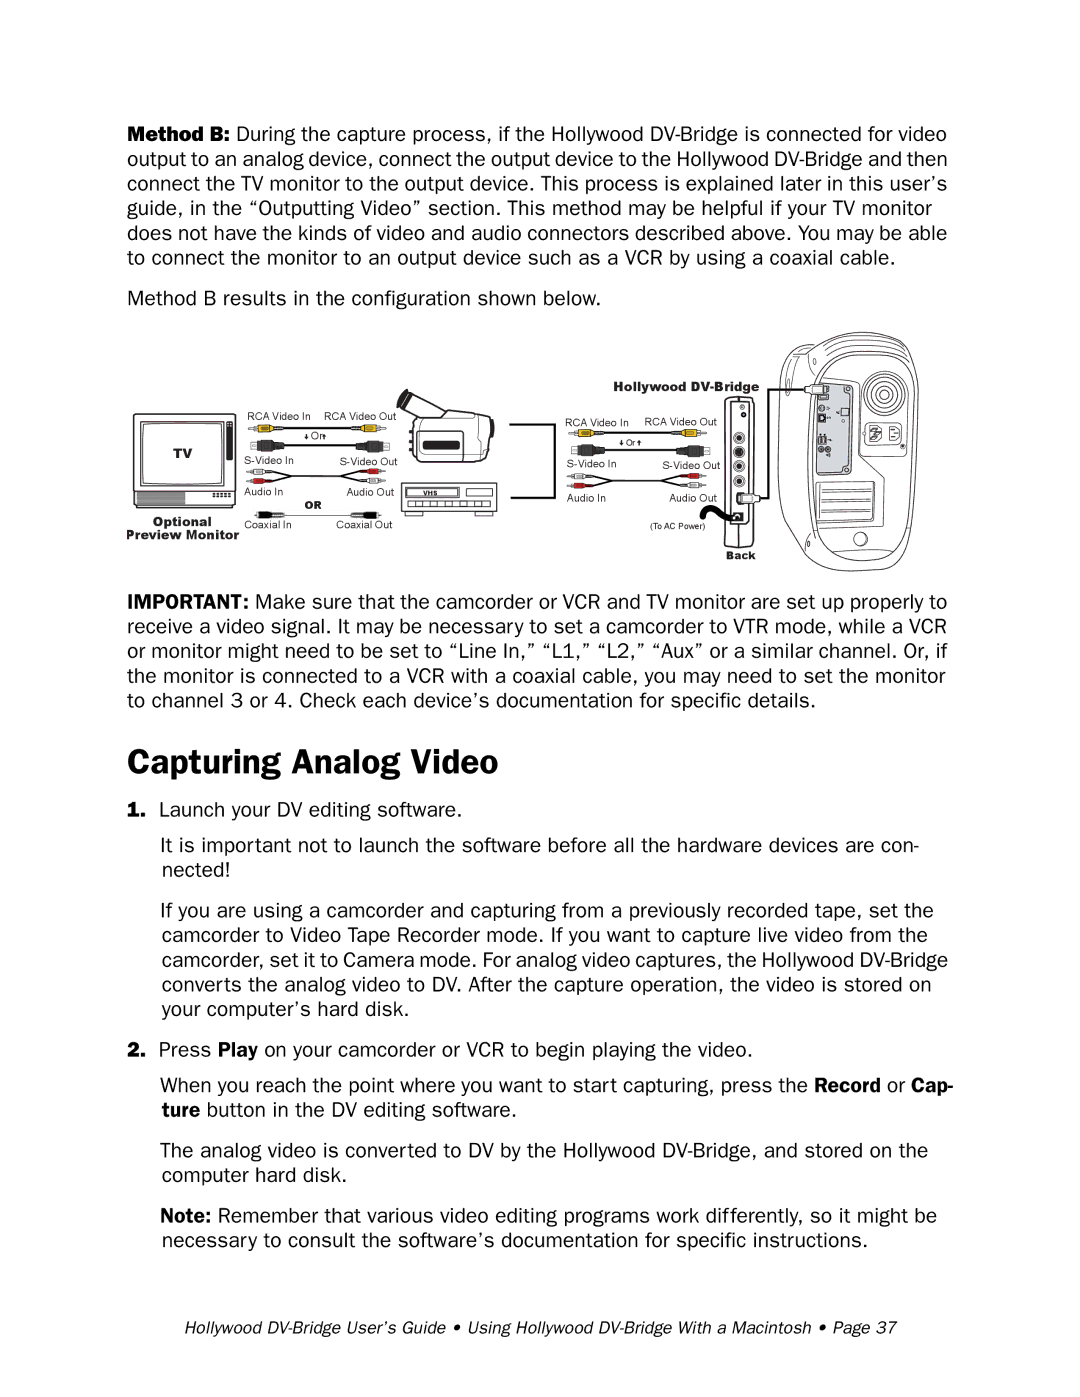
Method B: During the capture process, if the Hollywood
Method B results in the configuration shown below.
| RCA Video In | RCA Video Out |
| Or |
|
TV | ||
| ||
| Audio In | Audio Out |
| OR |
|
Optional | Coaxial In | Coaxial Out |
Preview Monitor |
|
|
VHS
Hollywood ![]()
![]()
![]()
![]()
![]()
RCA Video In | RCA Video Out |
Or |
|
Audio In | Audio Out |
| (To AC Power) |
Back
IMPORTANT: Make sure that the camcorder or VCR and TV monitor are set up properly to receive a video signal. It may be necessary to set a camcorder to VTR mode, while a VCR or monitor might need to be set to “Line In,” “L1,” “L2,” “Aux” or a similar channel. Or, if the monitor is connected to a VCR with a coaxial cable, you may need to set the monitor to channel 3 or 4. Check each device’s documentation for specific details.
Capturing Analog Video
1.Launch your DV editing software.
It is important not to launch the software before all the hardware devices are con- nected!
If you are using a camcorder and capturing from a previously recorded tape, set the camcorder to Video Tape Recorder mode. If you want to capture live video from the camcorder, set it to Camera mode. For analog video captures, the Hollywood
2.Press Play on your camcorder or VCR to begin playing the video.
When you reach the point where you want to start capturing, press the Record or Cap- ture button in the DV editing software.
The analog video is converted to DV by the Hollywood
Note: Remember that various video editing programs work differently, so it might be necessary to consult the software’s documentation for specific instructions.
Hollywood
