Installing Options
ERemove both pieces of adhesive tape.
2 |
TFWP060E |
FPull out the paper tray, and re- move the padding.
TFWP070E |
GRemove the ring attached to the red tag.
TFWP061E
HIf installing two paper feed units, place one paper feed unit on the other paper feed unit at first. If in- stalling only one paper feed unit, go to step I.
Align the paper feed unit onto the 4 upright pins on the other paper feed unit.
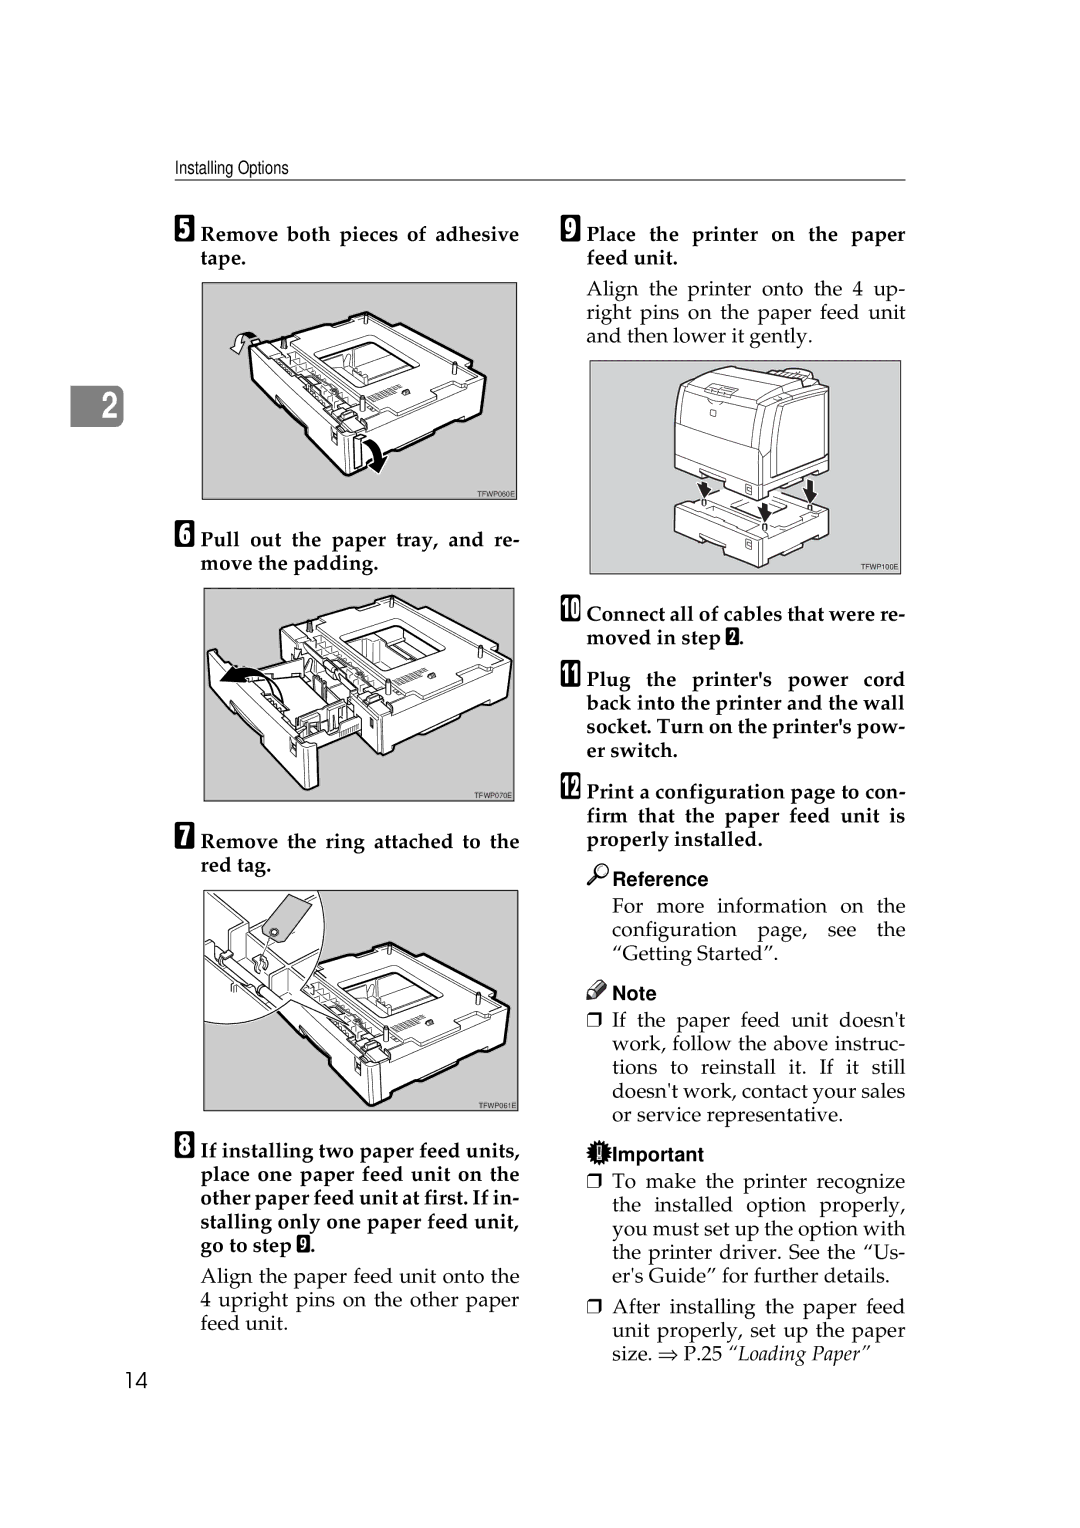
IPlace the printer on the paper feed unit.
Align the printer onto the 4 up- right pins on the paper feed unit and then lower it gently.
TFWP100E
JConnect all of cables that were re- moved in step B.
KPlug the printer's power cord back into the printer and the wall socket. Turn on the printer's pow- er switch.
LPrint a configuration page to con- firm that the paper feed unit is properly installed.

 Reference
For more information on the configuration page, see the “Getting Started”.
![]()
![]() Note
Note
❒If the paper feed unit doesn't work, follow the above instruc- tions to reinstall it. If it still doesn't work, contact your sales or service representative.
![]() Important
Important
❒To make the printer recognize the installed option properly, you must set up the option with the printer driver. See the “Us- er's Guide” for further details.
❒After installing the paper feed
unit properly, set up the paper size. ⇒ P.25 “Loading Paper”
14