SECTION 16: REMOVAL AND REPLACEMENT PARTS
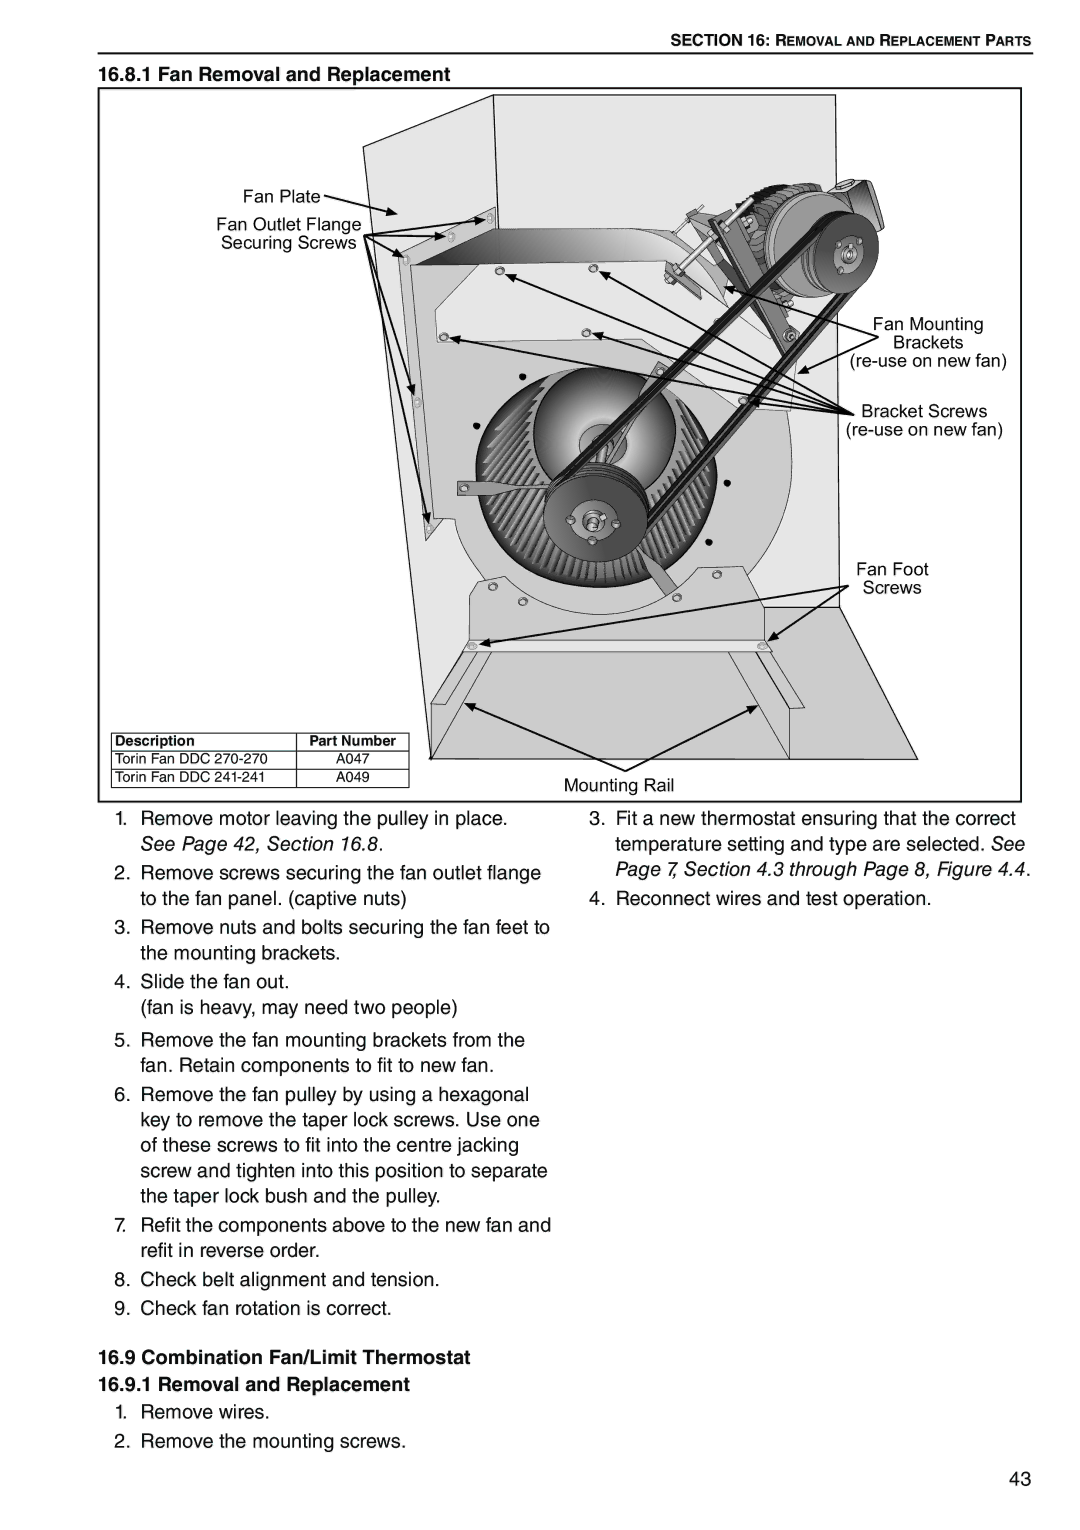
16.8.1 Fan Removal and Replacement
Fan Plate |
| |
Fan Outlet Flange |
| |
Securing Screws |
| |
|
| Fan Mounting |
|
| Brackets |
|
| |
|
| Bracket Screws |
|
| |
|
| Fan Foot |
|
| Screws |
Description | Part Number |
|
Torin Fan DDC | A047 |
|
Torin Fan DDC | A049 | Mounting Rail |
|
| |
1.Remove motor leaving the pulley in place. See Page 42, Section 16.8.
2.Remove screws securing the fan outlet flange to the fan panel. (captive nuts)
3.Remove nuts and bolts securing the fan feet to the mounting brackets.
4.Slide the fan out.
(fan is heavy, may need two people)
5.Remove the fan mounting brackets from the fan. Retain components to fit to new fan.
6.Remove the fan pulley by using a hexagonal key to remove the taper lock screws. Use one of these screws to fit into the centre jacking screw and tighten into this position to separate the taper lock bush and the pulley.
7.Refit the components above to the new fan and refit in reverse order.
8.Check belt alignment and tension.
9.Check fan rotation is correct.
16.9Combination Fan/Limit Thermostat 16.9.1 Removal and Replacement
1. Remove wires.
2. Remove the mounting screws.
3.Fit a new thermostat ensuring that the correct temperature setting and type are selected. See Page 7, Section 4.3 through Page 8, Figure 4.4.
4.Reconnect wires and test operation.
43