Top and Rear Panels
Top Panel
51 | 2 6 3 | 45 | Top | |
7 |
|
|
| and Rear Panels |
|
|
|
| |
8 |
|
|
|
|
9 |
|
|
|
|
10 |
|
|
|
|
11 |
|
|
|
|
12 |
|
|
|
|
13 14 | 15 | 16 | 17 |
|
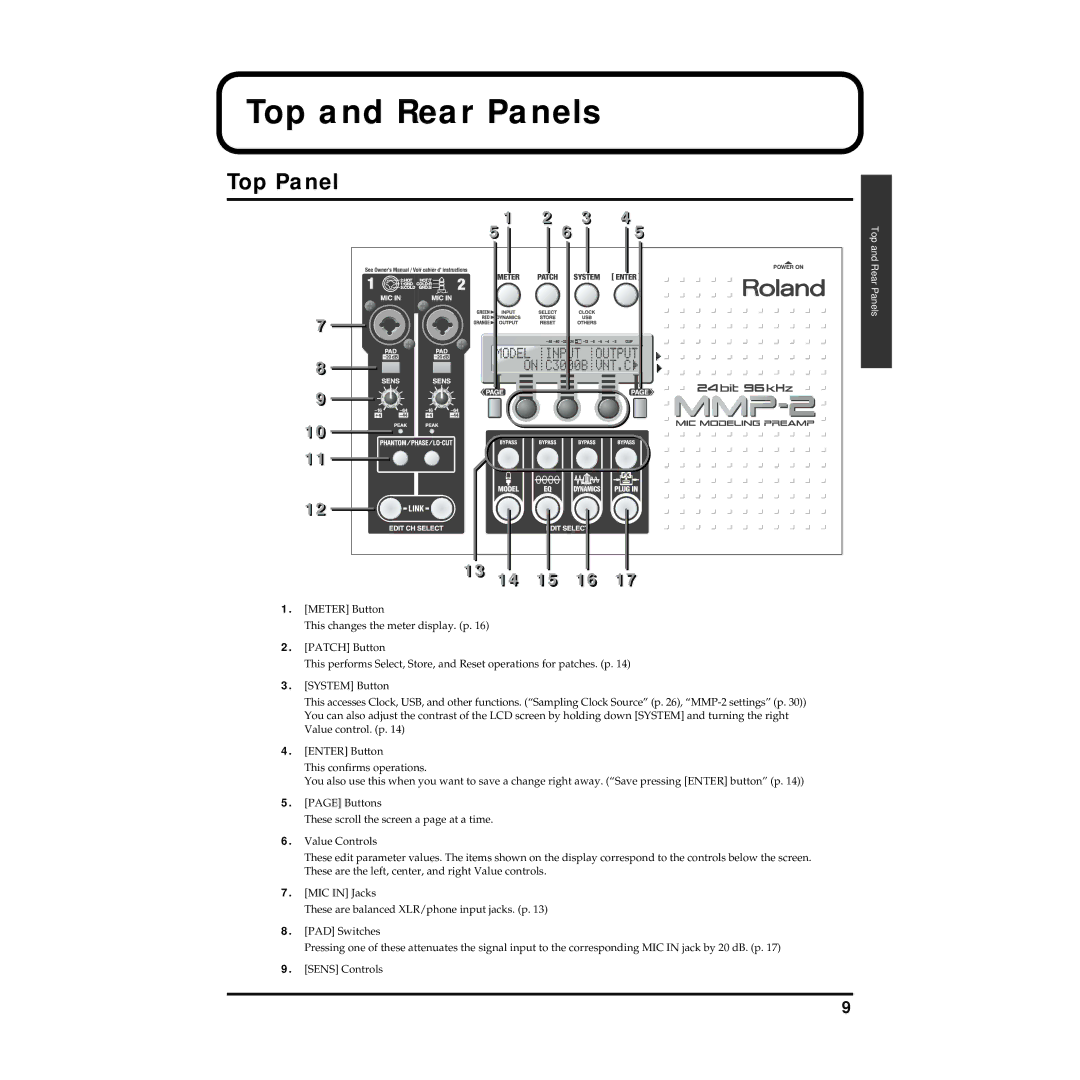
1.[METER] Button
This changes the meter display. (p. 16)
2.[PATCH] Button
This performs Select, Store, and Reset operations for patches. (p. 14)
3.[SYSTEM] Button
This accesses Clock, USB, and other functions. (“Sampling Clock Source” (p. 26),
4.[ENTER] Button
This confirms operations.
You also use this when you want to save a change right away. (“Save pressing [ENTER] button” (p. 14))
5.[PAGE] Buttons
These scroll the screen a page at a time.
6.Value Controls
These edit parameter values. The items shown on the display correspond to the controls below the screen. These are the left, center, and right Value controls.
7.[MIC IN] Jacks
These are balanced XLR/phone input jacks. (p. 13)
8.[PAD] Switches
Pressing one of these attenuates the signal input to the corresponding MIC IN jack by 20 dB. (p. 17)
9.[SENS] Controls
9