Installation
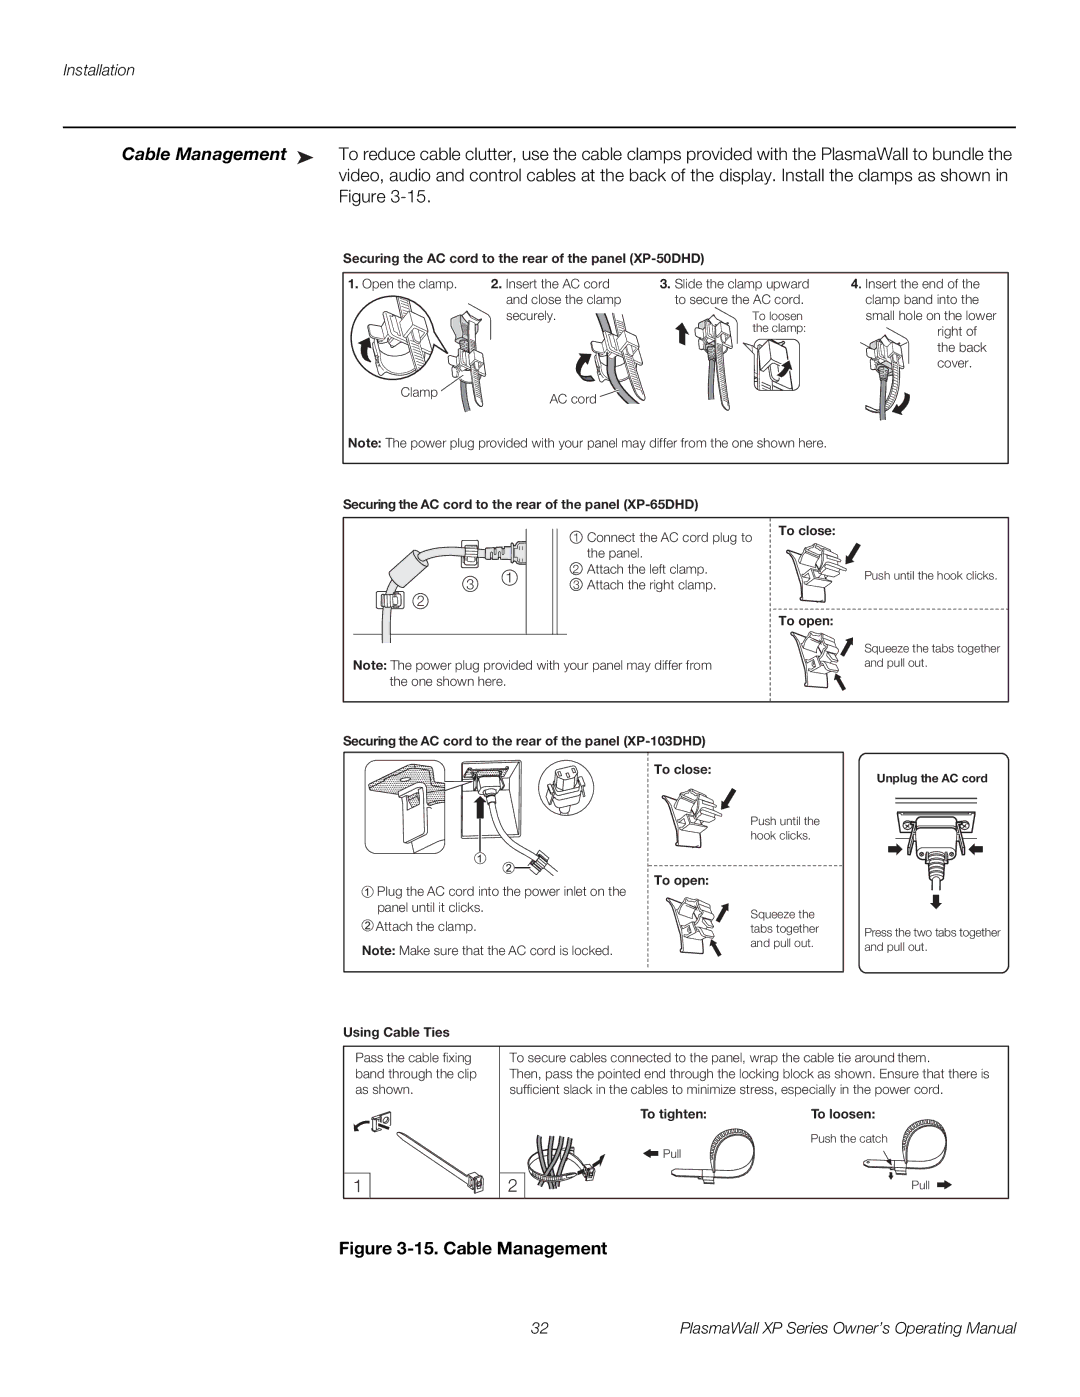
Cable Management ➤ To reduce cable clutter, use the cable clamps provided with the PlasmaWall to bundle the video, audio and control cables at the back of the display. Install the clamps as shown in Figure
Securing the AC cord to the rear of the panel (XP-50DHD)
1.Open the clamp.
Clamp
2. Insert the AC cord | 3. Slide the clamp upward | 4. Insert the end of the |
and close the clamp | to secure the AC cord. | clamp band into the |
securely. | To loosen | small hole on the lower |
| the clamp: | right of |
|
| the back |
|
| cover. |
AC cord |
|
|
Note: The power plug provided with your panel may differ from the one shown here.
Securing the AC cord to the rear of the panel
3 1
2
1Connect the AC cord plug to the panel.
2Attach the left clamp.
3Attach the right clamp.
To close:
To open:
Push until the hook clicks.
Squeeze the tabs together
Note: The power plug provided with your panel may differ fromand pull out. the one shown here.
Securing the AC cord to the rear of the panel
To close:
Unplug the AC cord
![]() Plug the AC cord into the power inlet on the panel until it clicks.
Plug the AC cord into the power inlet on the panel until it clicks.
![]() Attach the clamp.
Attach the clamp.
Note: Make sure that the AC cord is locked.
Push until the hook clicks.
To open:
Squeeze the tabs together and pull out.
Press the two tabs together and pull out.
Using Cable Ties
Pass the cable fixing band through the clip as shown.
To secure cables connected to the panel, wrap the cable tie around them.
Then, pass the pointed end through the locking block as shown. Ensure that there is sufficient slack in the cables to minimize stress, especially in the power cord.
1
2
To tighten: | To loosen: |
Push the catch
![]() Pull
Pull
Pull
Figure 3-15. Cable Management
32 | PlasmaWall XP Series Owner’s Operating Manual |