SETTING UP SHOOTING FUNCTION
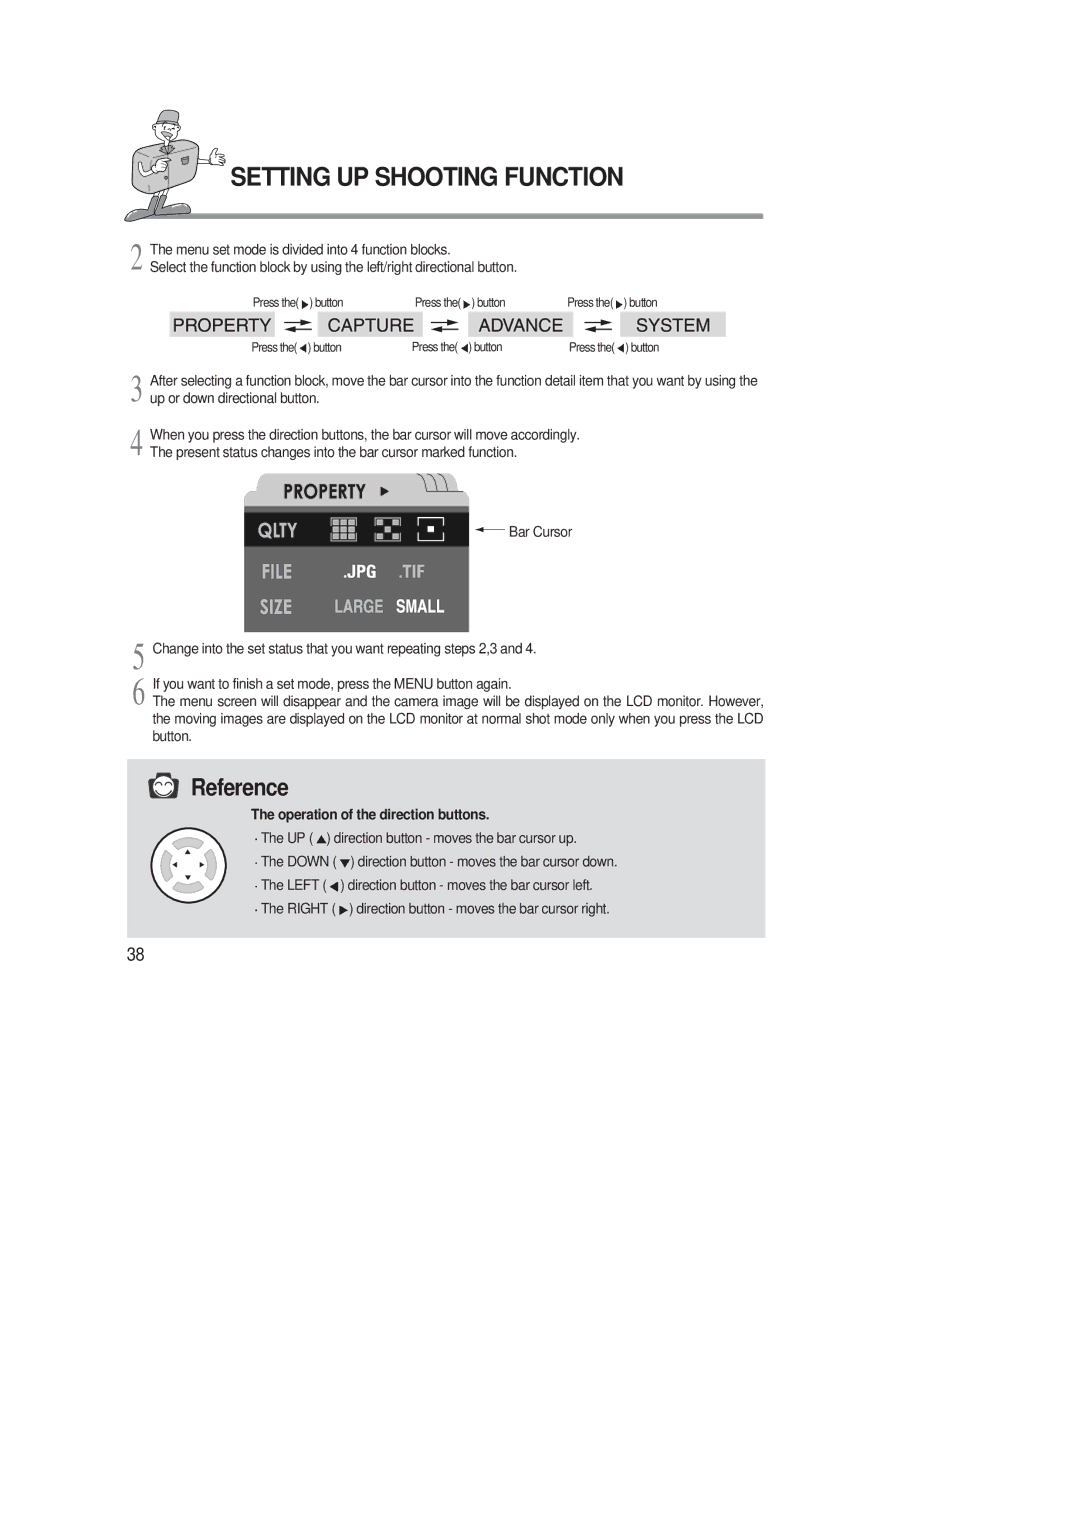
2 | The menu set mode is divided into 4 function blocks. |
|
|
|
|
|
|
|
| |||||||||||||
Select the function block by using the left/right directional button. |
|
|
|
|
|
|
| |||||||||||||||
|
| Press the( | ) button | Press the( | ) button | Press the( | ) button | |||||||||||||||
|
|
|
|
|
|
|
|
|
|
|
|
|
|
|
|
|
|
|
|
|
| |
|
|
|
|
|
|
|
|
|
|
|
|
|
|
|
|
|
|
|
|
|
|
|
|
|
|
|
|
|
|
|
|
|
|
|
|
|
|
|
|
|
|
|
|
|
|
|
|
|
|
|
|
|
|
|
|
|
|
|
|
|
|
|
|
|
|
|
|
|
|
| Press the( | ) button | Press the( | ) button | Press the( | ) button | |||||||||||||||
3 After selecting a function block, move the bar cursor into the function detail item that you want by using the up or down directional button.
4 When you press the direction buttons, the bar cursor will move accordingly. The present status changes into the bar cursor marked function.
![]()
![]() Bar Cursor
Bar Cursor
5 Change into the set status that you want repeating steps 2,3 and 4.
6 If you want to finish a set mode, press the MENU button again.
The menu screen will disappear and the camera image will be displayed on the LCD monitor. However, the moving images are displayed on the LCD monitor at normal shot mode only when you press the LCD button.
Reference
The operation of the direction buttons.
![]() The UP (
The UP (![]() ) direction button - moves the bar cursor up.
) direction button - moves the bar cursor up.
![]() The DOWN (
The DOWN (![]() ) direction button - moves the bar cursor down.
) direction button - moves the bar cursor down.
![]() The LEFT (
The LEFT (![]() ) direction button - moves the bar cursor left.
) direction button - moves the bar cursor left.
![]() The RIGHT (
The RIGHT (![]() ) direction button - moves the bar cursor right.
) direction button - moves the bar cursor right.
38
