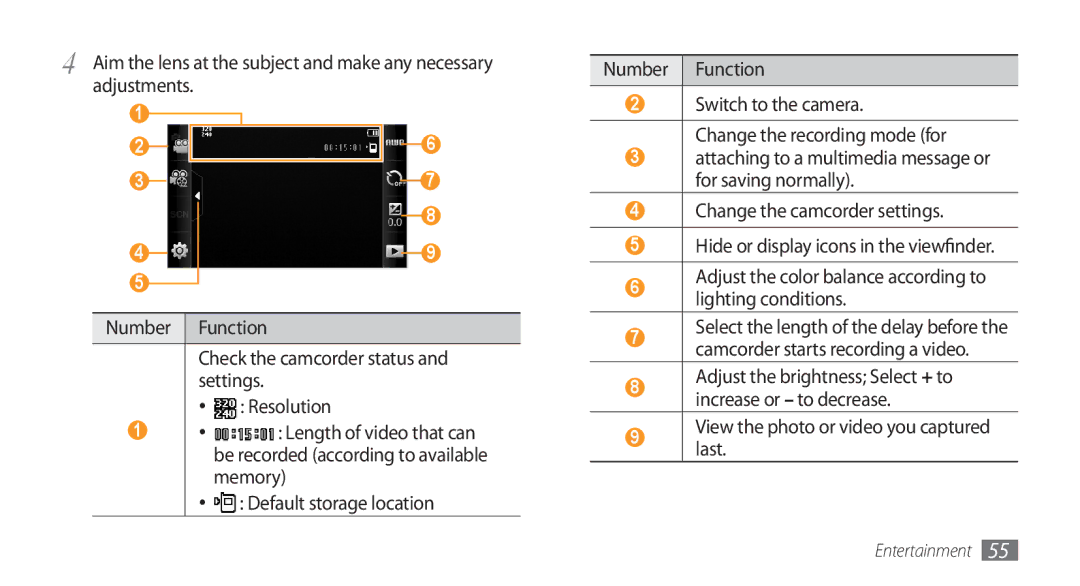
4 | Aim the lens at the subject and make any necessary | ||||||||||
| adjustments. |
|
|
| |||||||
| 1 |
|
|
|
|
|
|
|
|
| 6 |
| 2 |
|
|
|
|
|
|
|
|
| |
|
|
|
|
|
|
|
|
|
| ||
| 3 |
|
|
|
|
|
|
|
| 7 | |
|
|
|
|
|
|
|
|
| |||
|
|
|
|
|
|
|
|
| |||
| 4 |
|
|
|
|
|
|
|
|
| 8 |
|
|
|
|
|
|
|
|
|
| ||
|
|
|
|
|
|
|
|
|
| 9 | |
|
|
|
|
|
|
|
|
|
| ||
|
|
|
|
|
|
|
|
|
|
|
|
5
Number Function
Check the camcorder status and settings.
•![]() : Resolution
: Resolution
1• ![]() : Length of video that can be recorded (according to available memory)
: Length of video that can be recorded (according to available memory)
•![]() : Default storage location
: Default storage location
Number Function
2Switch to the camera.
Change the recording mode (for
3attaching to a multimedia message or for saving normally).
4Change the camcorder settings.
5Hide or display icons in the viewfinder.
6Adjust the color balance according to lighting conditions.
7Select the length of the delay before the camcorder starts recording a video.
8Adjust the brightness; Select + to increase or – to decrease.
9View the photo or video you captured last.
Entertainment 55
