Changing the Boot Priority
The default boot priority of your computer is the
By default, the highest boot priority device is set to the
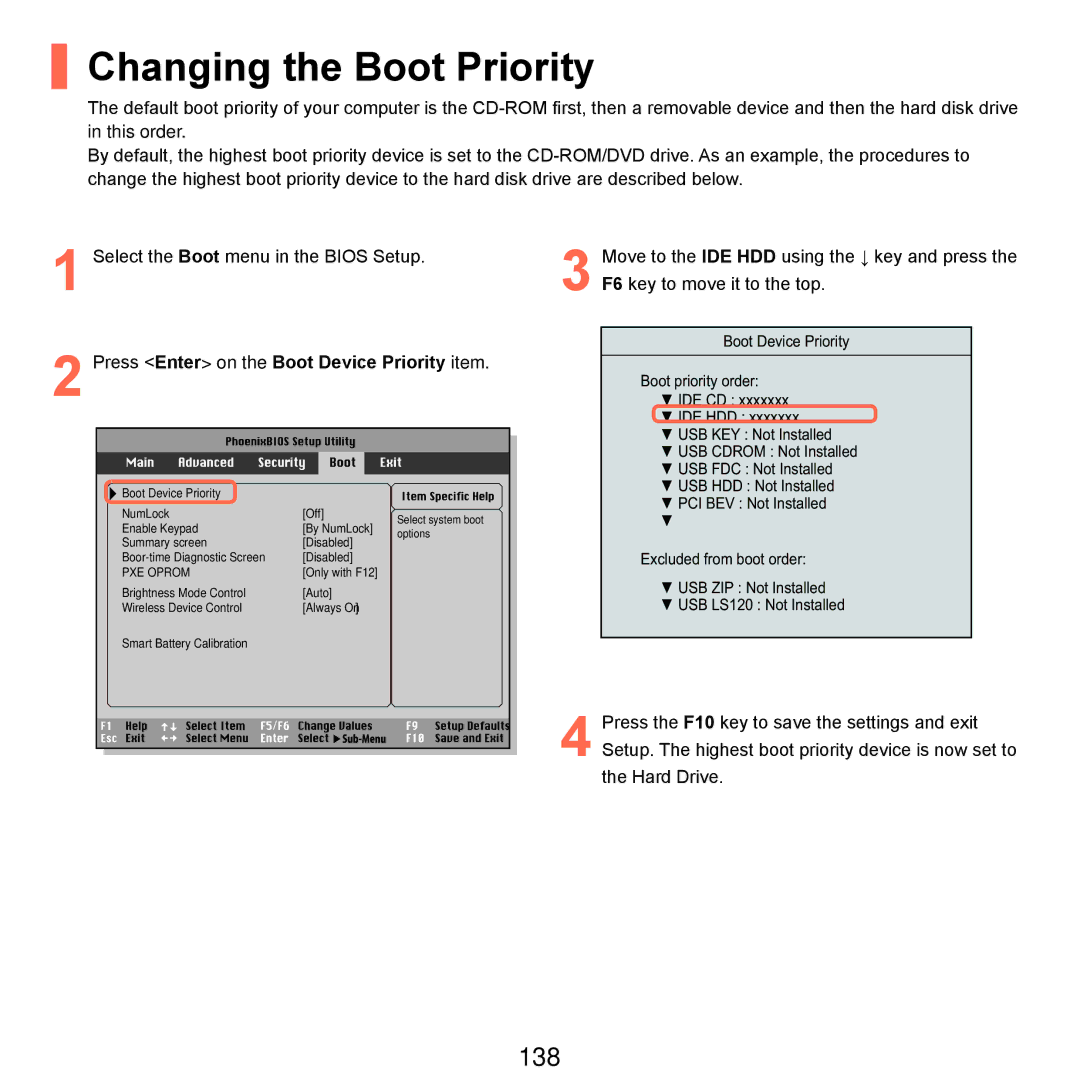
1 Select the Boot menu in the BIOS Setup. | 3 |
2 Press <Enter> on the Boot Device Priority item.
Boot Device Priority |
|
| |
NumLock | [Off] | Select system boot | |
Enable Keypad | [By NumLock] | ||
options | |||
Summary screen | [Disabled] | ||
| |||
[Disabled] |
| ||
PXE OPROM | [Only with F12] |
| |
Brightness Mode Control | [Auto] |
| |
Wireless Device Control | [Always On] |
| |
Smart Battery Calibration |
|
| |
|
| 4 |
Move to the IDE HDD using the ↓ key and press the F6 key to move it to the top.
Boot Device Priority
Boot priority order:
▼IDE CD : xxxxxxx
▼IDE HDD : xxxxxxx
▼USB KEY : Not Installed
▼USB CDROM : Not Installed
▼USB FDC : Not Installed
▼USB HDD : Not Installed
▼PCI BEV : Not Installed
▼
Excluded from boot order:
▼USB ZIP : Not Installed
▼USB LS120 : Not Installed
Press the F10 key to save the settings and exit Setup. The highest boot priority device is now set to
the Hard Drive.