2.Edit the image using the Shape/Edit/Effect tool and click on Save or Save
Copy.
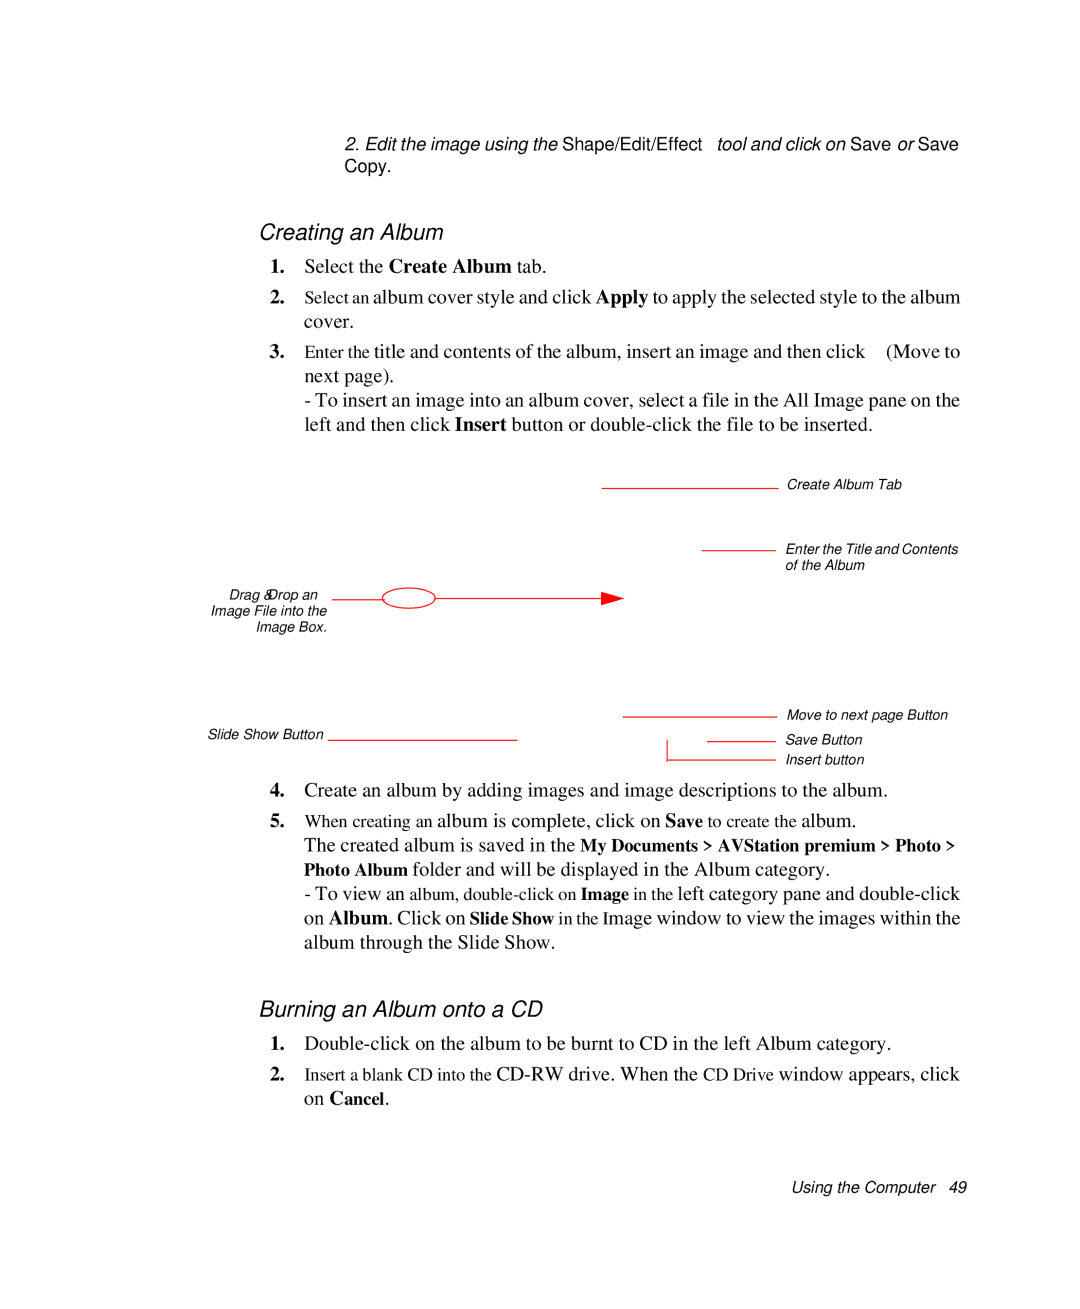
Creating an Album
1.Select the Create Album tab.
2.Select an album cover style and click Apply to apply the selected style to the album cover.
3.Enter the title and contents of the album, insert an image and then click ![]() (Move to next page).
(Move to next page).
- To insert an image into an album cover, select a file in the All Image pane on the left and then click Insert button or
Create Album Tab
Enter the Title and Contents
of the Album
Drag & Drop an
Image File into the
Image Box.
Slide Show Button |
|
|
| Move to next page Button | ||
|
|
| ||||
|
|
| Save Button | |||
|
|
|
|
|
| |
|
|
|
|
|
| Insert button |
|
|
|
|
|
| |
4.Create an album by adding images and image descriptions to the album.
5.When creating an album is complete, click on Save to create the album.
The created album is saved in the My Documents > AVStation premium > Photo > Photo Album folder and will be displayed in the Album category.
- To view an album,
Burning an Album onto a CD
1.
2.Insert a blank CD into the