Use of "Connect to a Network Projector"
4 After you click Connect button, the ‘Network Presentation’ dialog box opens and then minimizes on the Windows task bar. Click Pause/Resume button to switch between pausing and continuing the presentation.
5 Click Disconnect button to end the presentation.
In case of a projector and your computer are in the different network segment:
When a projector and your computer are in the different network segment, connect to the projector by specifying the projector’s network address.
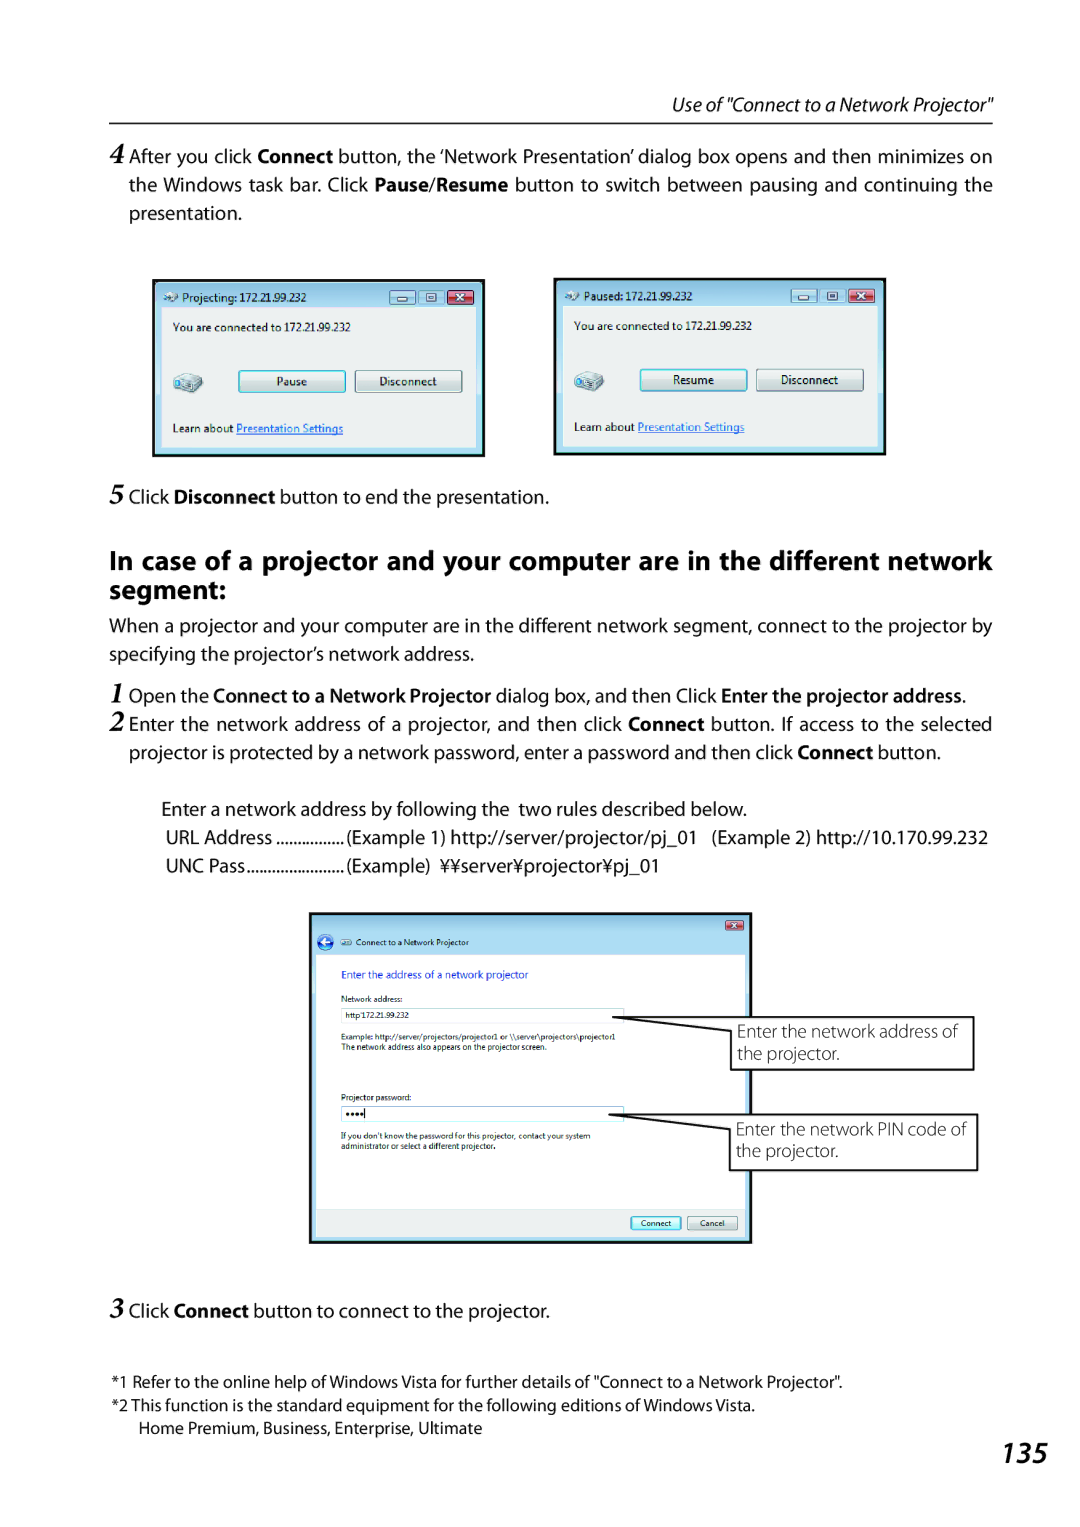
1 Open the Connect to a Network Projector dialog box, and then Click Enter the projector address.
2 Enter the network address of a projector, and then click Connect button. If access to the selected projector is protected by a network password, enter a password and then click Connect button.
Enter a network address by following the two rules described below.
URL Address | (Example 1) http://server/projector/pj_01 (Example 2) http://10.170.99.232 |
UNC Pass | (Example) ¥¥server¥projector¥pj_01 |
Enter the network address of the projector.
Enter the network PIN code of the projector.
3 Click Connect button to connect to the projector.
*1 Refer to the online help of Windows Vista for further details of "Connect to a Network Projector". *2 This function is the standard equipment for the following editions of Windows Vista.
Home Premium, Business, Enterprise, Ultimate
