Using the Network Communication
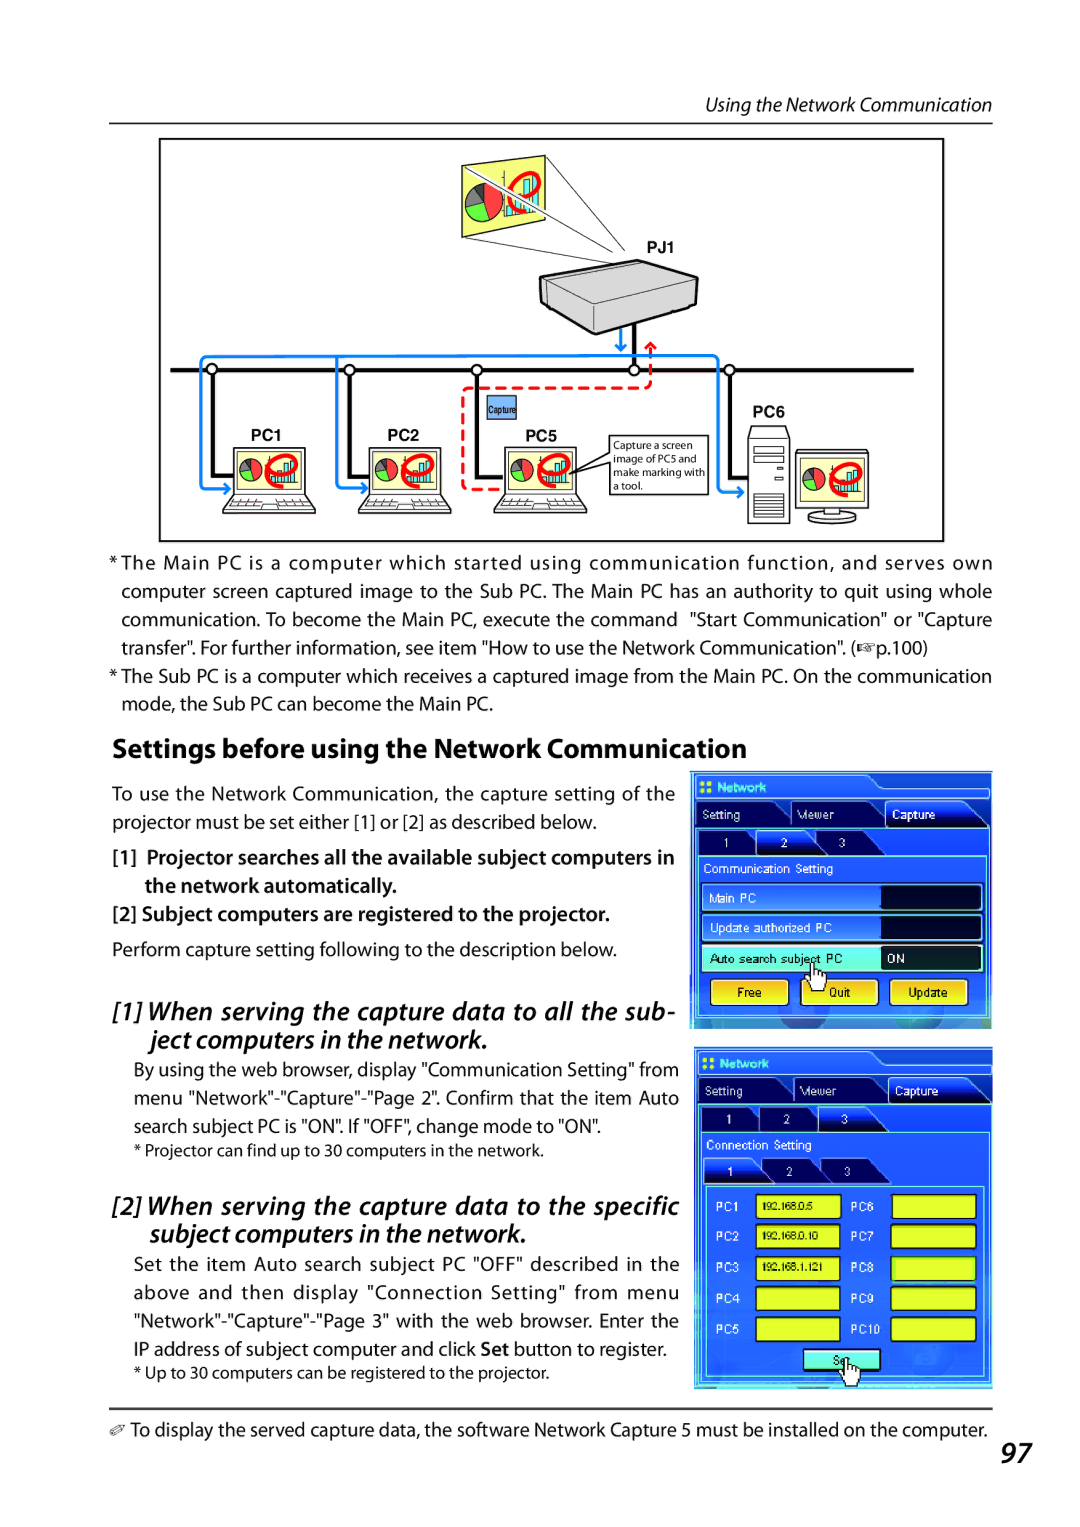
PJ1
PC1
PC2
Capture
PC5
Capture a screen image of PC5 and make marking with a tool.
PC6
*The Main PC is a computer which started using communication function, and serves own computer screen captured image to the Sub PC. The Main PC has an authority to quit using whole communication. To become the Main PC, execute the command "Start Communication" or "Capture transfer". For further information, see item "How to use the Network Communication". (☞p.100)
*The Sub PC is a computer which receives a captured image from the Main PC. On the communication mode, the Sub PC can become the Main PC.
Settings before using the Network Communication
To use the Network Communication, the capture setting of the projector must be set either [1] or [2] as described below.
[1]Projector searches all the available subject computers in the network automatically.
[2]Subject computers are registered to the projector.
Perform capture setting following to the description below.
[1]When serving the capture data to all the sub- ject computers in the network.
By using the web browser, display "Communication Setting" from menu
* Projector can find up to 30 computers in the network.
[2]When serving the capture data to the specific subject computers in the network.
Set the item Auto search subject PC "OFF" described in the above and then display "Connection Setting" from menu
*Up to 30 computers can be registered to the projector.
✐To display the served capture data, the software Network Capture 5 must be installed on the computer. 97