2WATCHING IMAGES
3 Set “DURATION”.
The duration for images to be saved to the PC should be set in units of one minute.
4 Click [BROWSE].
A dialog box for selecting save location will be displayed, and a suitable location should be set.
zIt is also acceptable to input a location for saving directly into “DESTINATION FOLDER”.
5 Click [OK].
The setting menu will close and the screen will return to the condition for procedure 2 above.
The “DESTINATION FOLDER” location is displayed.
6 Click [START].
(1)The saving process begins.
The elapsed save time and the current save image are displayed on screen.
The elapsed save time will be incremented as the save progresses.
Elapsed save time
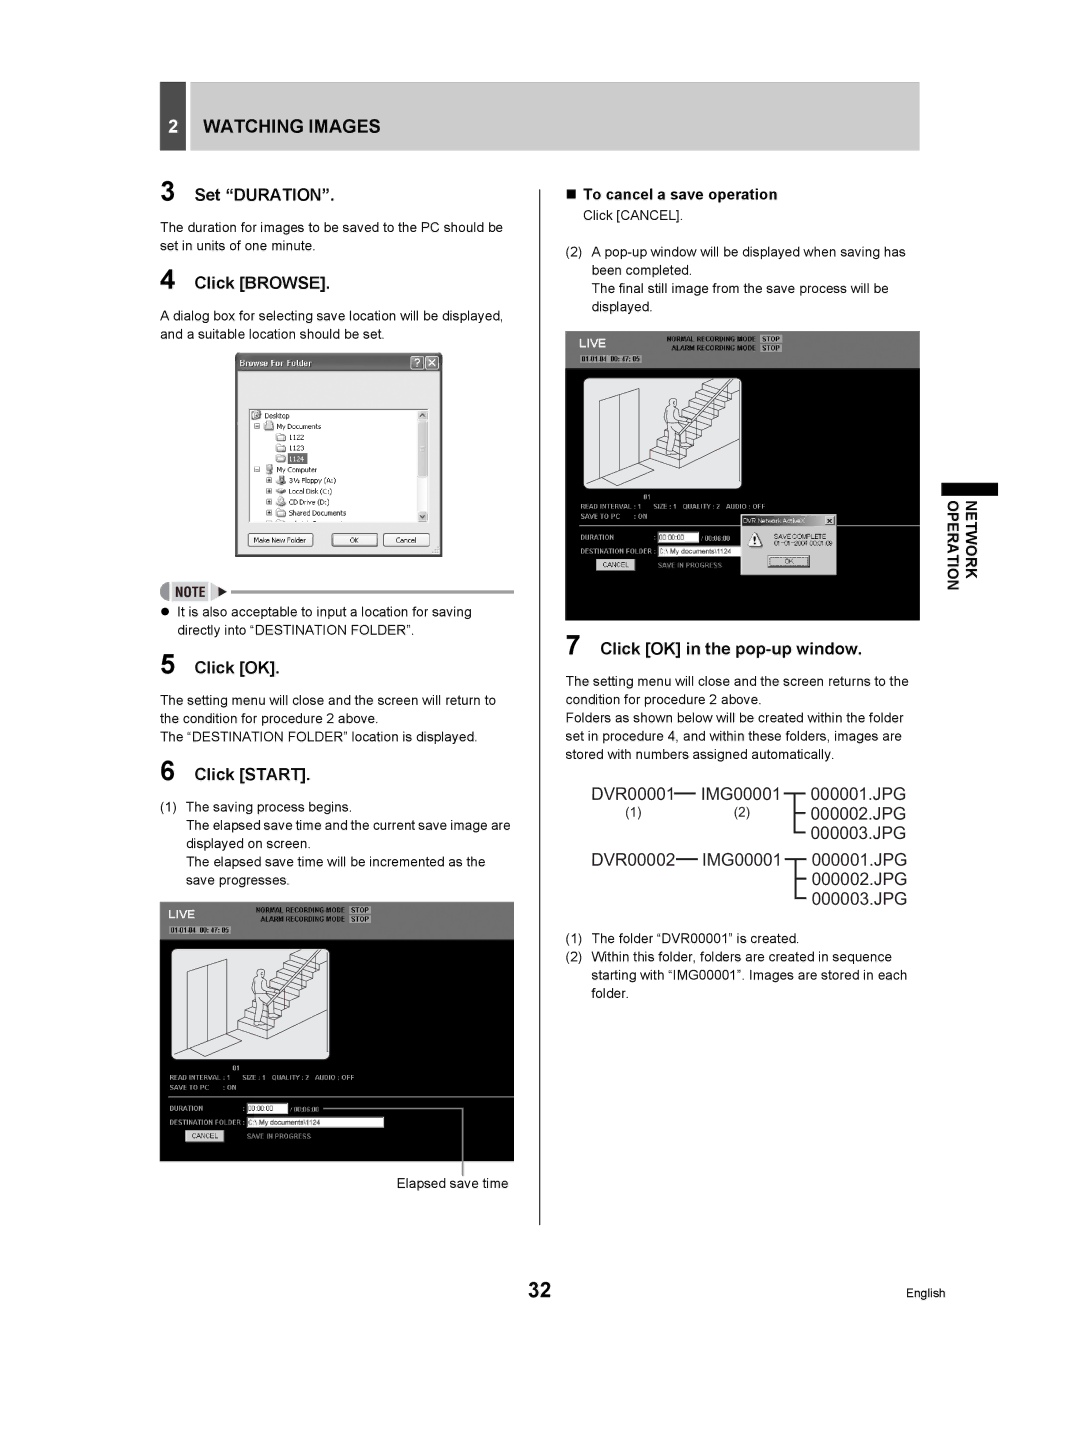
To cancel a save operation
Click [CANCEL].
(2)A
The final still image from the save process will be displayed.
NETWORK
OPERATION
7 Click [OK] in the pop-up window.
The setting menu will close and the screen returns to the condition for procedure 2 above.
Folders as shown below will be created within the folder set in procedure 4, and within these folders, images are stored with numbers assigned automatically.
DVR00001 |
|
|
| IMG00001 |
|
|
|
| 000001.JPG |
|
|
|
|
| |||||
(1) |
|
| (2) |
|
|
|
| 000002.JPG | |
|
|
| |||||||
|
|
|
|
|
|
|
|
| 000003.JPG |
|
|
|
|
|
|
|
| ||
DVR00002 |
|
| IMG00001 |
|
|
| 000001.JPG | ||
|
|
|
|
| |||||
|
|
|
|
|
|
|
|
| 000002.JPG |
|
|
|
|
|
|
|
|
| |
|
|
|
|
|
|
|
|
| 000003.JPG |
|
|
|
|
|
|
|
|
| |
(1)The folder “DVR00001” is created.
(2)Within this folder, folders are created in sequence starting with “IMG00001”. Images are stored in each folder.
32 | English |