Unit 6: Maintenance
RIBBON GUIDE ALIGNMENT
If the print ribbon is not spread smoothly over the print head when it makes contact with the media, print voids will occur at the point of the ribbon fold. Typically, this is the result of the axis of one of the following not being perfectly parallel with the platen roller: ribbon spindle, print head, or ribbon guide.
The purpose of the adjustable ribbon guide is to compensate for the axis deviations of the other two. By adjusting the ribbon guide proportionally to the degree of deviation, the ribbon spreads smoothly as it travels from the ribbon supply spindle, to the guide, and beyond.
Ribbon guide adjustment is a trial and error activity that requires the pause of printing, unlatching of the print head, adjusting the guide, relatching the print head, and printing once again. Several labels must be printed following each adjustment to determine if the adjustment was effective.
The ribbon guide is secured to the face of the print assembly by a screw on each end. Before adjusting the guide, visually inspect that its axis is parallel with that of the print assembly. If not, adjust accordingly, ensure the set screws are secure, and once again commence printing. By starting in a neutral position, either end may be adjusted vertically as necessary to remedy the wrinkling problem.
NOTE: To facilitate viewing of pertinent components, Figure
1 Test print a label to ensure the print head is properly balanced and aligned.
NOTE: Refer to their relative procedures within this manual for guidance on Print
Head Balance and Print Head Alignment.
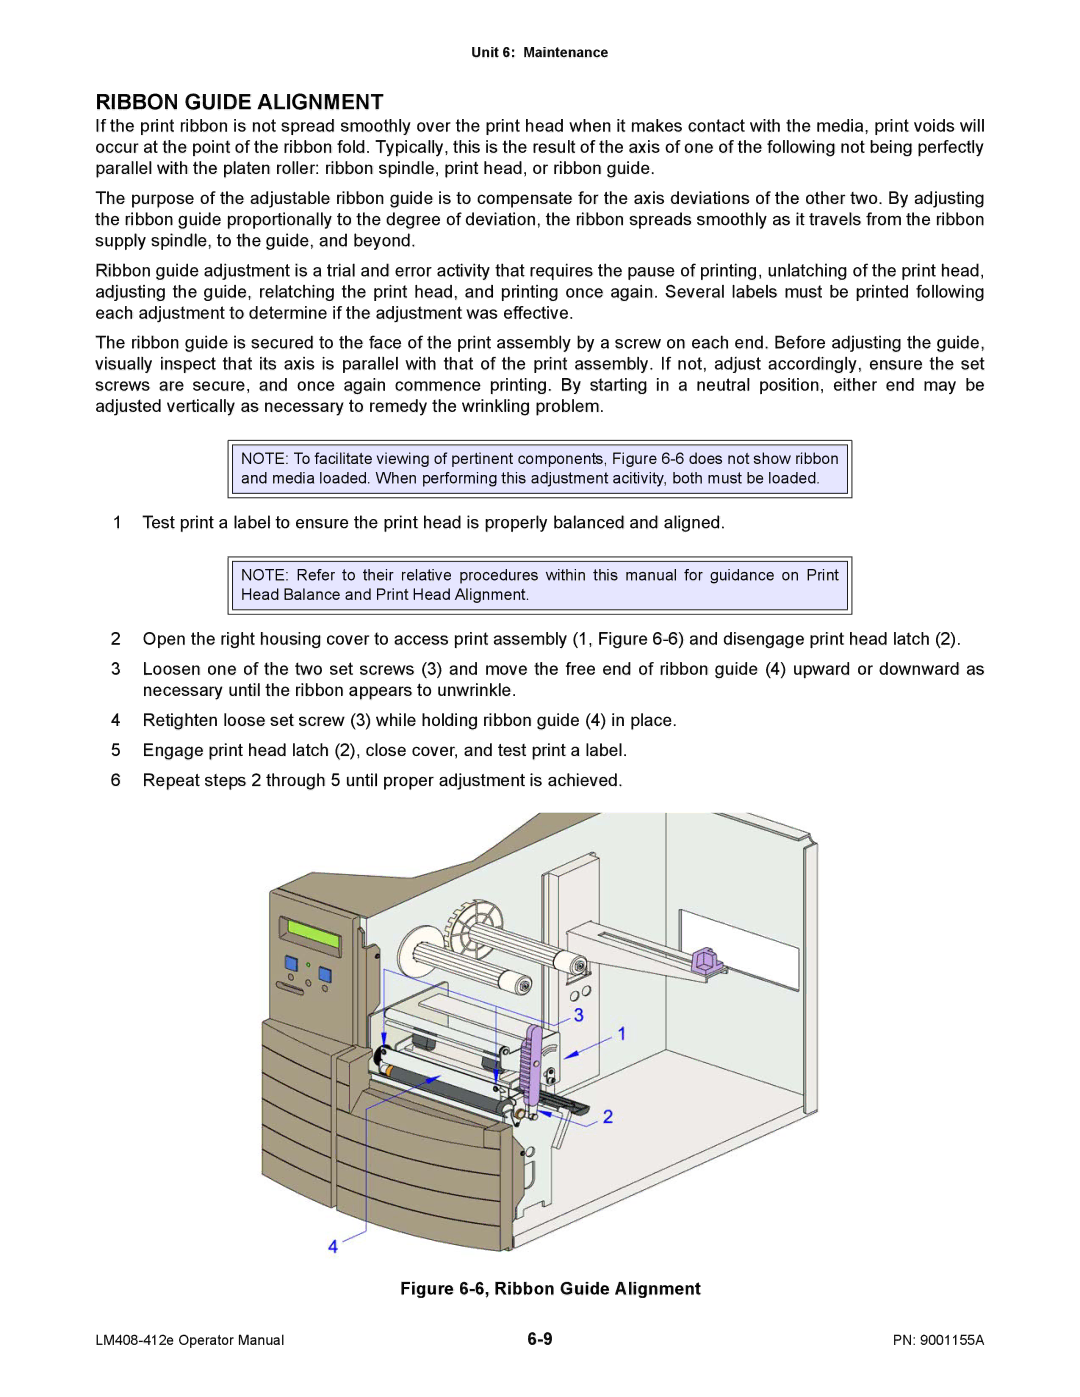
2Open the right housing cover to access print assembly (1, Figure
3Loosen one of the two set screws (3) and move the free end of ribbon guide (4) upward or downward as necessary until the ribbon appears to unwrinkle.
4Retighten loose set screw (3) while holding ribbon guide (4) in place.
5Engage print head latch (2), close cover, and test print a label.
6Repeat steps 2 through 5 until proper adjustment is achieved.
Figure 6-6, Ribbon Guide Alignment
PN: 9001155A |