bnce yOUhave selected the first muscle grou p that you want to exercise, refer to the lower pad of the computer. One or more :,ndicators will be lighted, showing you which exerc_sels) to do to develop the selected muscle group. One of the indicators will be Flashing to show you which exercise to do first. If you want to skip the first exercise, press the rlc L' arrow on the NEXT button until the indicator is flashing on the excrc_sethat you want to do first. The number of tile exercise will be shown in the CALORIES/EXERCISE NO. display.
The WEIGHT display will show the recommended weight setting for the first exercise, ff desired, the weight sel_ng can be changed. This can be done in the some manner as when the computer is in the manual mode. The SETSand REPS dlsplcrys will show the recomme- ded numbers oFsets and repetitions for the first exercise.IFdesired, the number of sets or'repetitlons can be changed. This can be done in the same manner as when the computer is in the manual mode. Begin the first exercise. (ReFerto pages 17 through 24 oFthis ownePs manual for information about the proper Formfor the exercise.) As you exercJse,the computer will provide the same _eedbeckas when it }sin the manual mode. When oil repetitions and sets have been completed for the first exercise, press the right arrow on the NEXT button to select the next exercise that you wont to do. Do as many of the indicated exercises as desired. .
VVhen you have completed the desired group that you wont to exercise. Do as desired until your workout is completed.
exercisesfor the first muscle group that you many of the indicated exercises as desired.
selected,press on the next muscle Selectas many muscle groups as
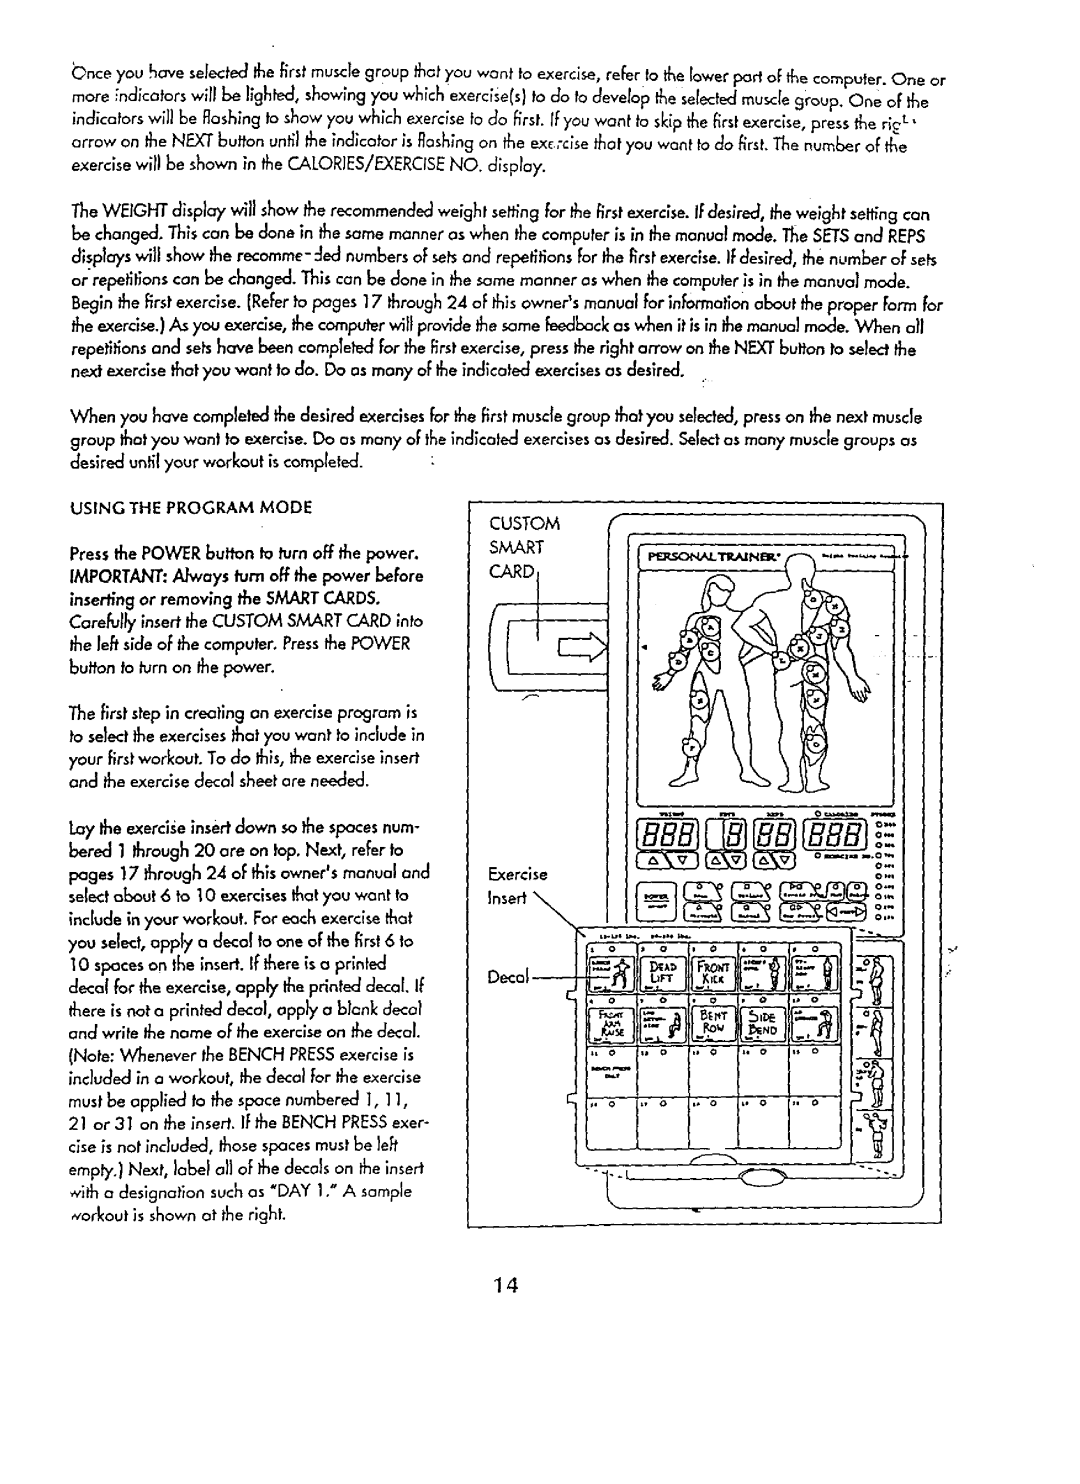
USING THE PROGRAM MODE
Press the POWER button to turn off the power. IMPORTANT: Always turn off the power before inse_ng or removing the SMART CARDS.
Carefully insert the CUSTOM SMART CARD into the left side of the computer. Pressthe POWER button to turn on the power.
The first stepin creating an exercise program is to select the exercises that you want to include in
your first workout. To do this, the exercise insert and the exercise decal sheetare needed.
Lay the exercl.se insert down so the spaces num- bered 1 through 20 ore on fop. Next, refer to Pages 17 through 24 of this owner'smanual and selectabout 6 to 10 exercises that you want to include in your workout. For each exerdse that you select, apply a decal to one of the first 6 to 10 spaces on the insert. If there is a pr{nted decal for the exercise, app b'the printed decal. If there is not a printed decal, opph/a blank decal and write the name of the exercise on the decal.
(Note: Whenever the BENCH PRESSexercise is included in o workout, the decal Forthe exercise
must be applied to the space numbered 1, 11,
21 or 31 on the insert. If the BENCH PRESSexer- cise is not included, those spaces must be left empb,. ) Next, )abel all of the decals on the insert _vltha designation such as "DAY 1/'A sample _vorkout is shown at the right.
CUSTOM
SMART
Exercise |
|
|
|
|
|
| ..... |
|
|
|
|
|
| opel | |
Insert |
|
|
|
|
|
|
|
0 | _ | 0 | I | 0 | e 0 | p | 0 |
Decal |
|
|
|
|
|
|
|
O | J | O | • | O | w O | _ | O |
I
14