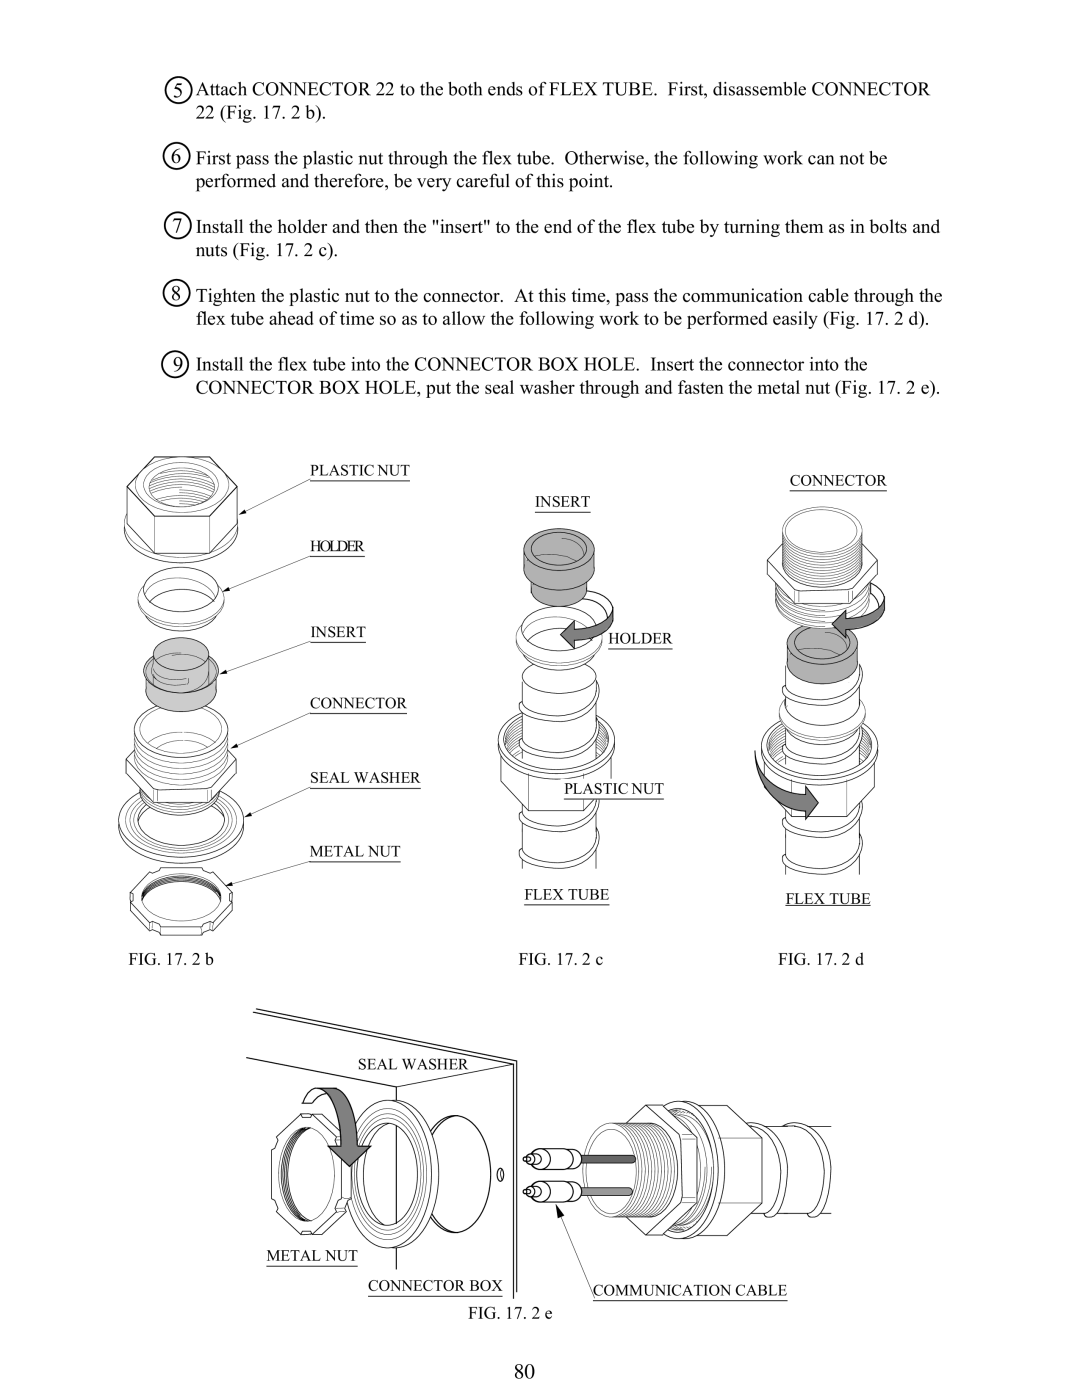
5Attach CONNECTOR 22 to the both ends of FLEX TUBE. First, disassemble CONNECTOR 22 (Fig. 17. 2 b).
6First pass the plastic nut through the flex tube. Otherwise, the following work can not be performed and therefore, be very careful of this point.
7Install the holder and then the "insert" to the end of the flex tube by turning them as in bolts and nuts (Fig. 17. 2 c).
8Tighten the plastic nut to the connector. At this time, pass the communication cable through the flex tube ahead of time so as to allow the following work to be performed easily (Fig. 17. 2 d).
9Install the flex tube into the CONNECTOR BOX HOLE. Insert the connector into the CONNECTOR BOX HOLE, put the seal washer through and fasten the metal nut (Fig. 17. 2 e).
| PLASTIC NUT |
| CONNECTOR |
|
|
| |
|
| INSERT |
|
| HOLDER |
|
|
| INSERT | HOLDER |
|
|
|
| |
| CONNECTOR |
|
|
| SEAL WASHER | PLASTIC NUT |
|
|
|
| |
| METAL NUT |
|
|
|
| FLEX TUBE | FLEX TUBE |
|
|
| |
FIG. 17. 2 b |
| FIG. 17. 2 c | FIG. 17. 2 d |
SEAL WASHER
METAL NUT
CONNECTOR BOX | COMMUNICATION CABLE |
|
FIG. 17. 2 e
80