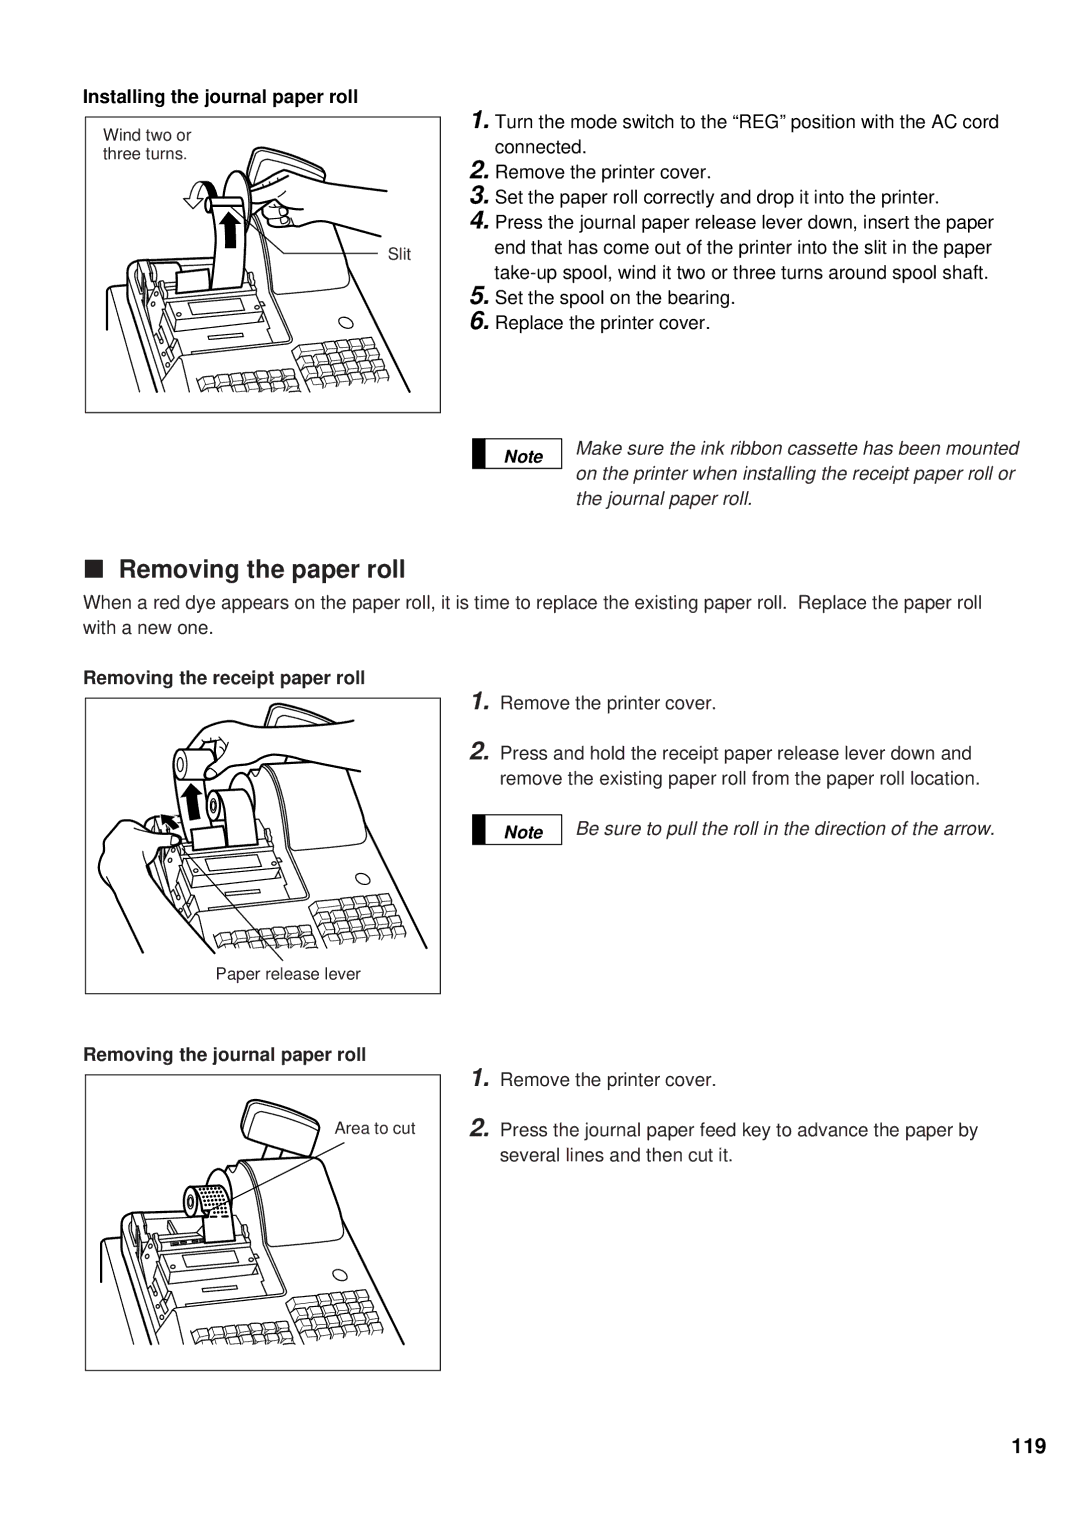
Installing the journal paper roll
Wind two or |
three turns. |
Slit |
1.Turn the mode switch to the “REG” position with the ACcord connected.
2.Remove the printer cover.
3.Set the paper roll correctly and drop it into the printer.
4.Press the journal paper release lever down, insert the paper end that has come out of the printer into the slit in the paper
5.Set the spool on the bearing.
6.Replace the printer cover.
| Note | Make sure the ink ribbon cassette has been mounted |
|
| on the printer when installing the receipt paper roll or |
|
| |
|
| the journal paper roll. |
Removing the paper roll
When a red dye appears on the paper roll, it is time to replace the existing paper roll. Replace the paper roll with a new one.
Removing the receipt paper roll
Paper release lever |
1.Remove the printer cover.
2.Press and hold the receipt paper release lever down and remove the existing paper roll from the paper roll location.
| Note | Be sure to pull the roll in the direction of the arrow. |
Removing the journal paper roll
Area to cut |
1.Remove the printer cover.
2.Press the journal paper feed key to advance the paper by several lines and then cut it.