Chapter 3 | Options |
3.0Introduction
The
3.1Installation
WARNING: Hazardous voltages are present inside the
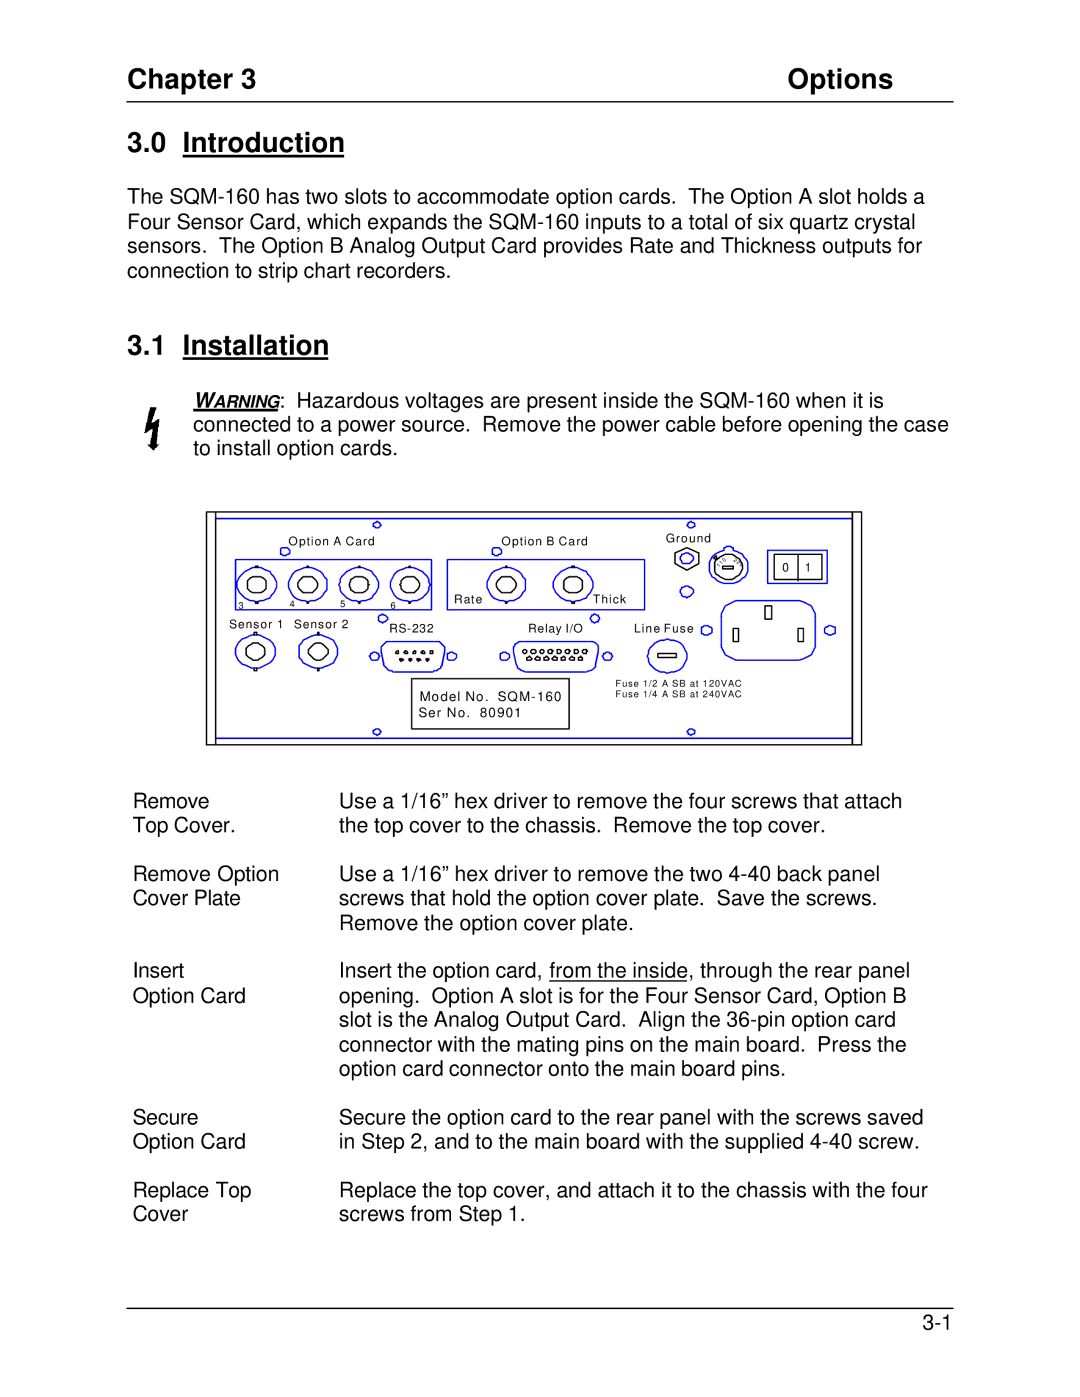
| Option A Card |
|
| Option B Card | Ground |
|
|
| |
|
|
|
|
|
| 0 | 2 |
|
|
|
|
|
|
|
| 2 | 0 | 1 | |
|
|
|
|
|
| 1 | 0 | ||
|
|
|
|
|
| 1 |
| ||
|
|
|
|
|
|
|
| ||
3 | 4 | 5 | 6 | Rate | Thick |
|
|
| |
|
|
|
|
|
| ||||
Sensor 1 | Sensor 2 | Relay I/O | Line Fuse |
|
|
| |||
|
|
|
|
|
| ||||
|
|
|
|
|
| Fuse 1/2 A SB at 120VAC |
|
| |
Manufactured By |
|
| Model No . SQM - 160 | Fuse 1/4 A SB at 240VAC |
|
| |||
S i g m a |
|
| Ser No . | 80901 |
|
|
|
| |
Σ instruments |
|
|
|
|
|
|
|
| |
Remove | Use a 1/16” hex driver to remove the four screws that attach |
Top Cover. | the top cover to the chassis. Remove the top cover. |
Remove Option | Use a 1/16” hex driver to remove the two |
Cover Plate | screws that hold the option cover plate. Save the screws. |
| Remove the option cover plate. |
Insert | Insert the option card, from the inside, through the rear panel |
Option Card | opening. Option A slot is for the Four Sensor Card, Option B |
| slot is the Analog Output Card. Align the |
| connector with the mating pins on the main board. Press the |
| option card connector onto the main board pins. |
Secure | Secure the option card to the rear panel with the screws saved |
Option Card | in Step 2, and to the main board with the supplied |
Replace Top | Replace the top cover, and attach it to the chassis with the four |
Cover | screws from Step 1. |