Setting the Camera
— Camera setting Page
When you click Camera on the Administrator menu, the Camera setting page appears.
Use this page to set the functions of the camera.
Note
To update the camera for the changed setting, click Apply on the changed item.
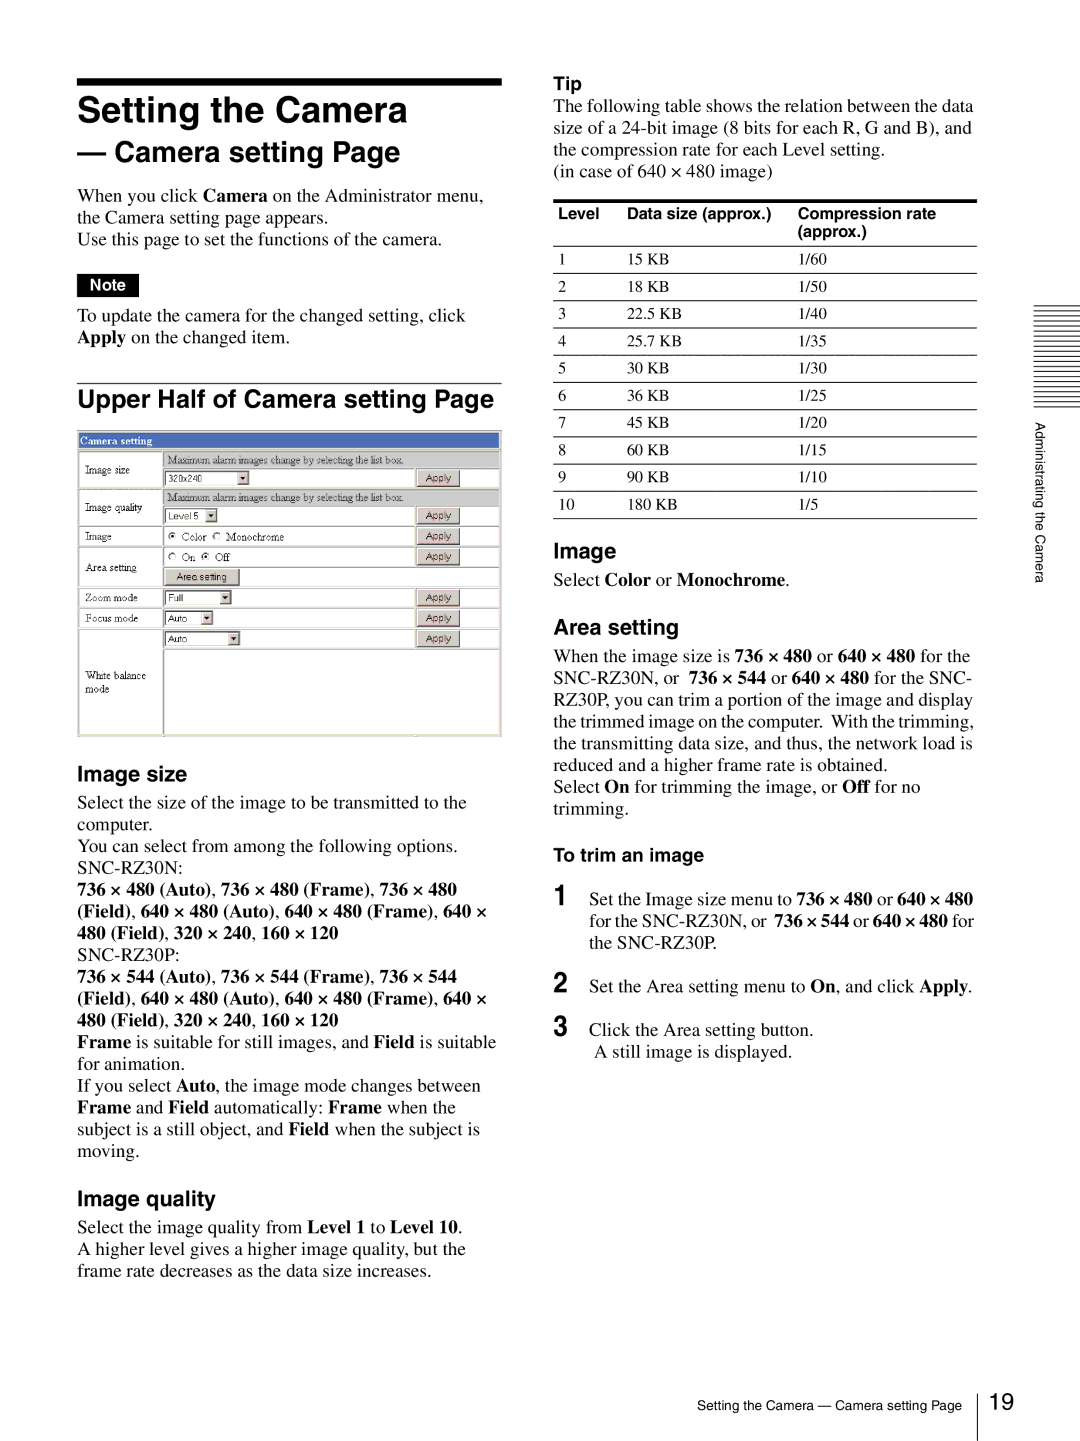
Upper Half of Camera setting Page
Image size
Select the size of the image to be transmitted to the computer.
You can select from among the following options.
736 × 480 (Auto), 736 × 480 (Frame), 736 × 480 (Field), 640 × 480 (Auto), 640 × 480 (Frame), 640 × 480 (Field), 320 × 240, 160 × 120
736 × 544 (Auto), 736 × 544 (Frame), 736 × 544 (Field), 640 × 480 (Auto), 640 × 480 (Frame), 640 × 480 (Field), 320 × 240, 160 × 120
Frame is suitable for still images, and Field is suitable for animation.
If you select Auto, the image mode changes between Frame and Field automatically: Frame when the subject is a still object, and Field when the subject is moving.
Image quality
Select the image quality from Level 1 to Level 10. A higher level gives a higher image quality, but the frame rate decreases as the data size increases.
Tip
The following table shows the relation between the data size of a
(in case of 640 × 480 image)
Level | Data size (approx.) | Compression rate |
|
| (approx.) |
|
|
|
1 | 15 KB | 1/60 |
|
|
|
2 | 18 KB | 1/50 |
|
|
|
3 | 22.5 KB | 1/40 |
|
|
|
4 | 25.7 KB | 1/35 |
|
|
|
5 | 30 KB | 1/30 |
|
|
|
6 | 36 KB | 1/25 |
|
|
|
7 | 45 KB | 1/20 |
|
|
|
8 | 60 KB | 1/15 |
|
|
|
9 | 90 KB | 1/10 |
|
|
|
10 | 180 KB | 1/5 |
|
|
|
Image
Select Color or Monochrome.
Area setting
When the image size is 736 × 480 or 640 × 480 for the
Select On for trimming the image, or Off for no trimming.
To trim an image
1 Set the Image size menu to 736 × 480 or 640 × 480 for the
2 Set the Area setting menu to On, and click Apply.
3 Click the Area setting button. A still image is displayed.
Administrating the Camera
Setting the Camera — Camera setting Page
19