i68
After you have run this program, turn off the printer and adjust the top of form position. When you turn the printer back on the page length will reset to its normal setting (usually 11 inches).
TOP AND BOTTOM MARGINS
Some programs don’t keep track of where they are printing on the page. This causes problems when you get to the bottom of a page because these programs just keep on printing, right over the perforation. This makes it very hard to read, especially if a line happens to fall right on the perforation.
The printer has a solution to this predicament. This printer can keep track of the position on the page, and advance the paper so that you won’t print too near the perforation. There are two commands to do this. One controls the space at the top of the page (top margin) and the other controls the space at the bottom of the page (bottom margin). The control codes are given in the following table:
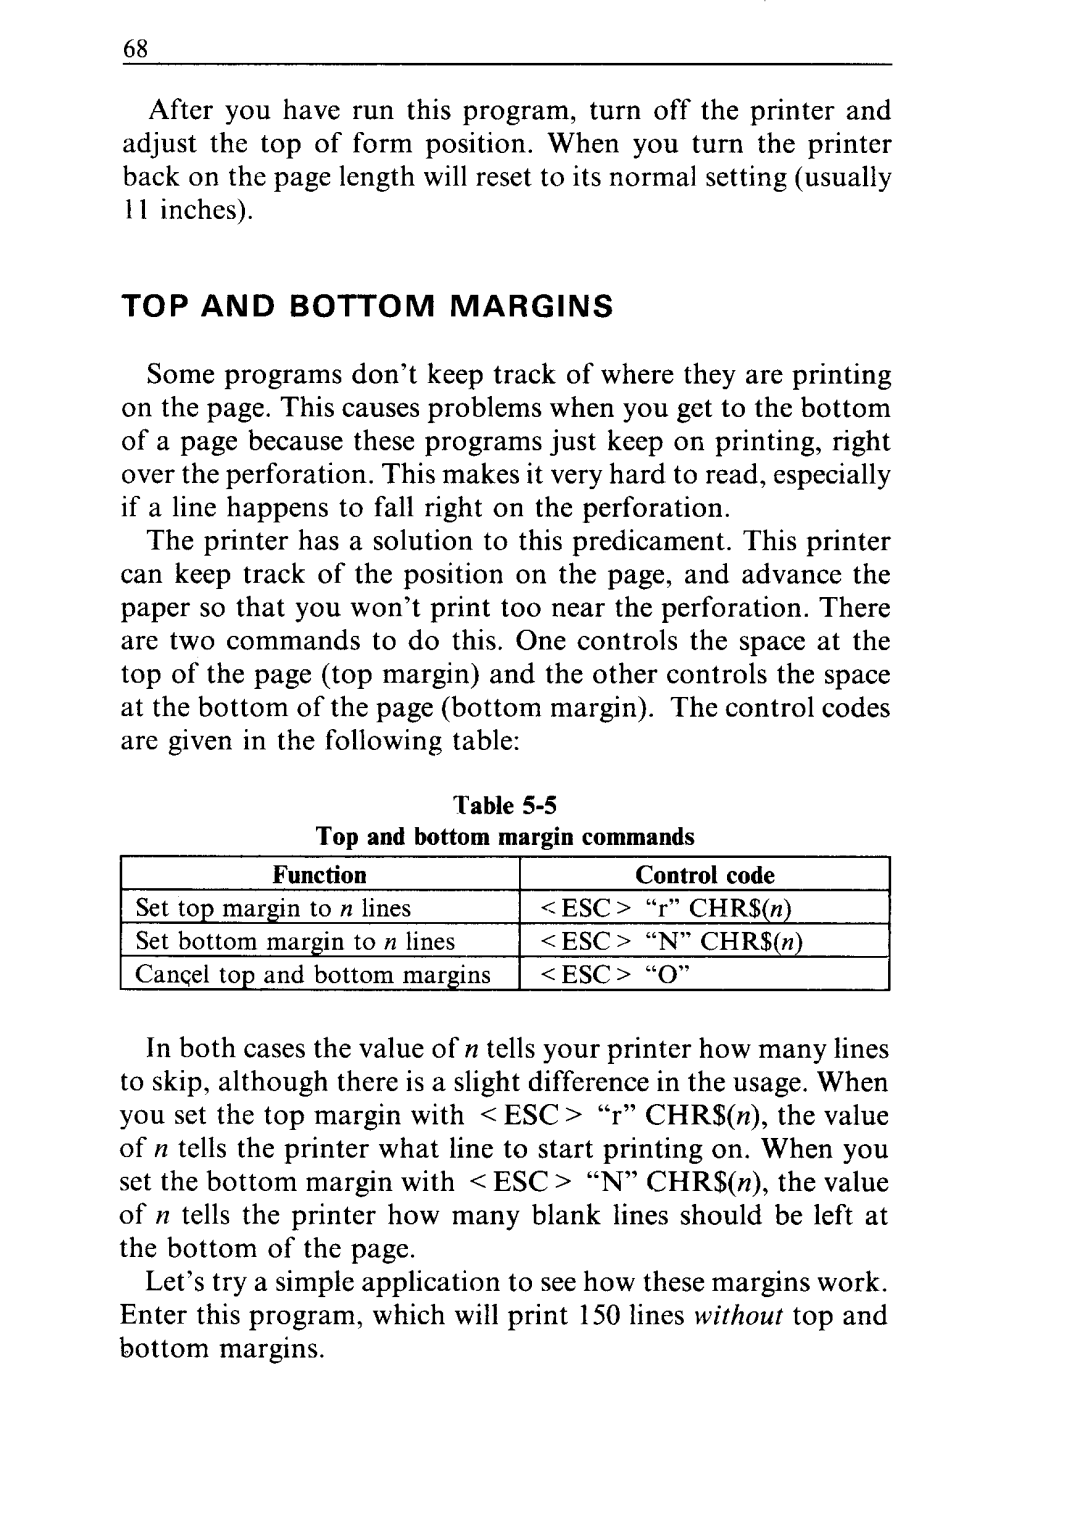
Table
Top and bottom margin commands
Function
Set top margin to n lines Set bottom margin to n lines Cancel top and bottom margins
Control code
<ESC > “N” CHR$(n)
<ESC > “0”
In both cases the value of n tells your printer how many lines to skip, although there is a slight difference in the usage. When you set the top margin with < ESC > “r” CHR$(n), the value of y1tells the printer what line to start printing on. When you set the bottom margin with < ESC > “N” CHR$(n), the value of 12tells the printer how many blank lines should be left at the bottom of the page.
Let’s try a simple application to see how these margins work. Enter this program, which will print 150 lines without top and bottom margins.