![]()
![]()
![]()
![]()
![]()
![]() C2SBA+II/C2SBA+/C2SBA/C2SBE User's Manual
C2SBA+II/C2SBA+/C2SBA/C2SBE User's Manual
2-3 Processor and Heatsink Fan Installation
When handling the processor package, avoid placing
!direct pressure on the label area of the fan.
Notes: 1. Always connect the power cord last and always remove it before adding, removing or changing any hardware components. Make sure that you install the processor into the CPU LGA 775 socket before you install the CPU heatsink.
2.The Intel LGA 775 Processor package contains the CPU fan and heatsink as- sembly. If you buy a CPU separately, make sure that you use only
3.Make sure to install the motherboard into the chassis before you install the CPU heatsink and fan.
4.When purchasing an LGA 775 Processor or when receiving a motherboard with an LGA 775 Processor
5.Refer to the MB Features Section for more details on CPU support.
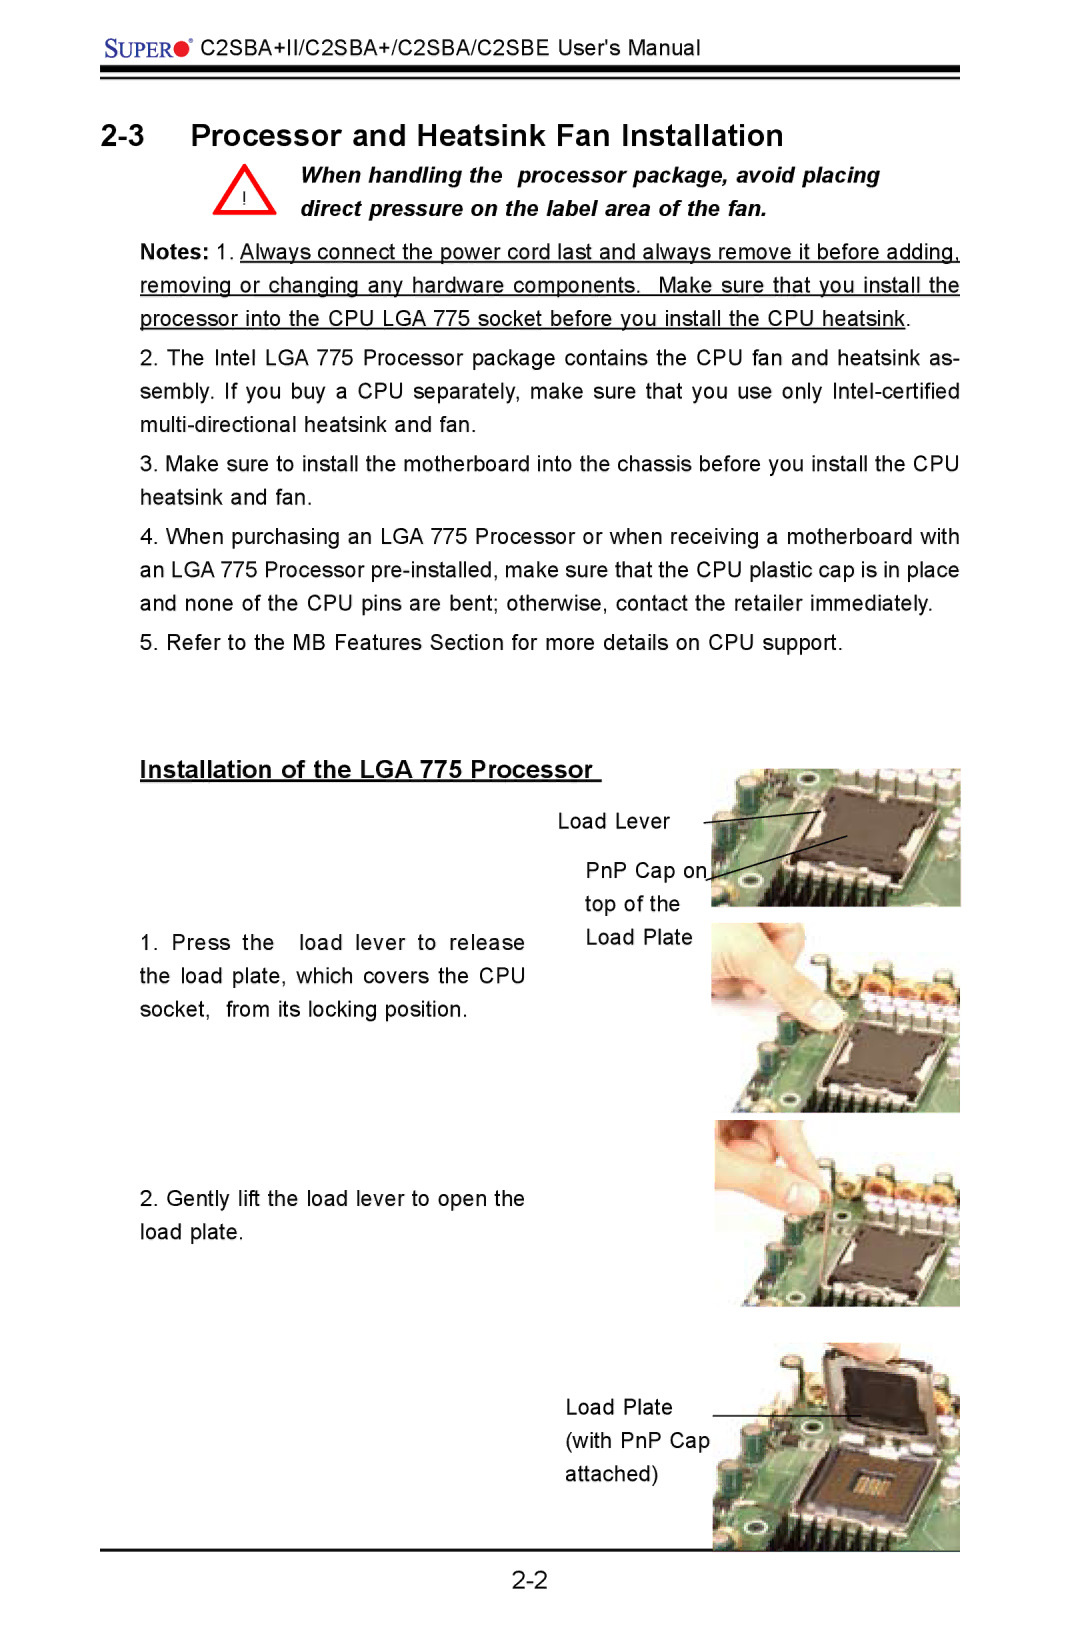
Installation of the LGA 775 Processor
1.Press the load lever to release the load plate, which covers the CPU socket, from its locking position.
Load Lever
PnP Cap on![]()
top of the
Load Plate
2.Gently lift the load lever to open the load plate.
Load Plate (with PnP Cap attached)