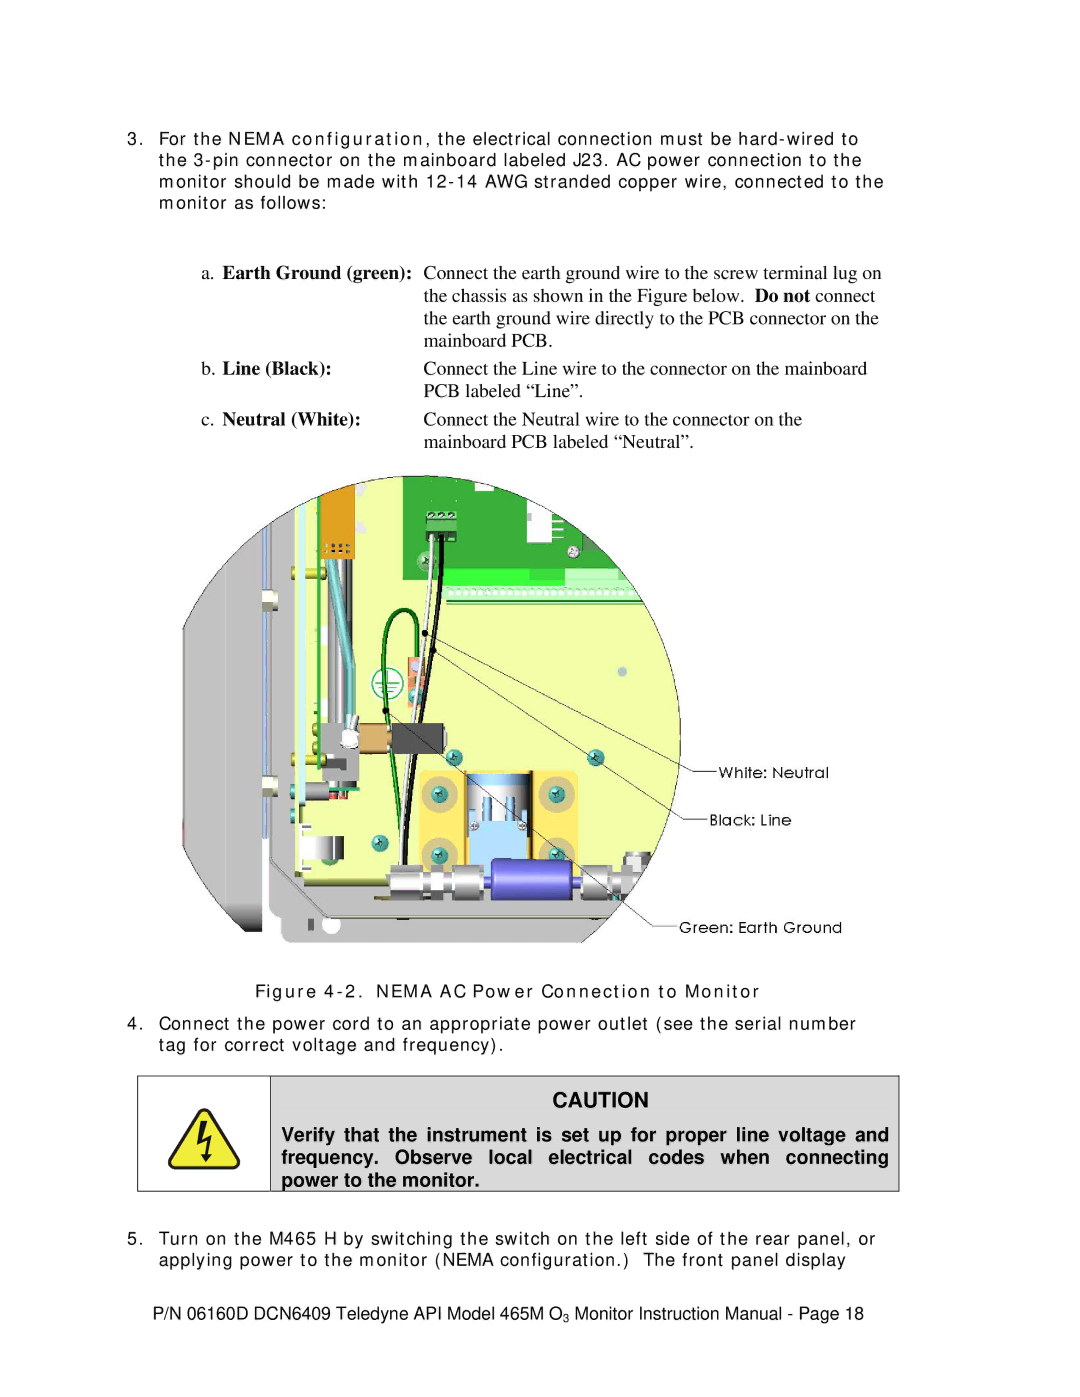
3.For the NEMA configuration, the electrical connection must be
a.Earth Ground (green): Connect the earth ground wire to the screw terminal lug on the chassis as shown in the Figure below. Do not connect the earth ground wire directly to the PCB connector on the mainboard PCB.
b.Line (Black): Connect the Line wire to the connector on the mainboard PCB labeled “Line”.
c.Neutral (White): Connect the Neutral wire to the connector on the mainboard PCB labeled “Neutral”.
Figure 4-2. NEMA AC Power Connection to Monitor
4.Connect the power cord to an appropriate power outlet (see the serial number tag for correct voltage and frequency).
CAUTION
Verify that the instrument is set up for proper line voltage and frequency. Observe local electrical codes when connecting power to the monitor.
5.Turn on the M465 H by switching the switch on the left side of the rear panel, or applying power to the monitor (NEMA configuration.) The front panel display
P/N 06160D DCN6409 Teledyne API Model 465M O3 Monitor Instruction Manual - Page 18
