Installation/Set up
and OperationViewing
Recording
Setting up
Others
Connecting the Camera and Personal Computer by Network (Cont.)
Structure of Connection
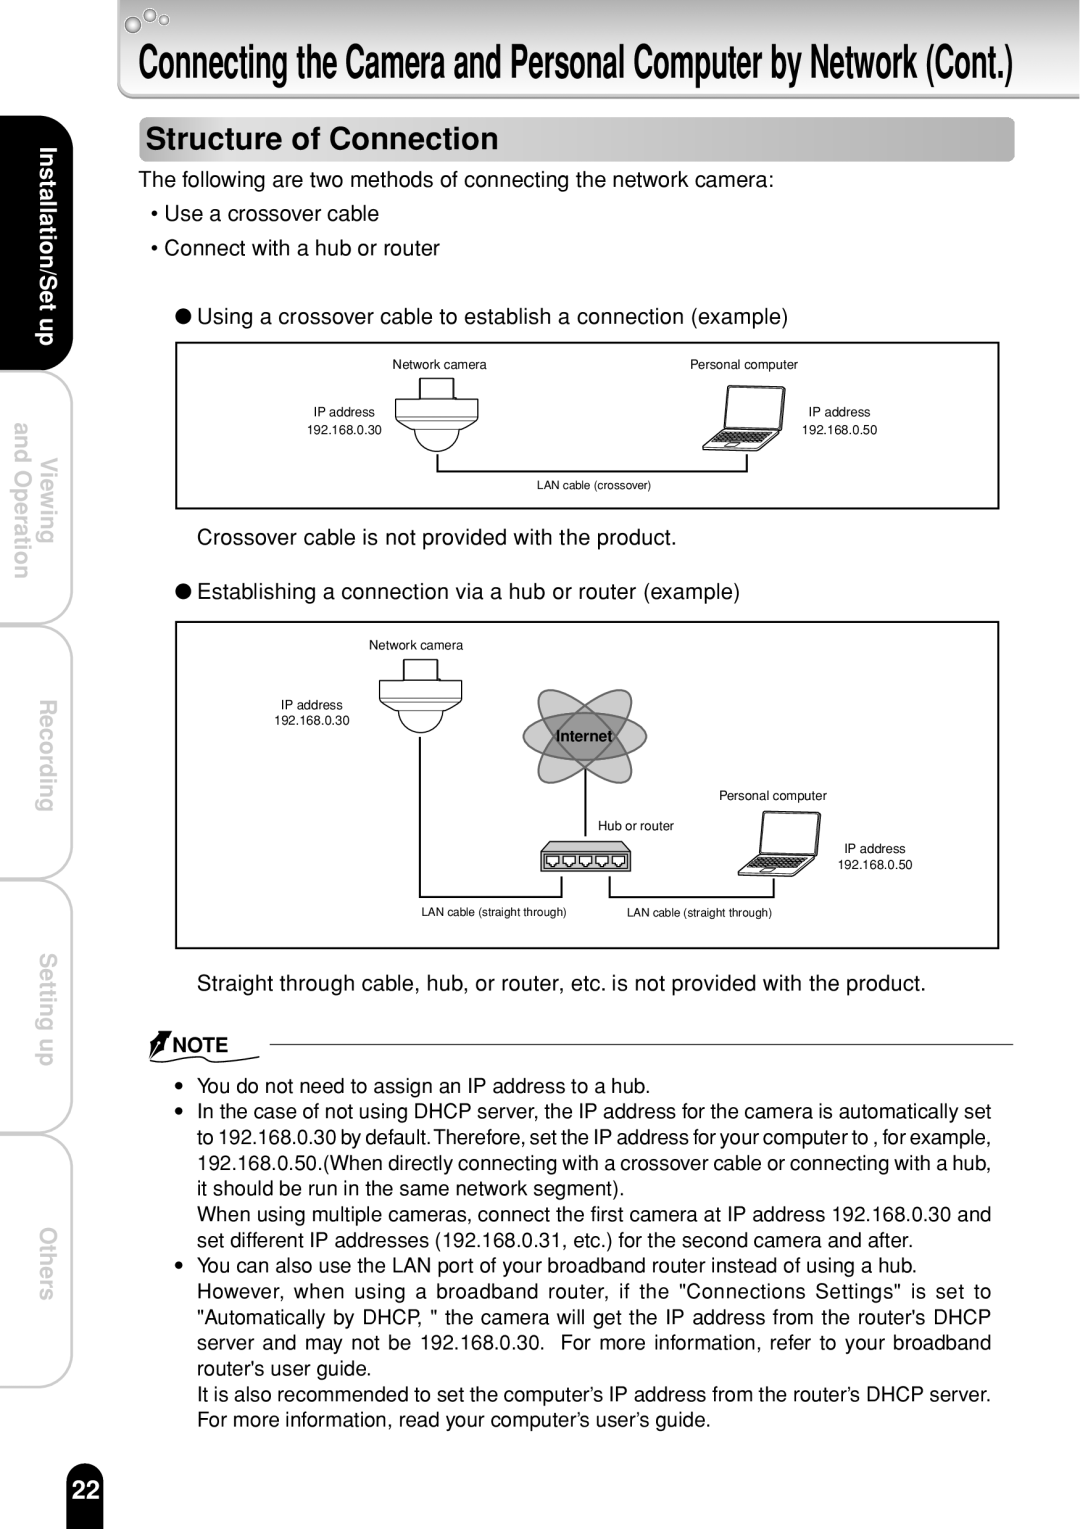
The following are two methods of connecting the network camera:
•Use a crossover cable
•Connect with a hub or router
●Using a crossover cable to establish a connection (example)
Network camera | Personal computer |
IP address | IP address |
192.168.0.30 | 192.168.0.50 |
LAN cable (crossover)
Crossover cable is not provided with the product.
●Establishing a connection via a hub or router (example)
Network camera
IP address
192.168.0.30
Internet
Personal computer
Hub or router
IP address
192.168.0.50
LAN cable (straight through) | LAN cable (straight through) |
Straight through cable, hub, or router, etc. is not provided with the product.
![]() NOTE
NOTE
●You do not need to assign an IP address to a hub.
●In the case of not using DHCP server, the IP address for the camera is automatically set to 192.168.0.30 by default.Therefore, set the IP address for your computer to , for example, 192.168.0.50.(When directly connecting with a crossover cable or connecting with a hub, it should be run in the same network segment).
When using multiple cameras, connect the first camera at IP address 192.168.0.30 and set different IP addresses (192.168.0.31, etc.) for the second camera and after.
●You can also use the LAN port of your broadband router instead of using a hub. However, when using a broadband router, if the "Connections Settings" is set to "Automatically by DHCP, " the camera will get the IP address from the router's DHCP server and may not be 192.168.0.30. For more information, refer to your broadband router's user guide.
It is also recommended to set the computer’s IP address from the router’s DHCP server. For more information, read your computer’s user’s guide.
22