1 | 4 – Front and Rear Panel Features (continued) |
| |
| J |
| M |
2 | L |
K |
N
3
4
5
6
7
8
O
P
H | I | H |
|
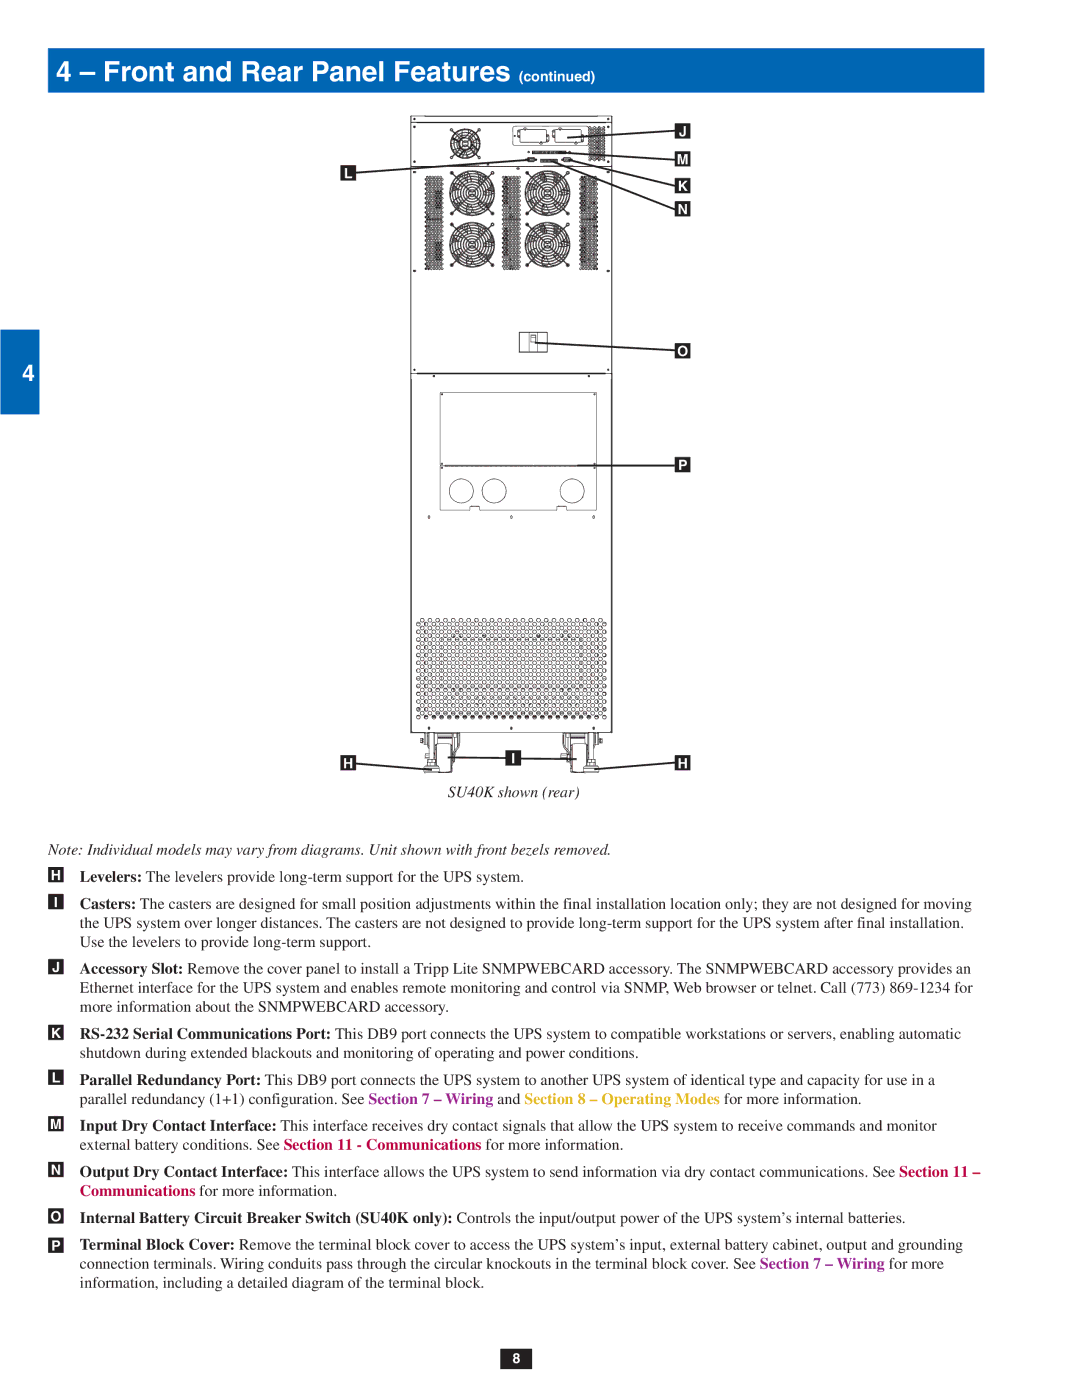
SU40K shown (rear)
9
10
11
12
13
14
Note: Individual models may vary from diagrams. Unit shown with front bezels removed.
•H | Levelers: The levelers provide |
| Casters: The casters are designed for small position adjustments within the final installation location only; they are not designed for moving |
•I | |
| the UPS system over longer distances. The casters are not designed to provide |
| Use the levelers to provide |
| Accessory Slot: Remove the cover panel to install a Tripp Lite SNMPWEBCARD accessory. The SNMPWEBCARD accessory provides an |
•J | |
| Ethernet interface for the UPS system and enables remote monitoring and control via SNMP, Web browser or telnet. Call (773) |
| more information about the SNMPWEBCARD accessory. |
| |
•K | |
| shutdown during extended blackouts and monitoring of operating and power conditions. |
|
|
•L | Parallel Redundancy Port: This DB9 port connects the UPS system to another UPS system of identical type and capacity for use in a |
| |
| parallel redundancy (1+1) configuration. See Section 7 – Wiring and Section 8 – Operating Modes for more information. |
|
|
M | Input Dry Contact Interface: This interface receives dry contact signals that allow the UPS system to receive commands and monitor |
• | |
| external battery conditions. See Section 11 - Communications for more information. |
|
|
•N | Output Dry Contact Interface: This interface allows the UPS system to send information via dry contact communications. See Section 11 – |
| Communications for more information. |
| Internal Battery Circuit Breaker Switch (SU40K only): Controls the input/output power of the UPS system’s internal batteries. |
•O | |
| Terminal Block Cover: Remove the terminal block cover to access the UPS system’s input, external battery cabinet, output and grounding |
•P | |
| connection terminals. Wiring conduits pass through the circular knockouts in the terminal block cover. See Section 7 – Wiring for more |
| information, including a detailed diagram of the terminal block. |
8
