LIMITS SETUP
!IMPORTANT:
1.Before the initial limits setup, a Positive Stop MUST be installed at the close position. This will be used as a reference to relearn the limit positions if the gate has been operated manually while released or if the EPS2 Cable has been disconnected.
2.In the event of a complete power failure, including battery backup, the
limit positions may have may been cleared and will need to be reset as described.
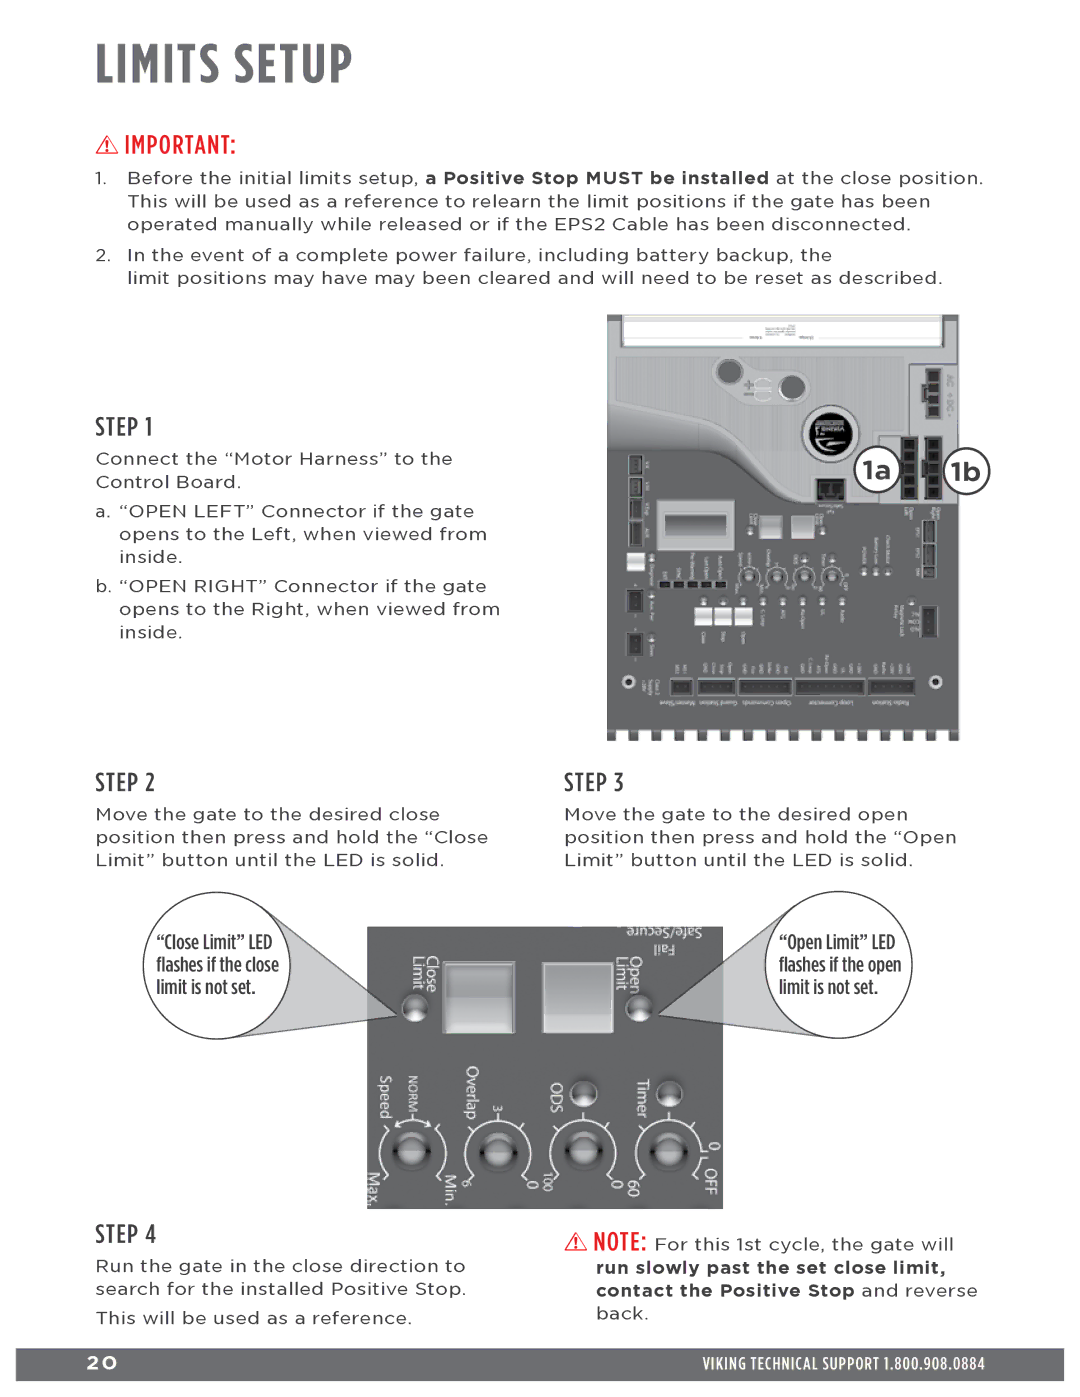
STEP 1
Connect the “Motor Harness” to the | 1a | 1b | |
Control Board. | |||
|
|
a.“OPEN LEFT” Connector if the gate opens to the Left, when viewed from inside.
b.“OPEN RIGHT” Connector if the gate opens to the Right, when viewed from inside.
STEP 2
Move the gate to the desired close position then press and hold the “Close Limit” button until the LED is solid.
STEP 3
Move the gate to the desired open position then press and hold the “Open Limit” button until the LED is solid.
“Close Limit” LED flashes if the close limit is not set.
STEP 4
Run the gate in the close direction to search for the installed Positive Stop.
This will be used as a reference.
2 0
“Open Limit” LED flashes if the open limit is not set.
!NOTE: For this 1st cycle, the gate will run slowly past the set close limit, contact the Positive Stop and reverse back.
VIKING TECHNICAL SUPPORT 1.800.908.0884